
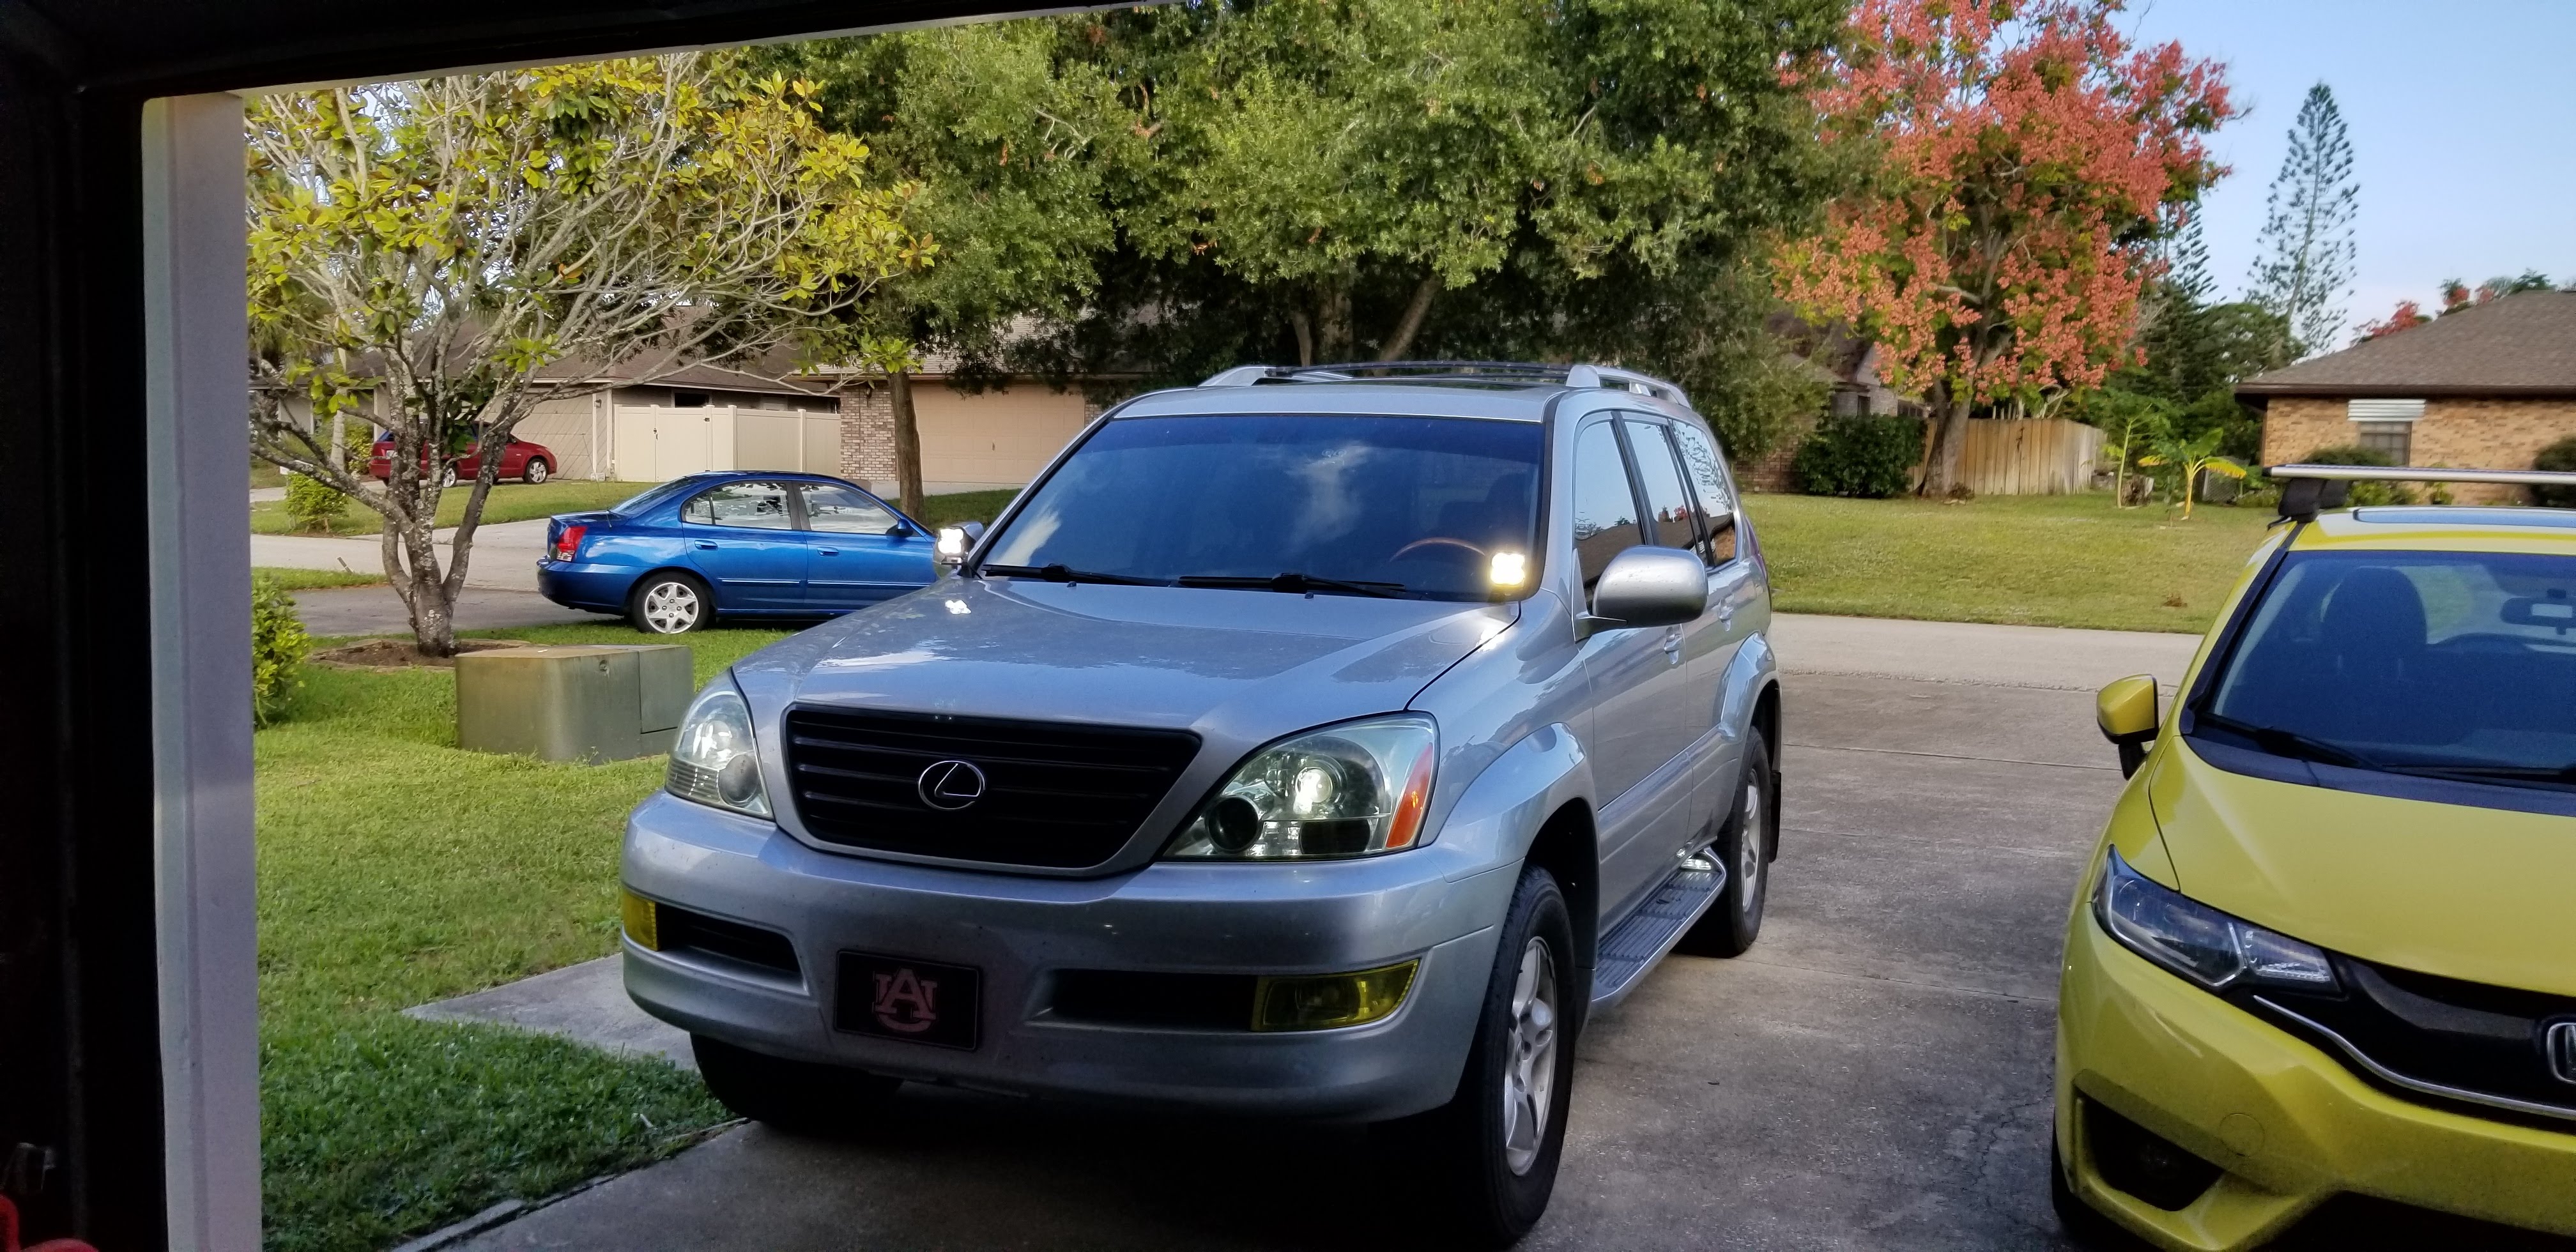
Lexus GX470 - Ditch Lights Install
I installed ditch lights in my GX today, it took about 3 hours and $250.
Parts Bought
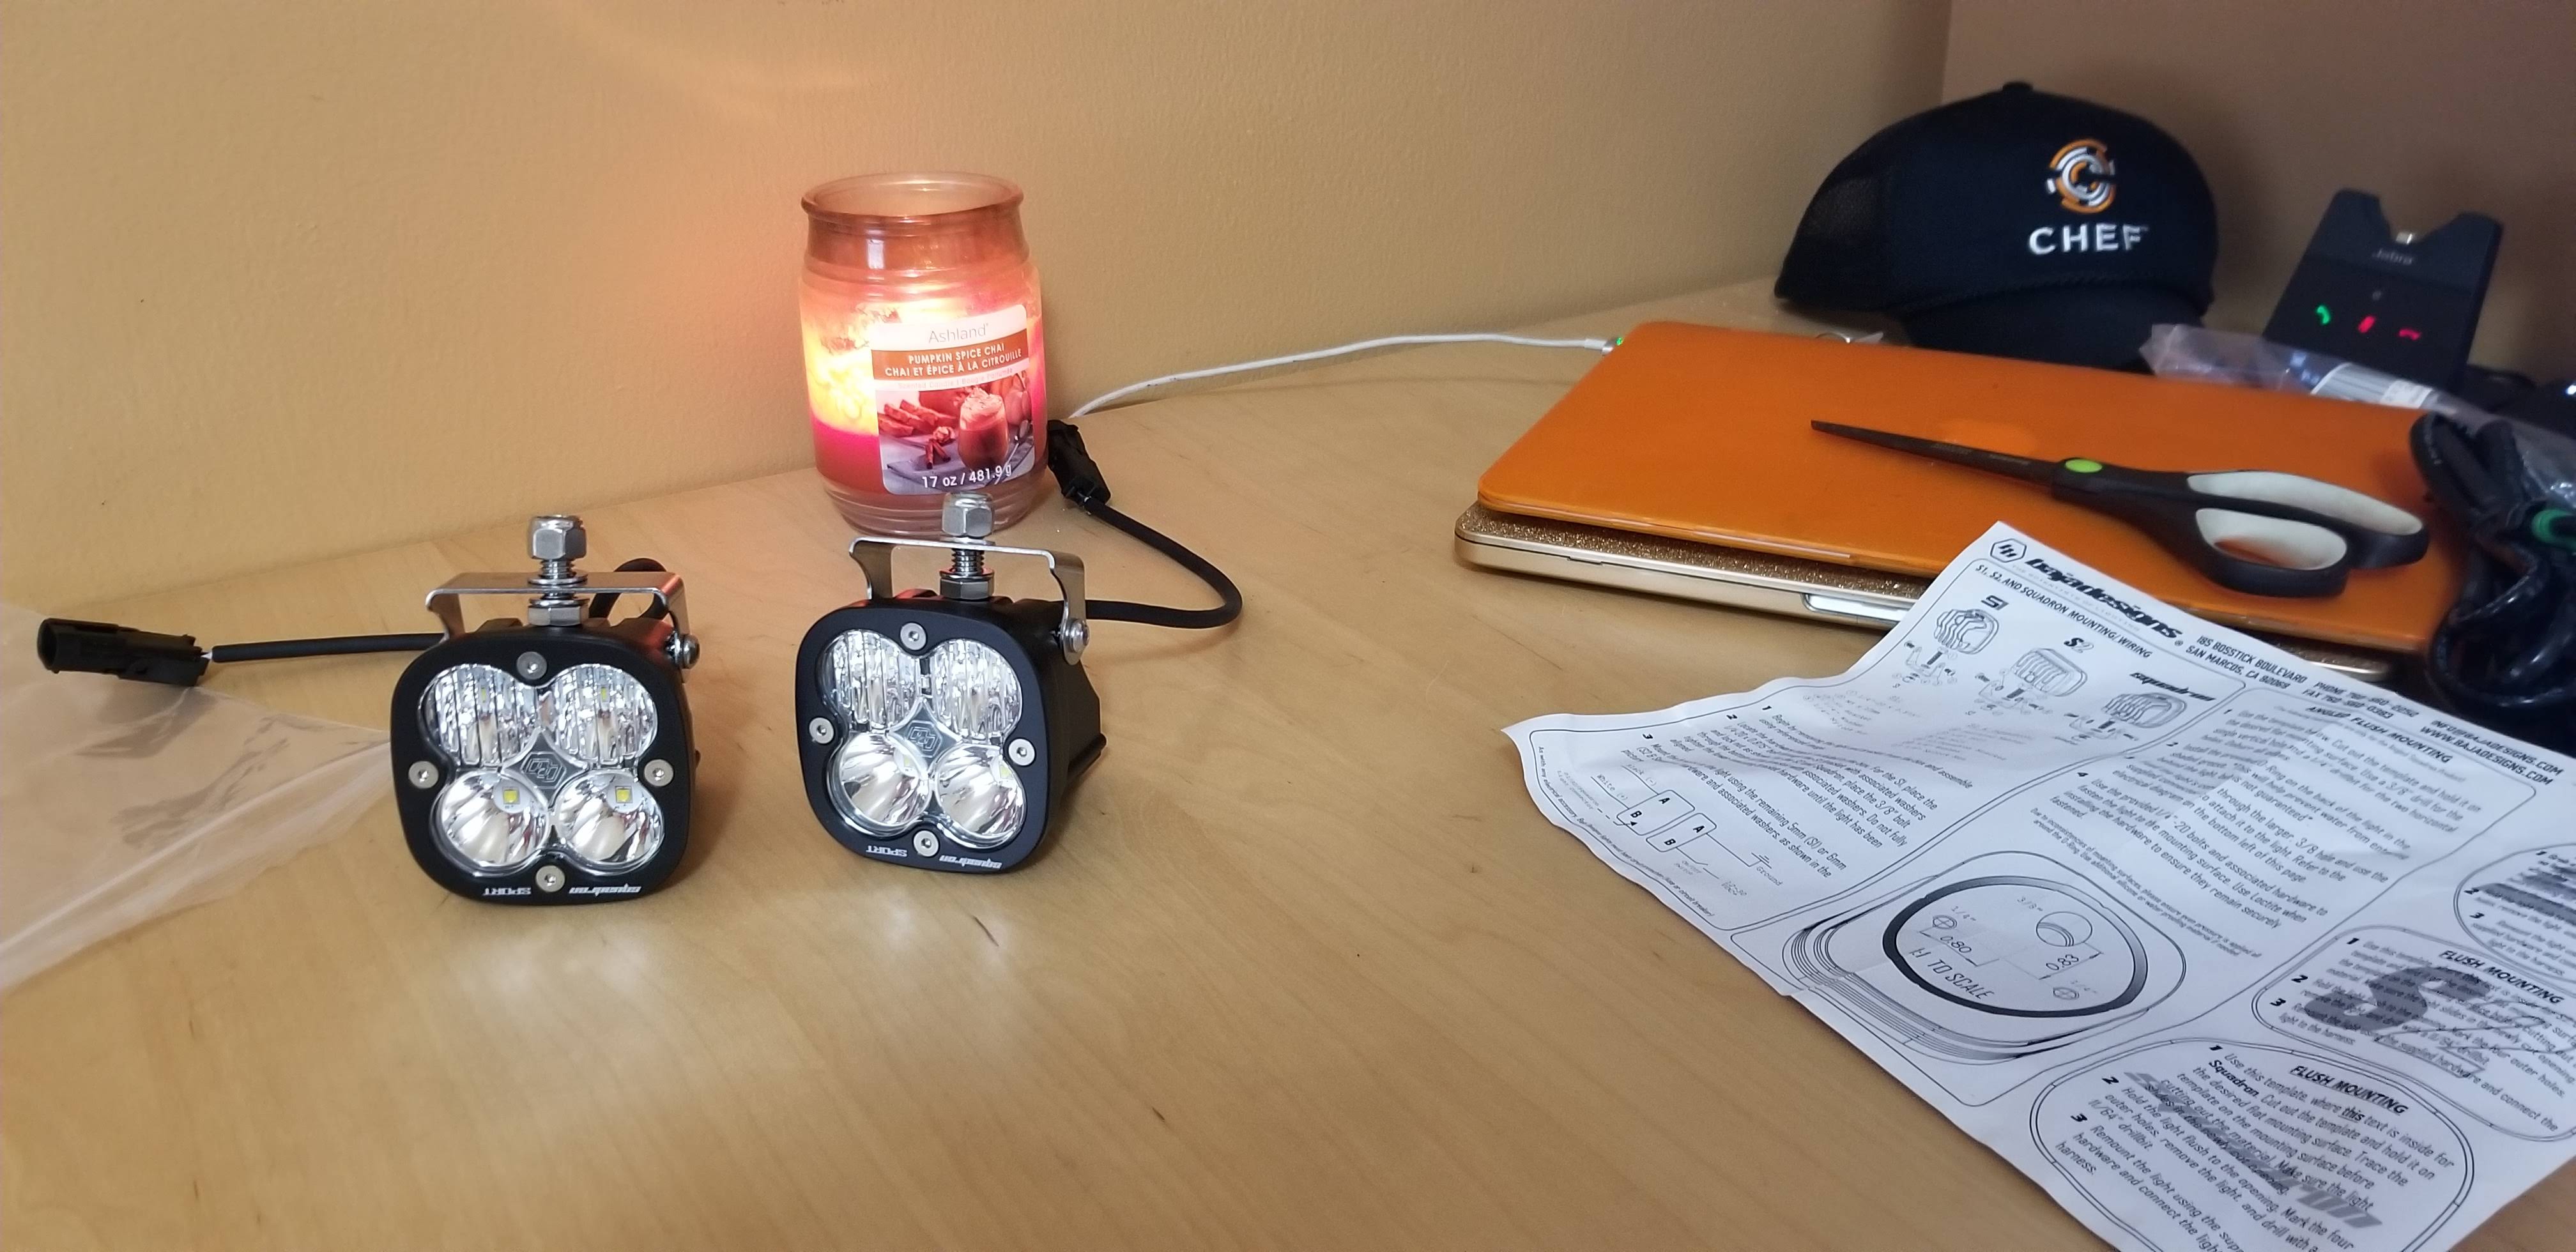
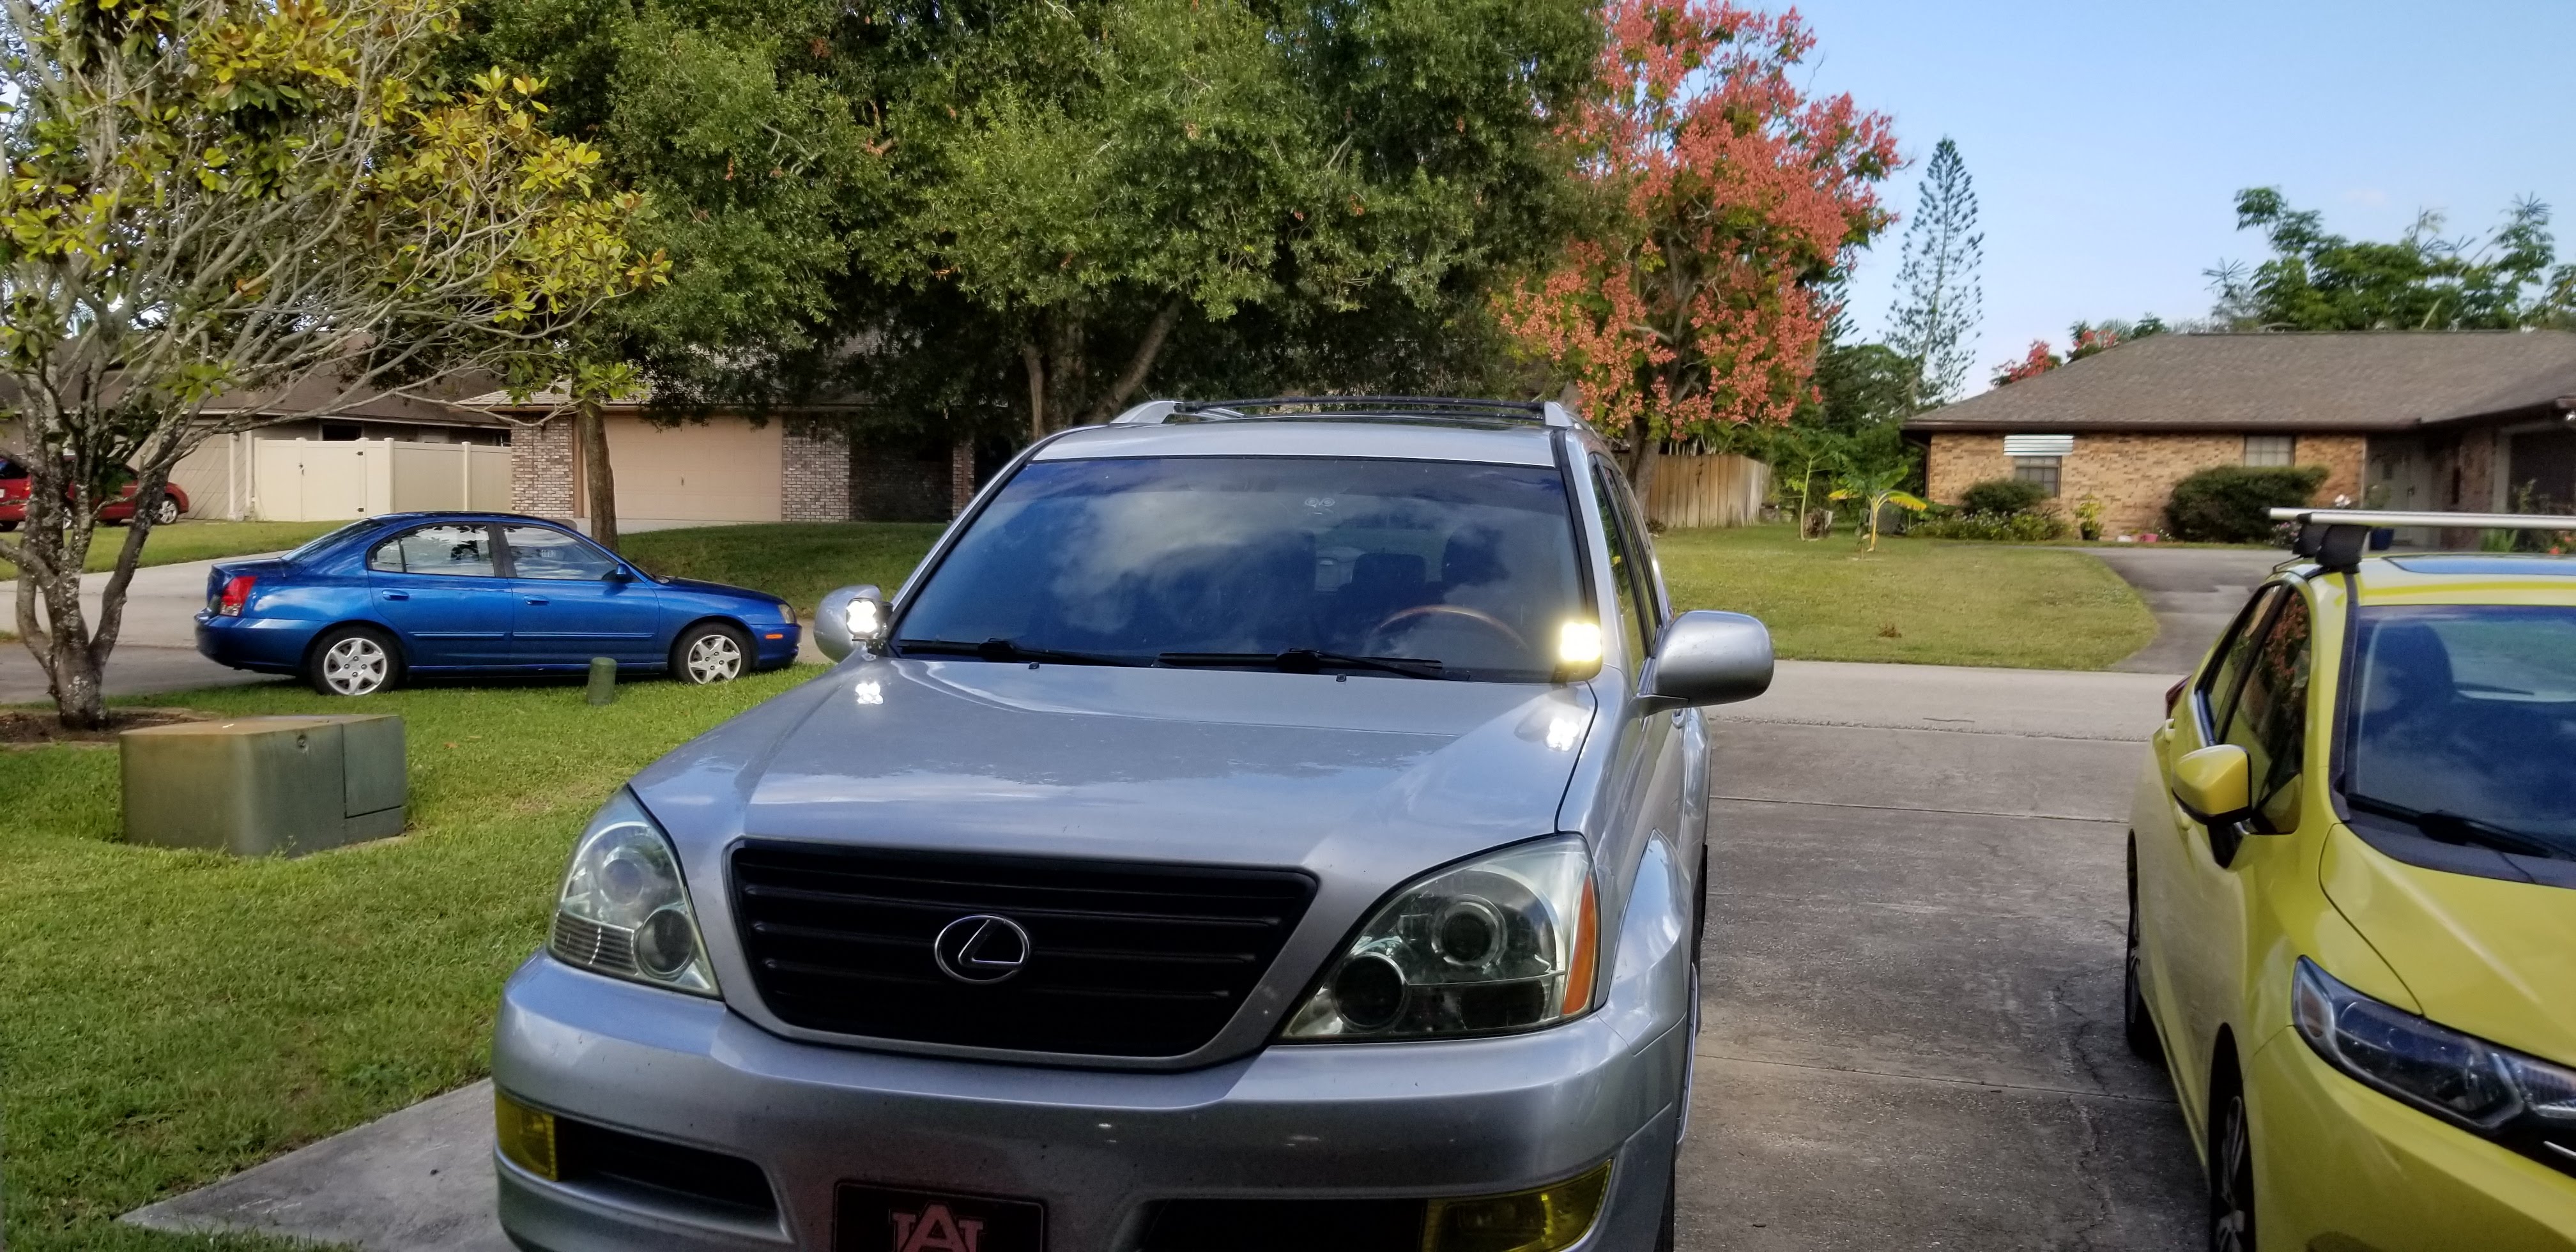
At the time of purchase, Rago Fabrication was having a sale. I bought the ditch brackets and Baja Squadron Sport pods with wiring harness for $235. You could do this install with any set of LED pods, but you’ll have to make your own wiring harness (with a fuse). The Rago mounts are great, so definitely use those.
Alright, here’s how to do it. First, install the brackets from Rago. This was a required first for me, since my brackets got here five days before my lights and wiring harness. I followed this video to install the brackets, just take 1 bolt out at a time to make the hood not move.
Next, put the lights on the brackets, follow the instructions there.
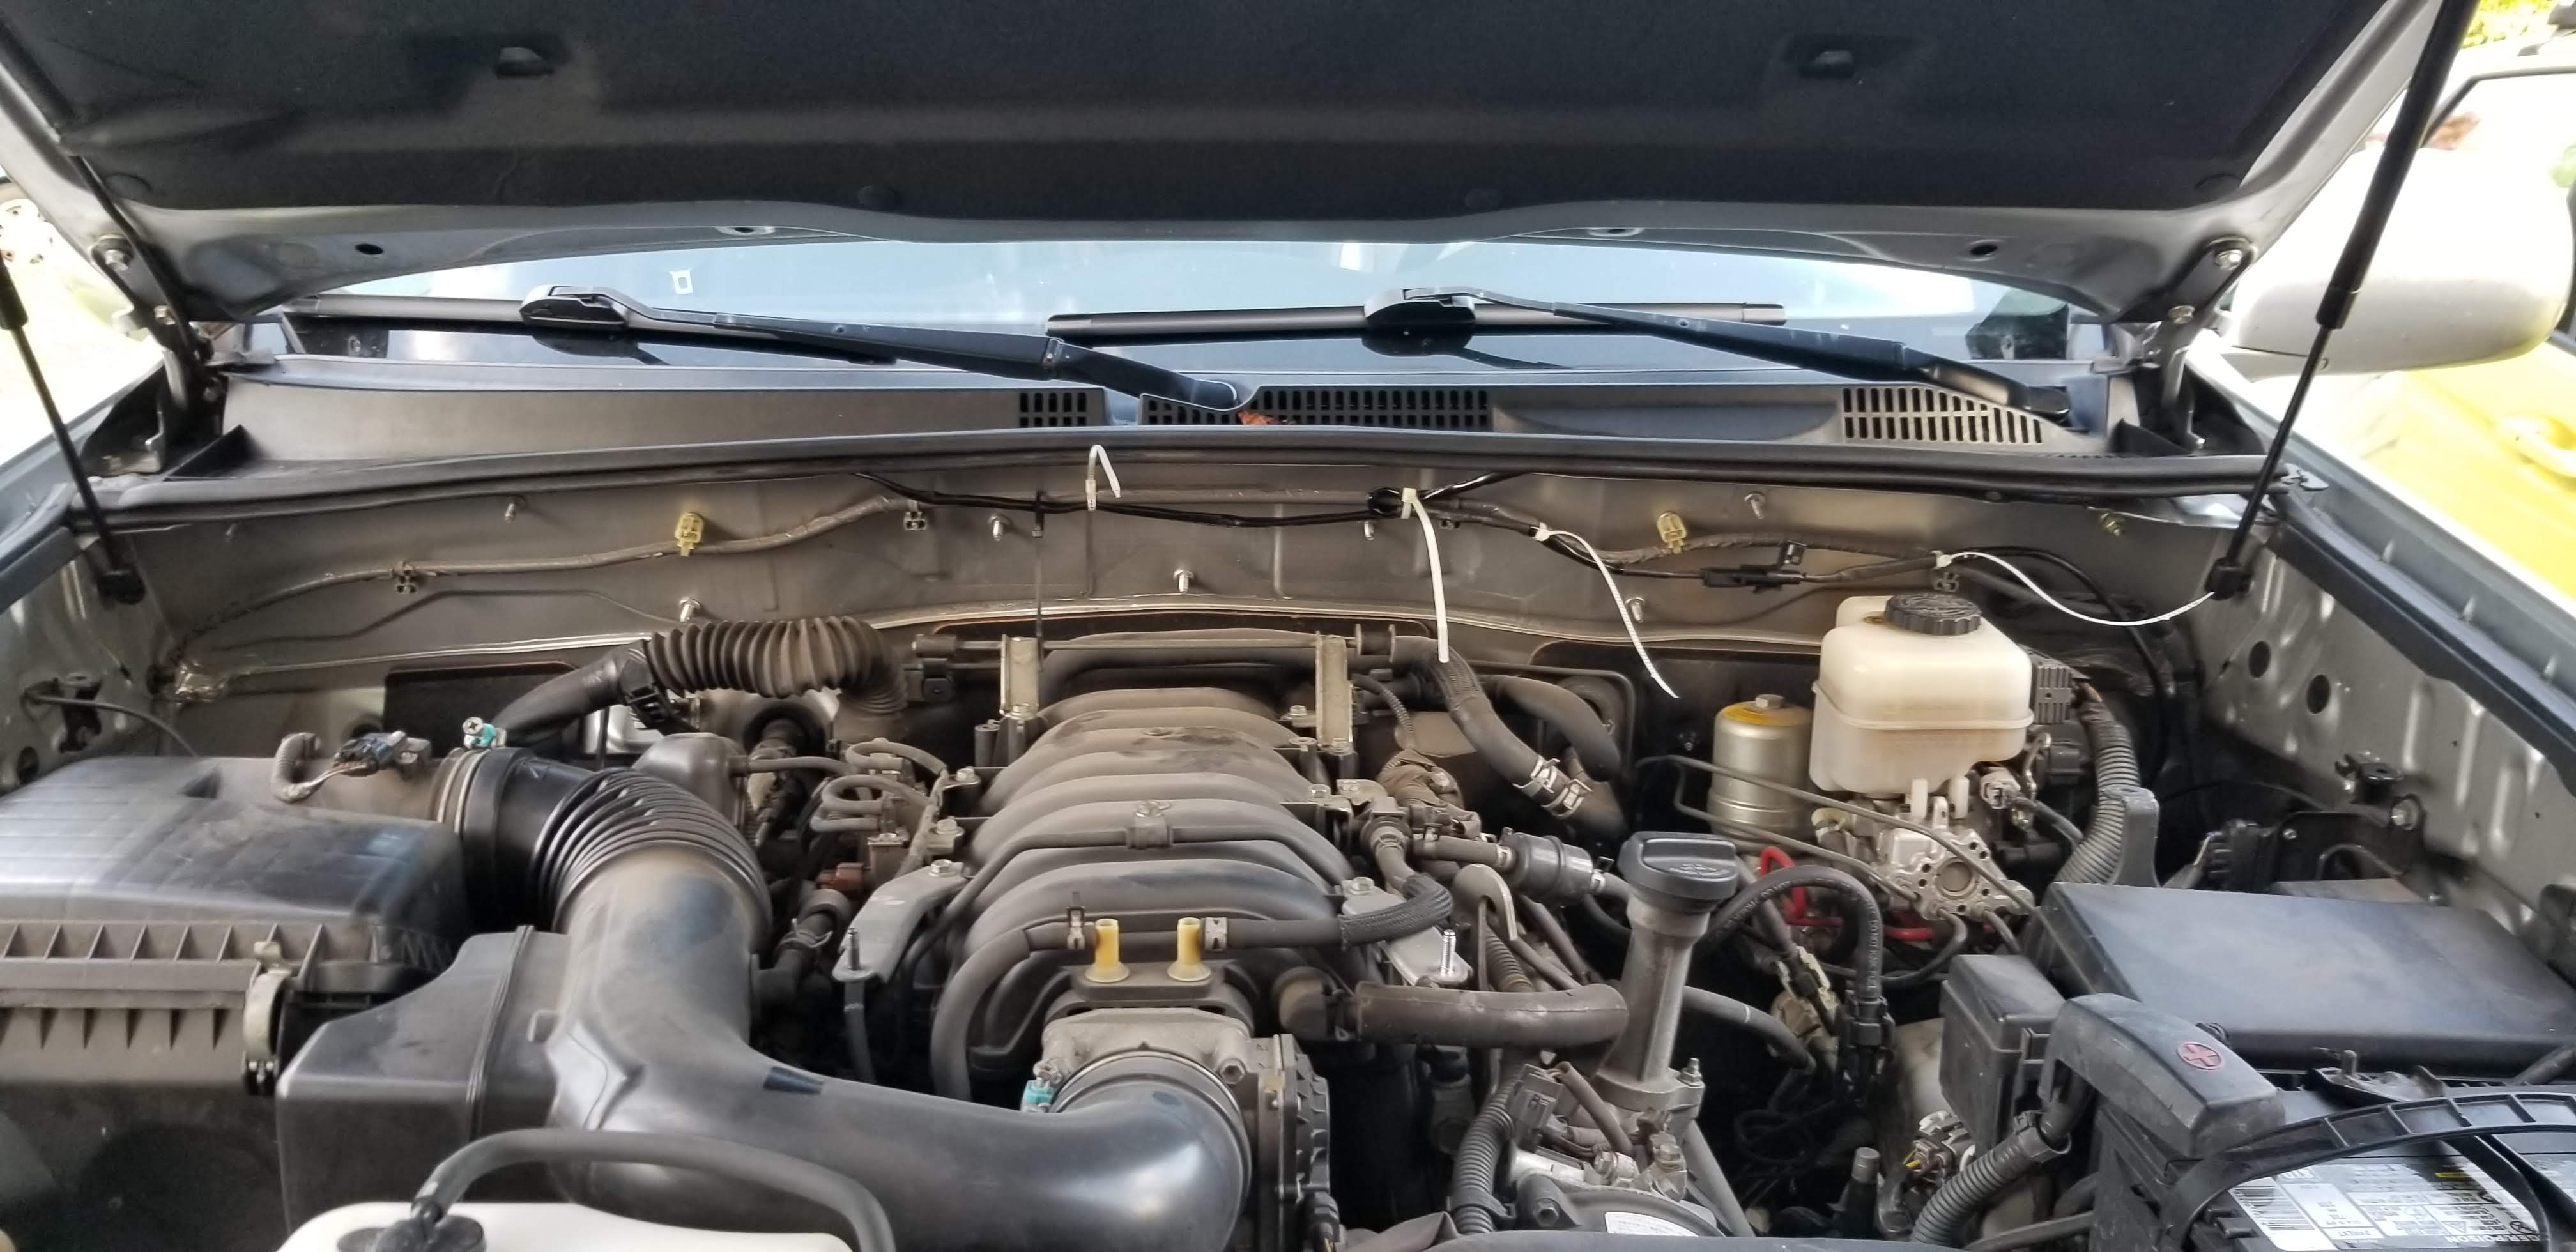
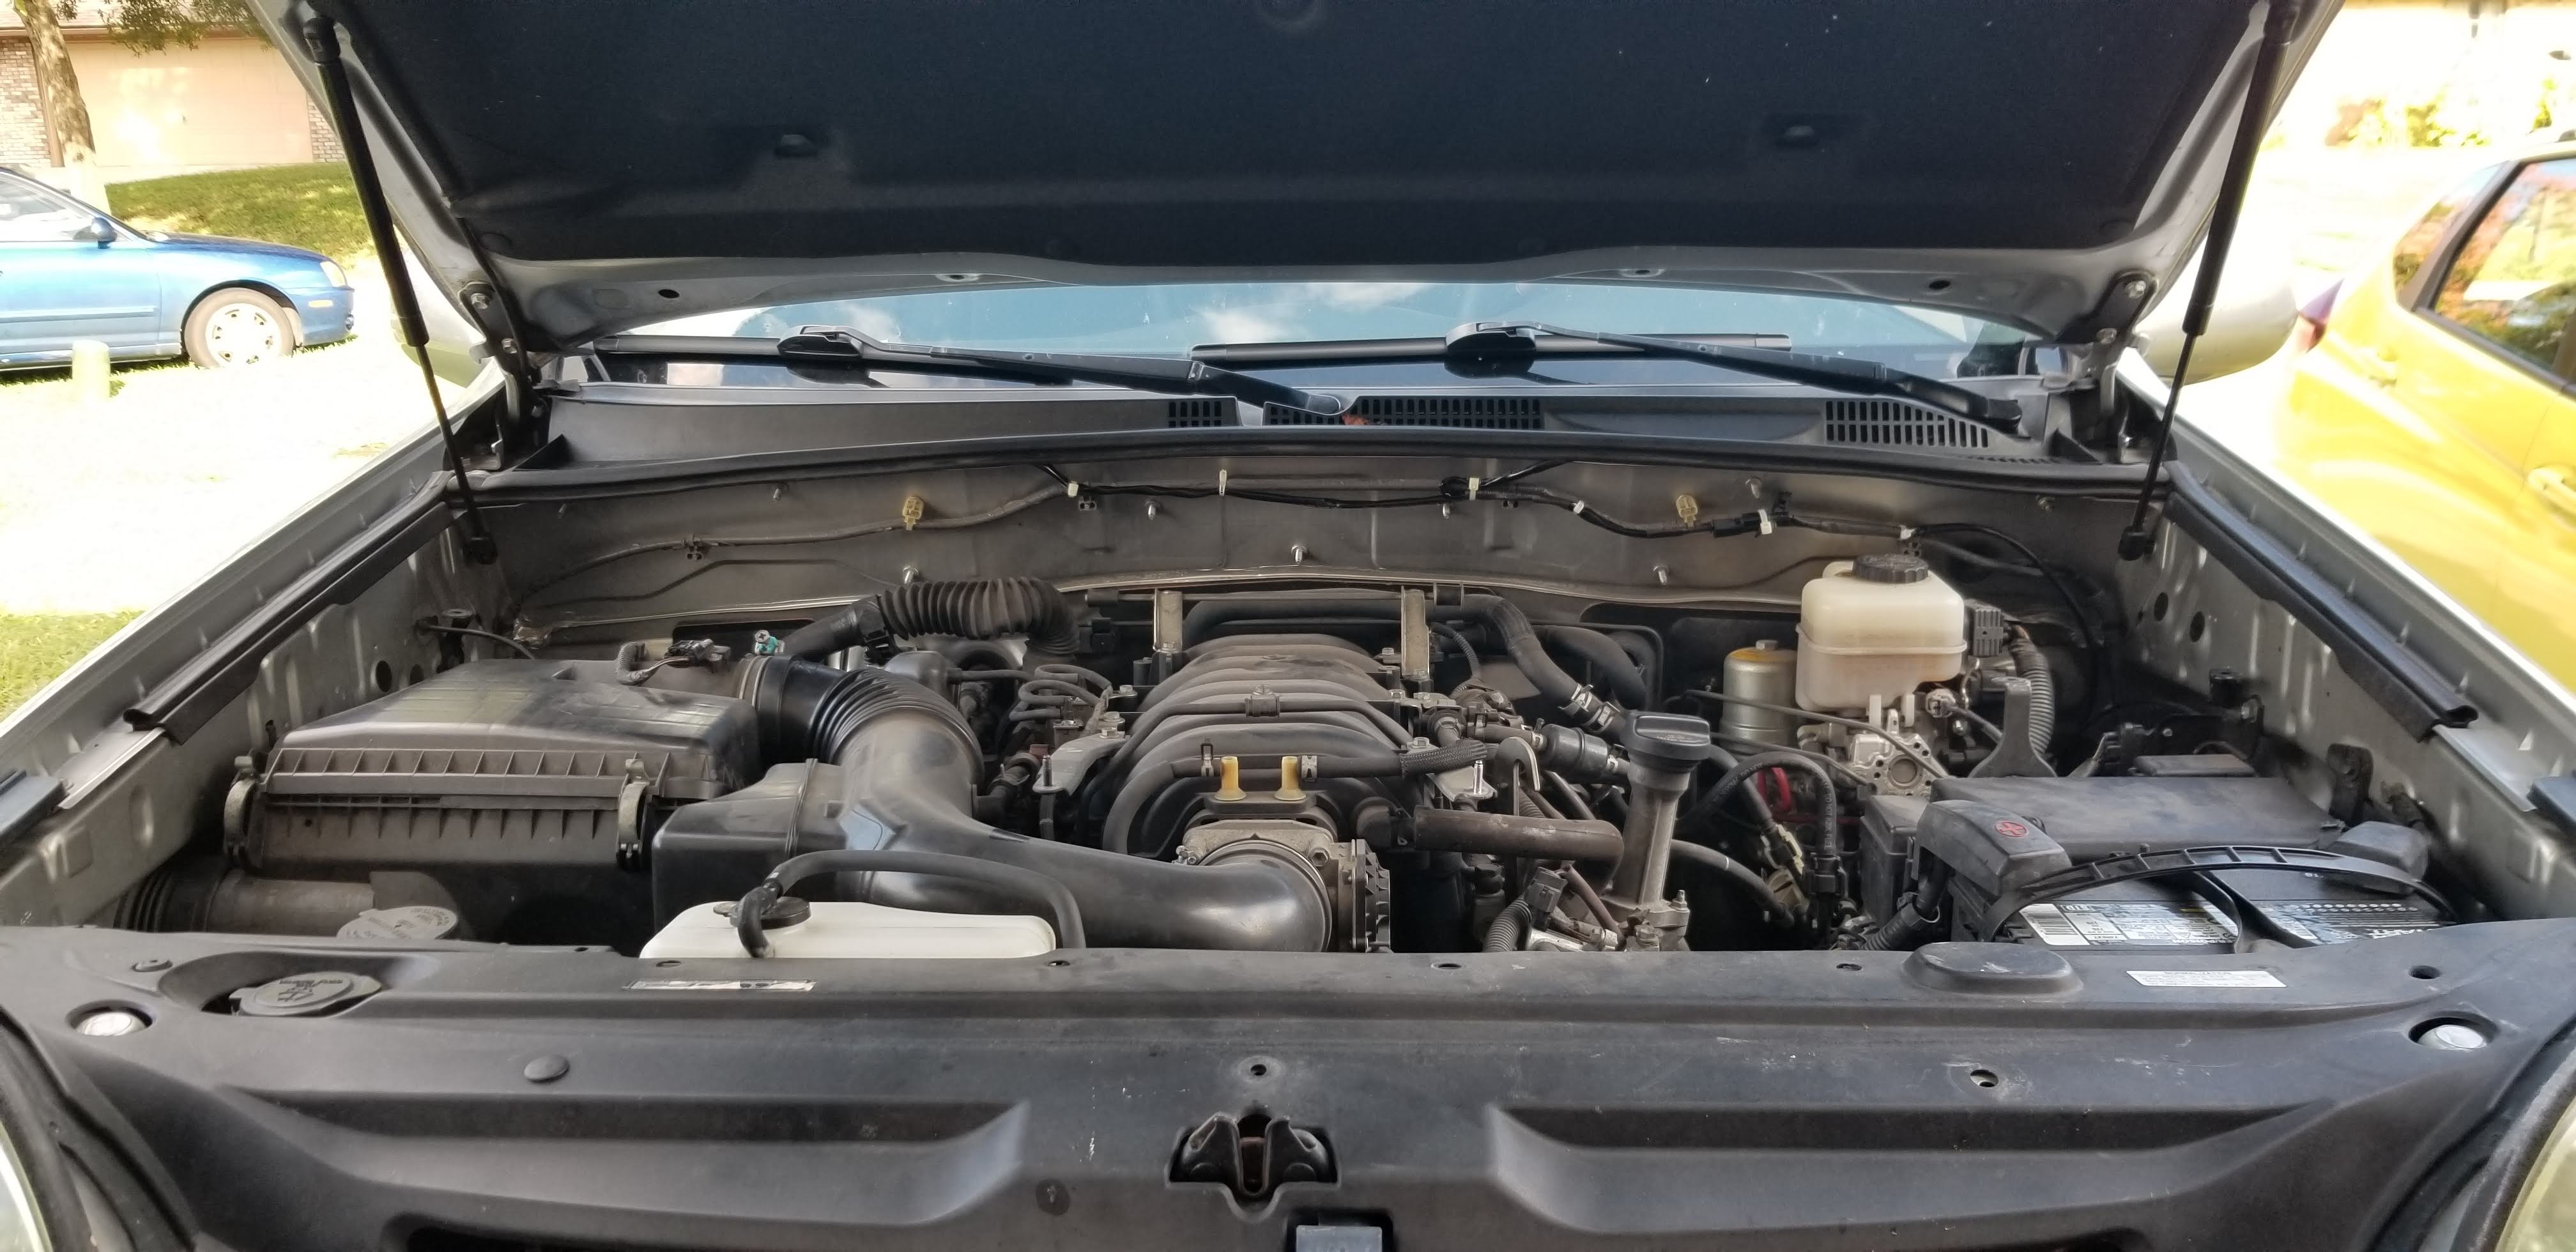
Then, take apart all the plastic in your engine, if you still have it. The plastic that is. I hope you still have the engine. I took off the engine cover in order to remove the very back plastic piece that was hiding some wiring.
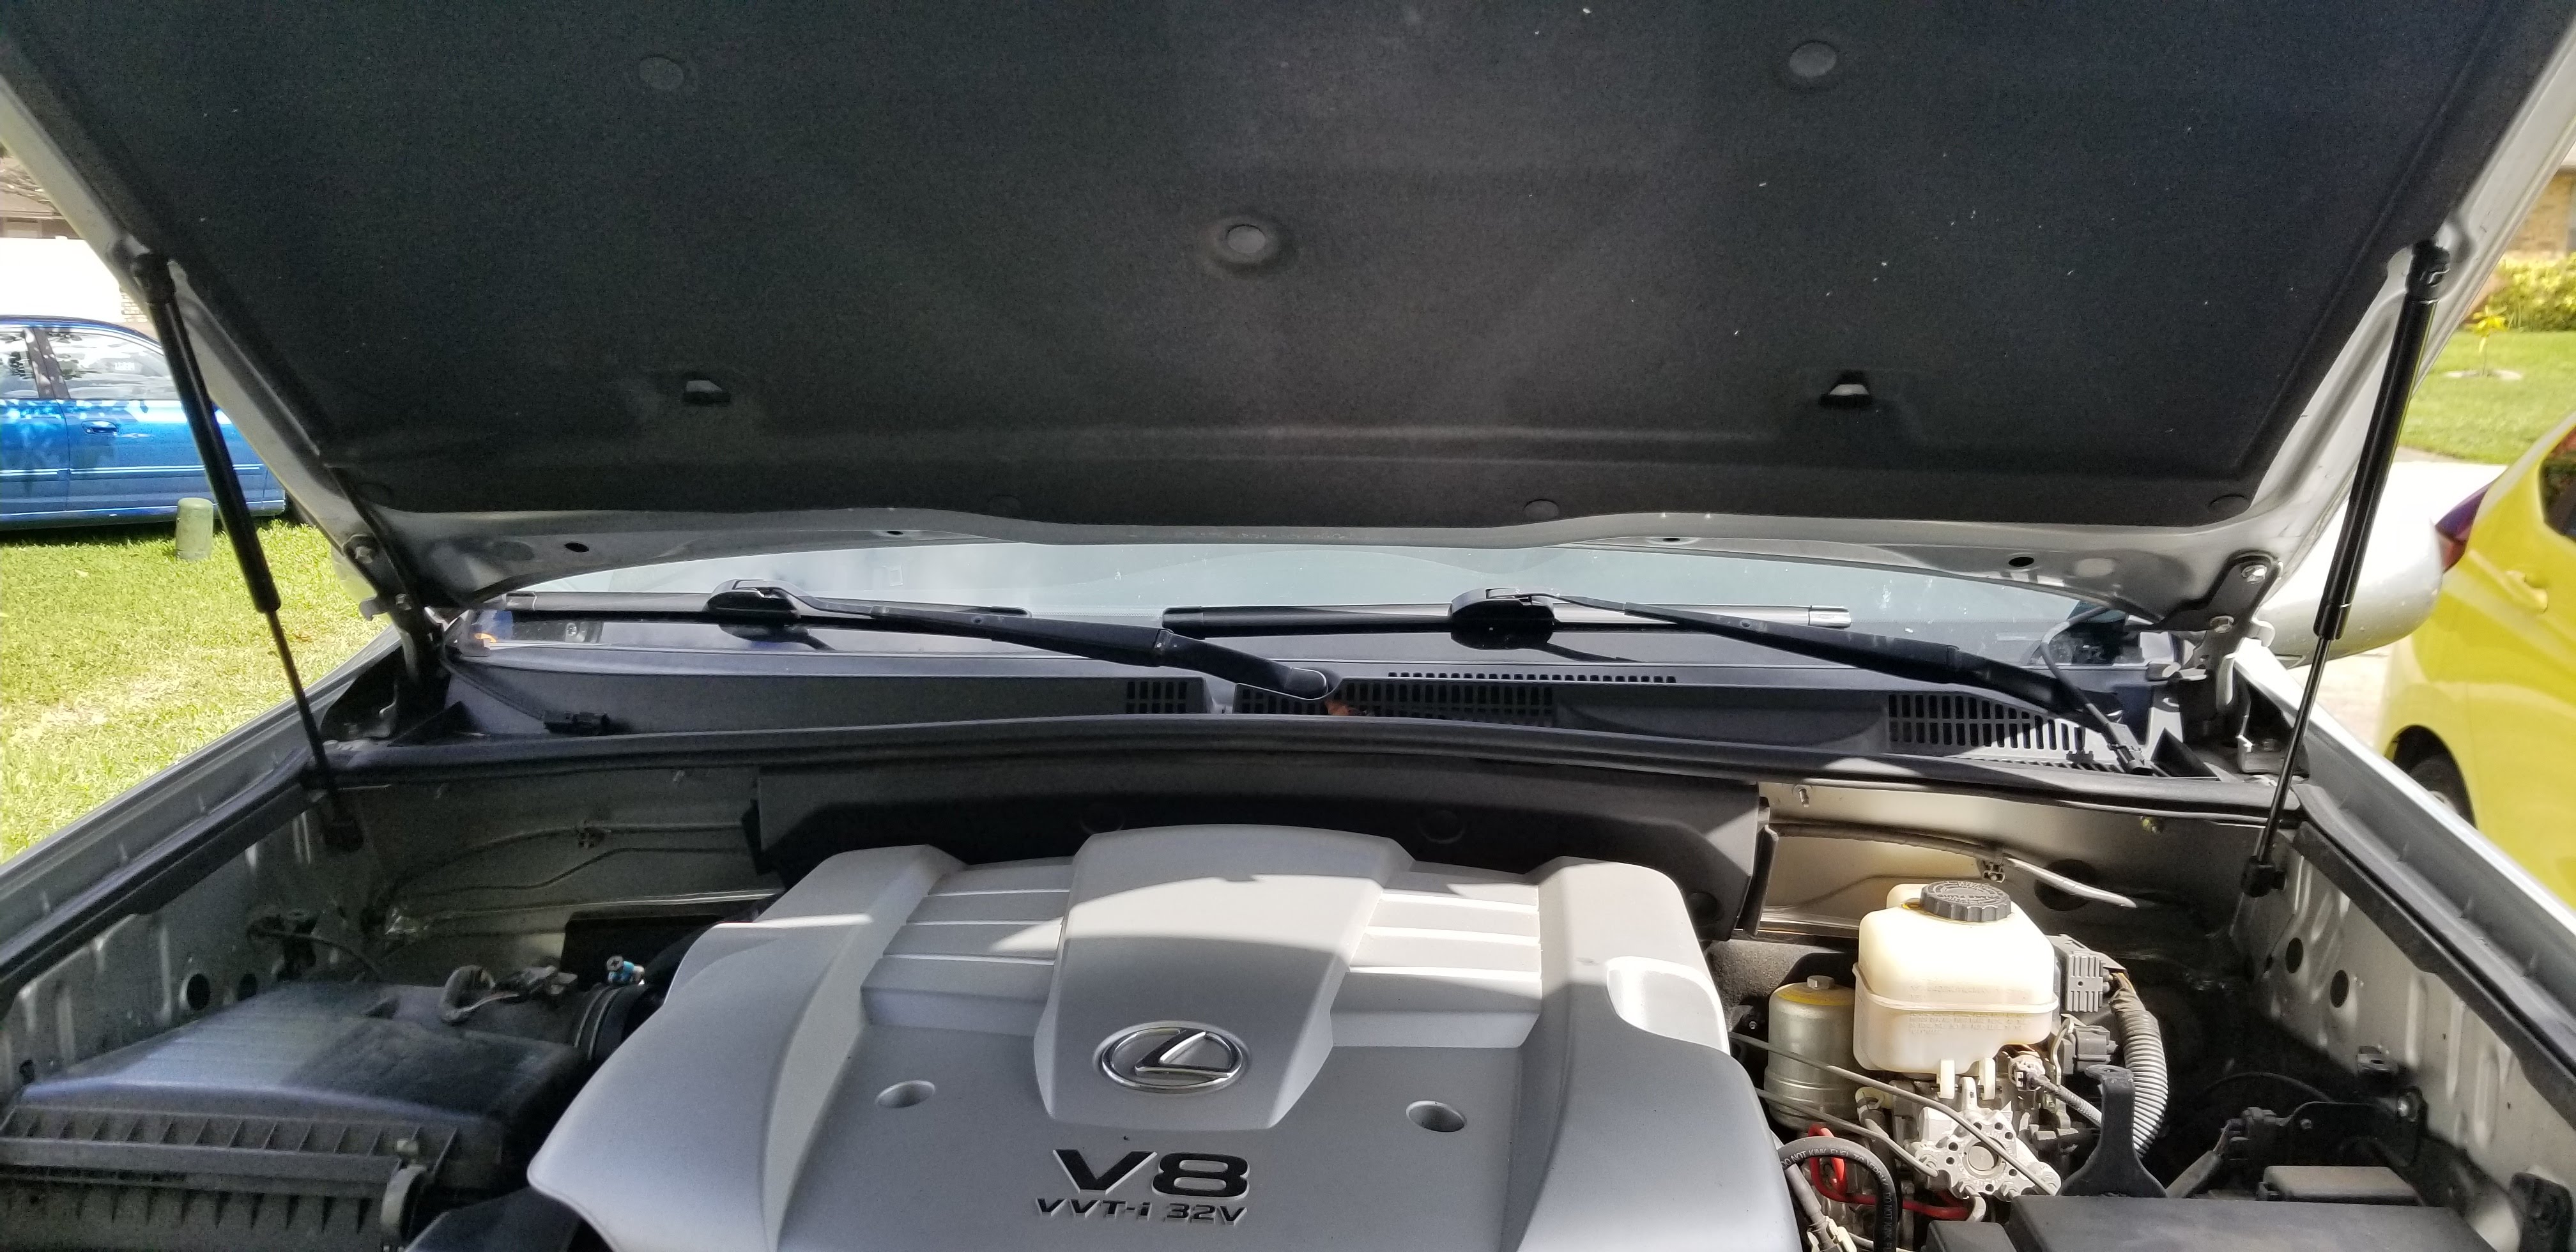
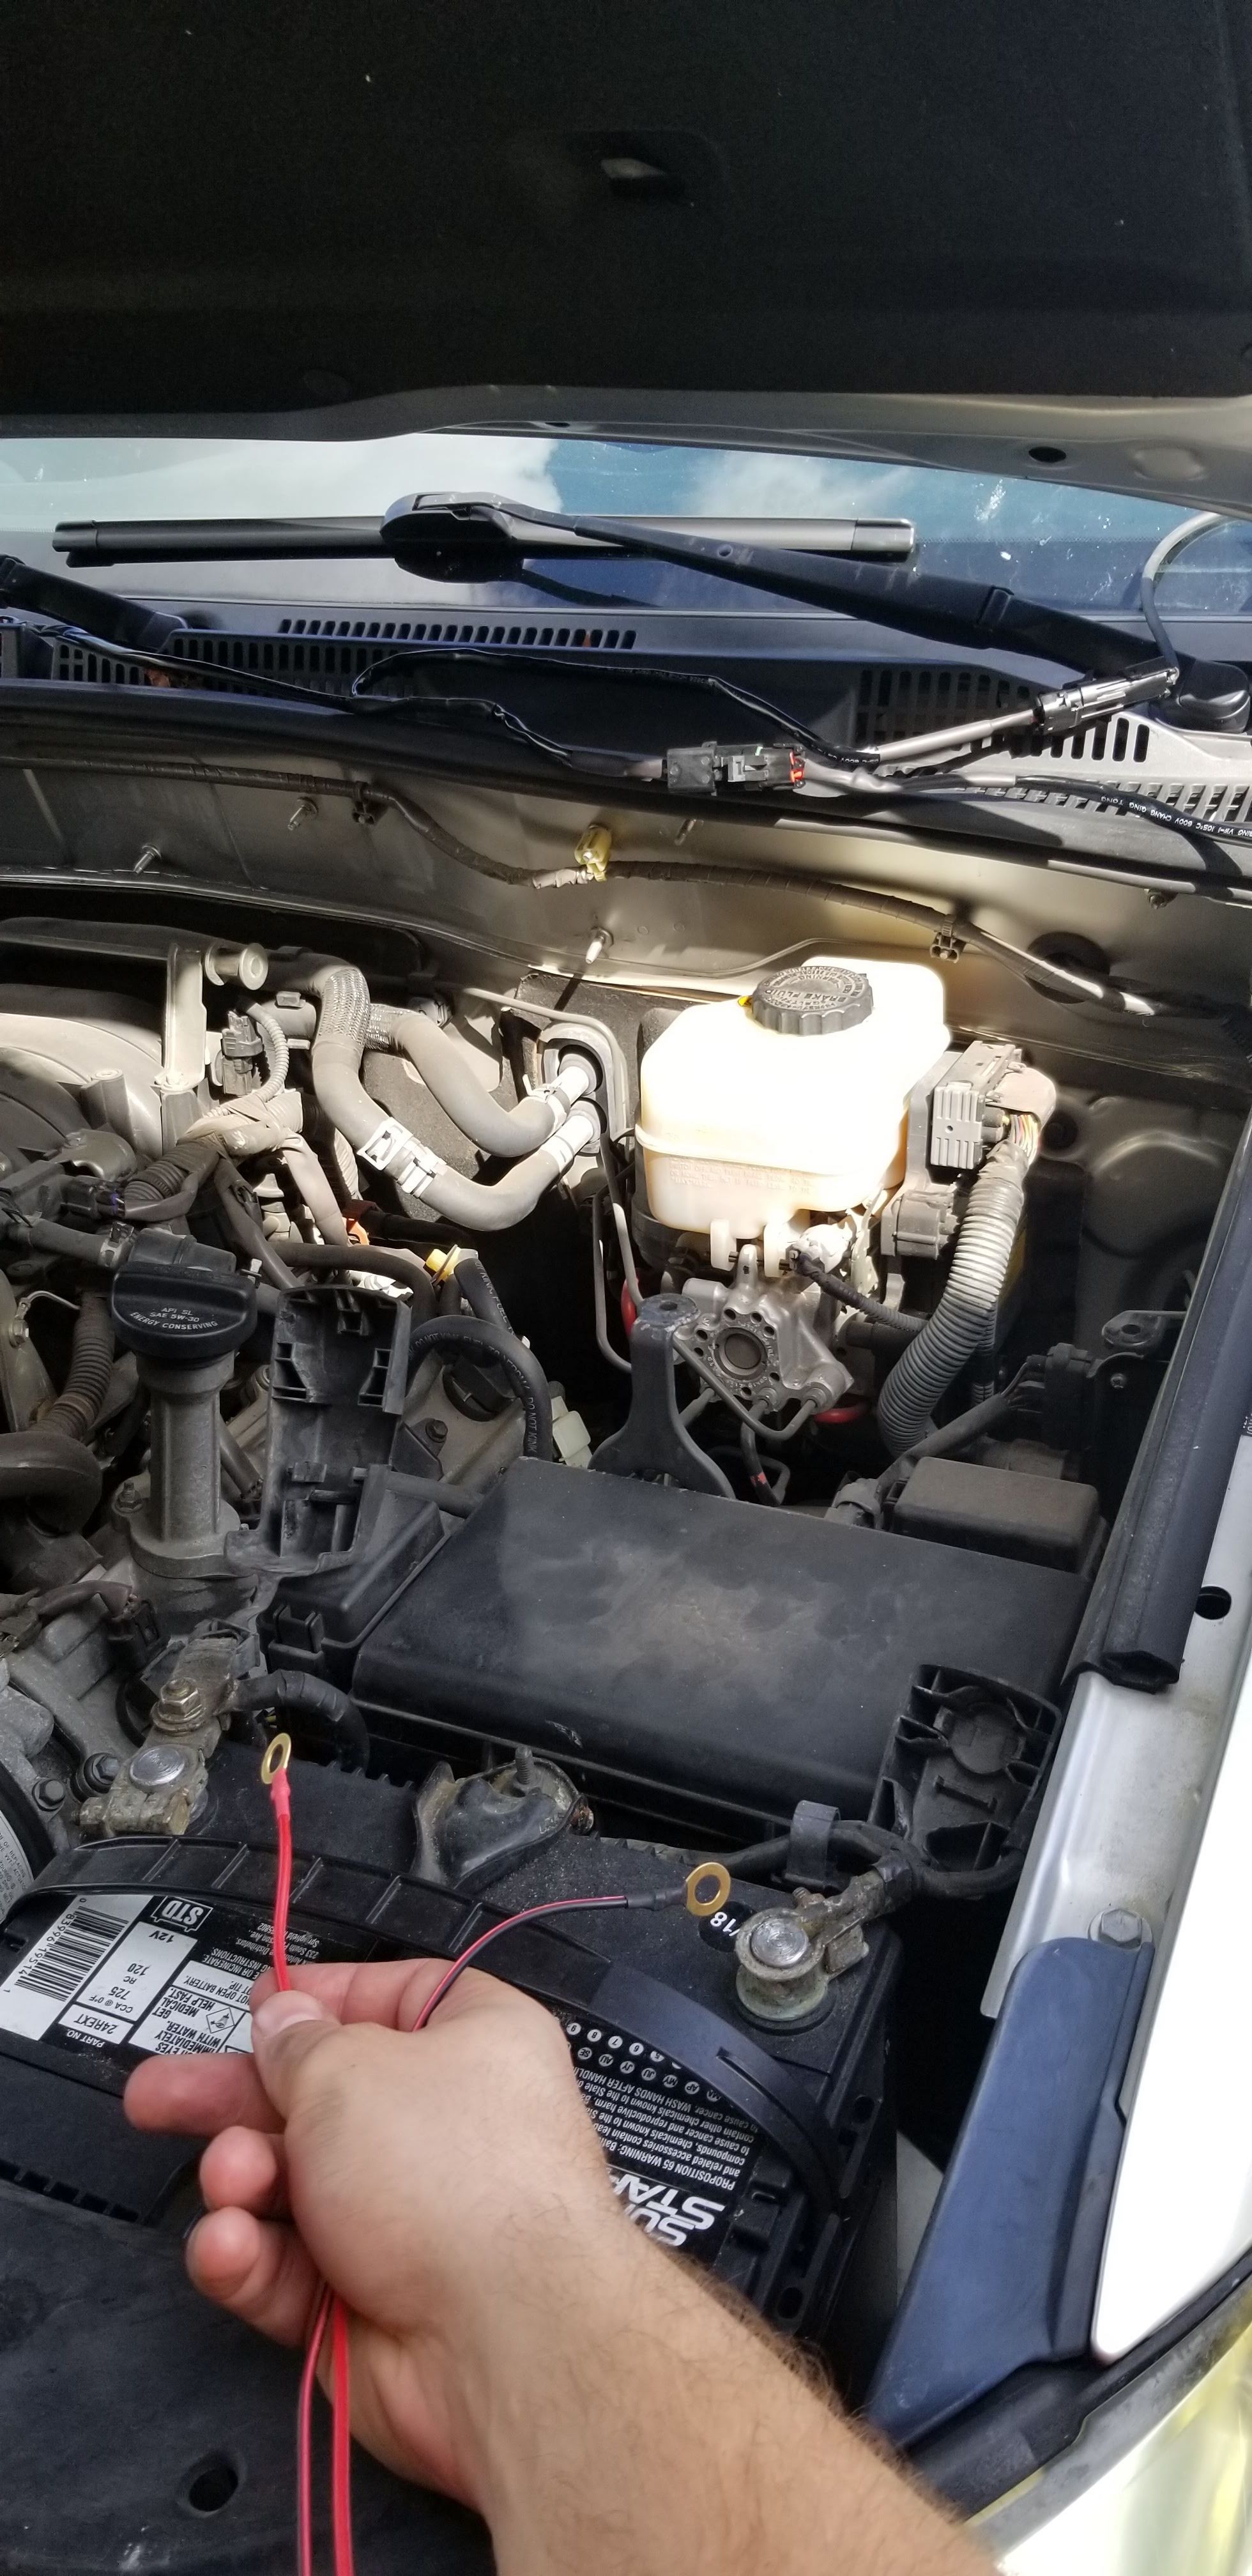
Lay your wiring harness in place, you can even hook it up. You can take the red to the positive terminal and black to the negative terminal of your battery to test the harness and lights, just make sure the switch is one.
Now here comes what I thought was the hardest part - getting part of the wiring harness through the firewall. I decided to use the Add a Circuit Tap, so I don’t plug directly in to the battery (which is possible). The part of the harness that connects to the splitter that plugs both lights in, I fed that part through the firewall from the cabin.
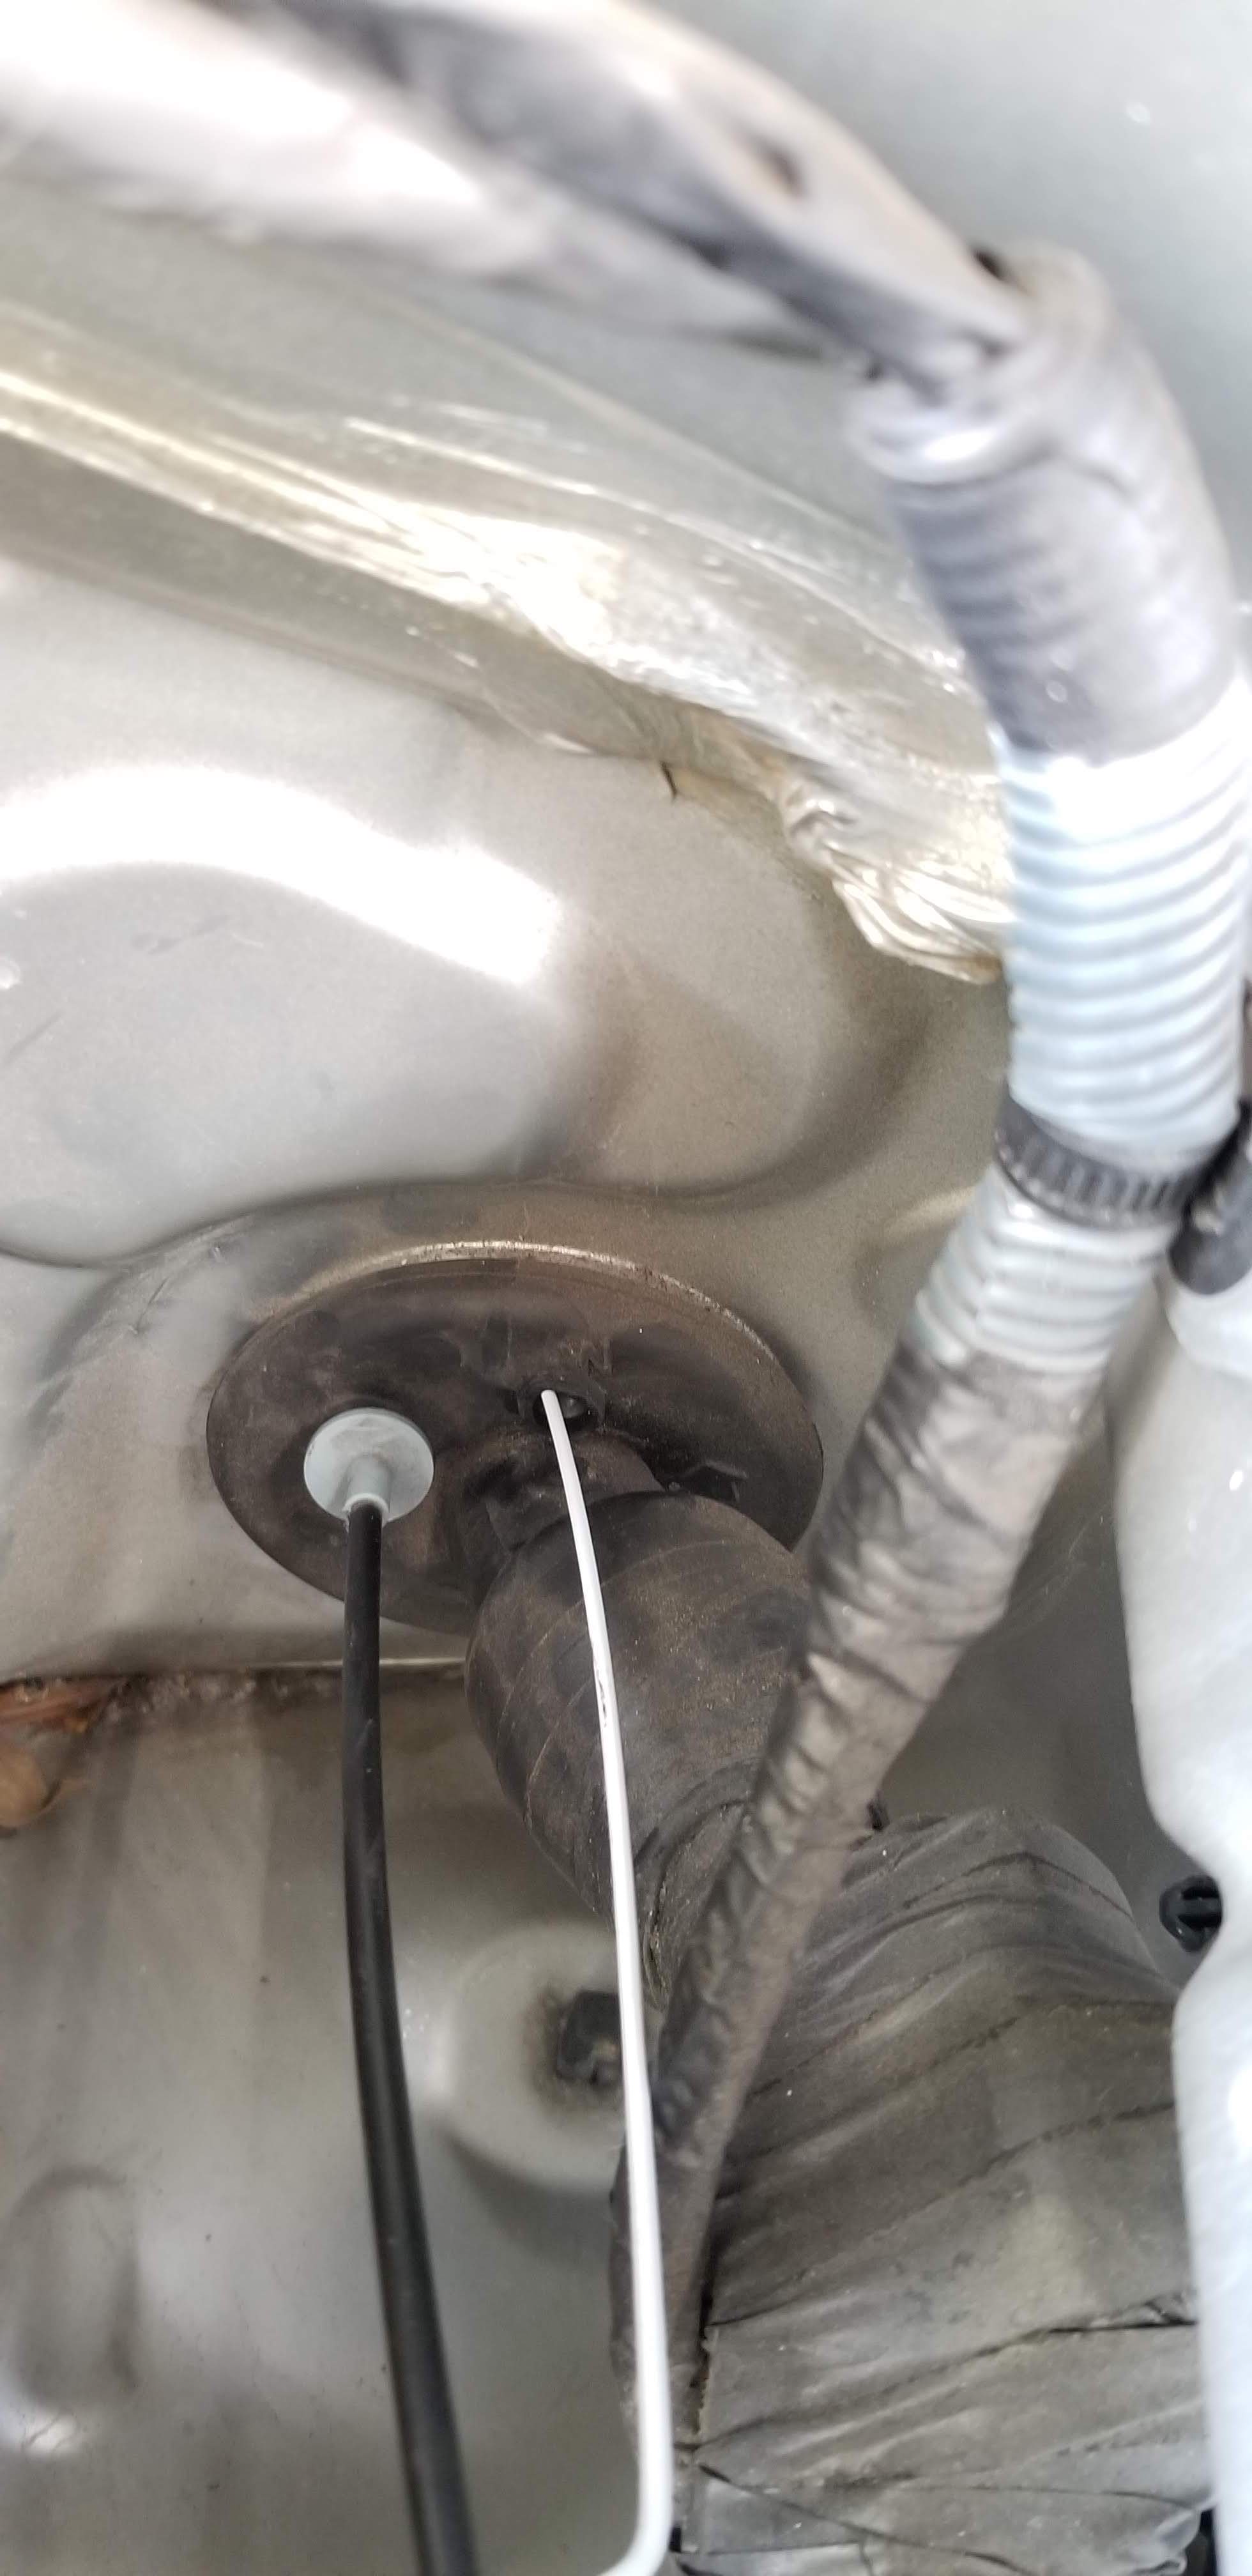
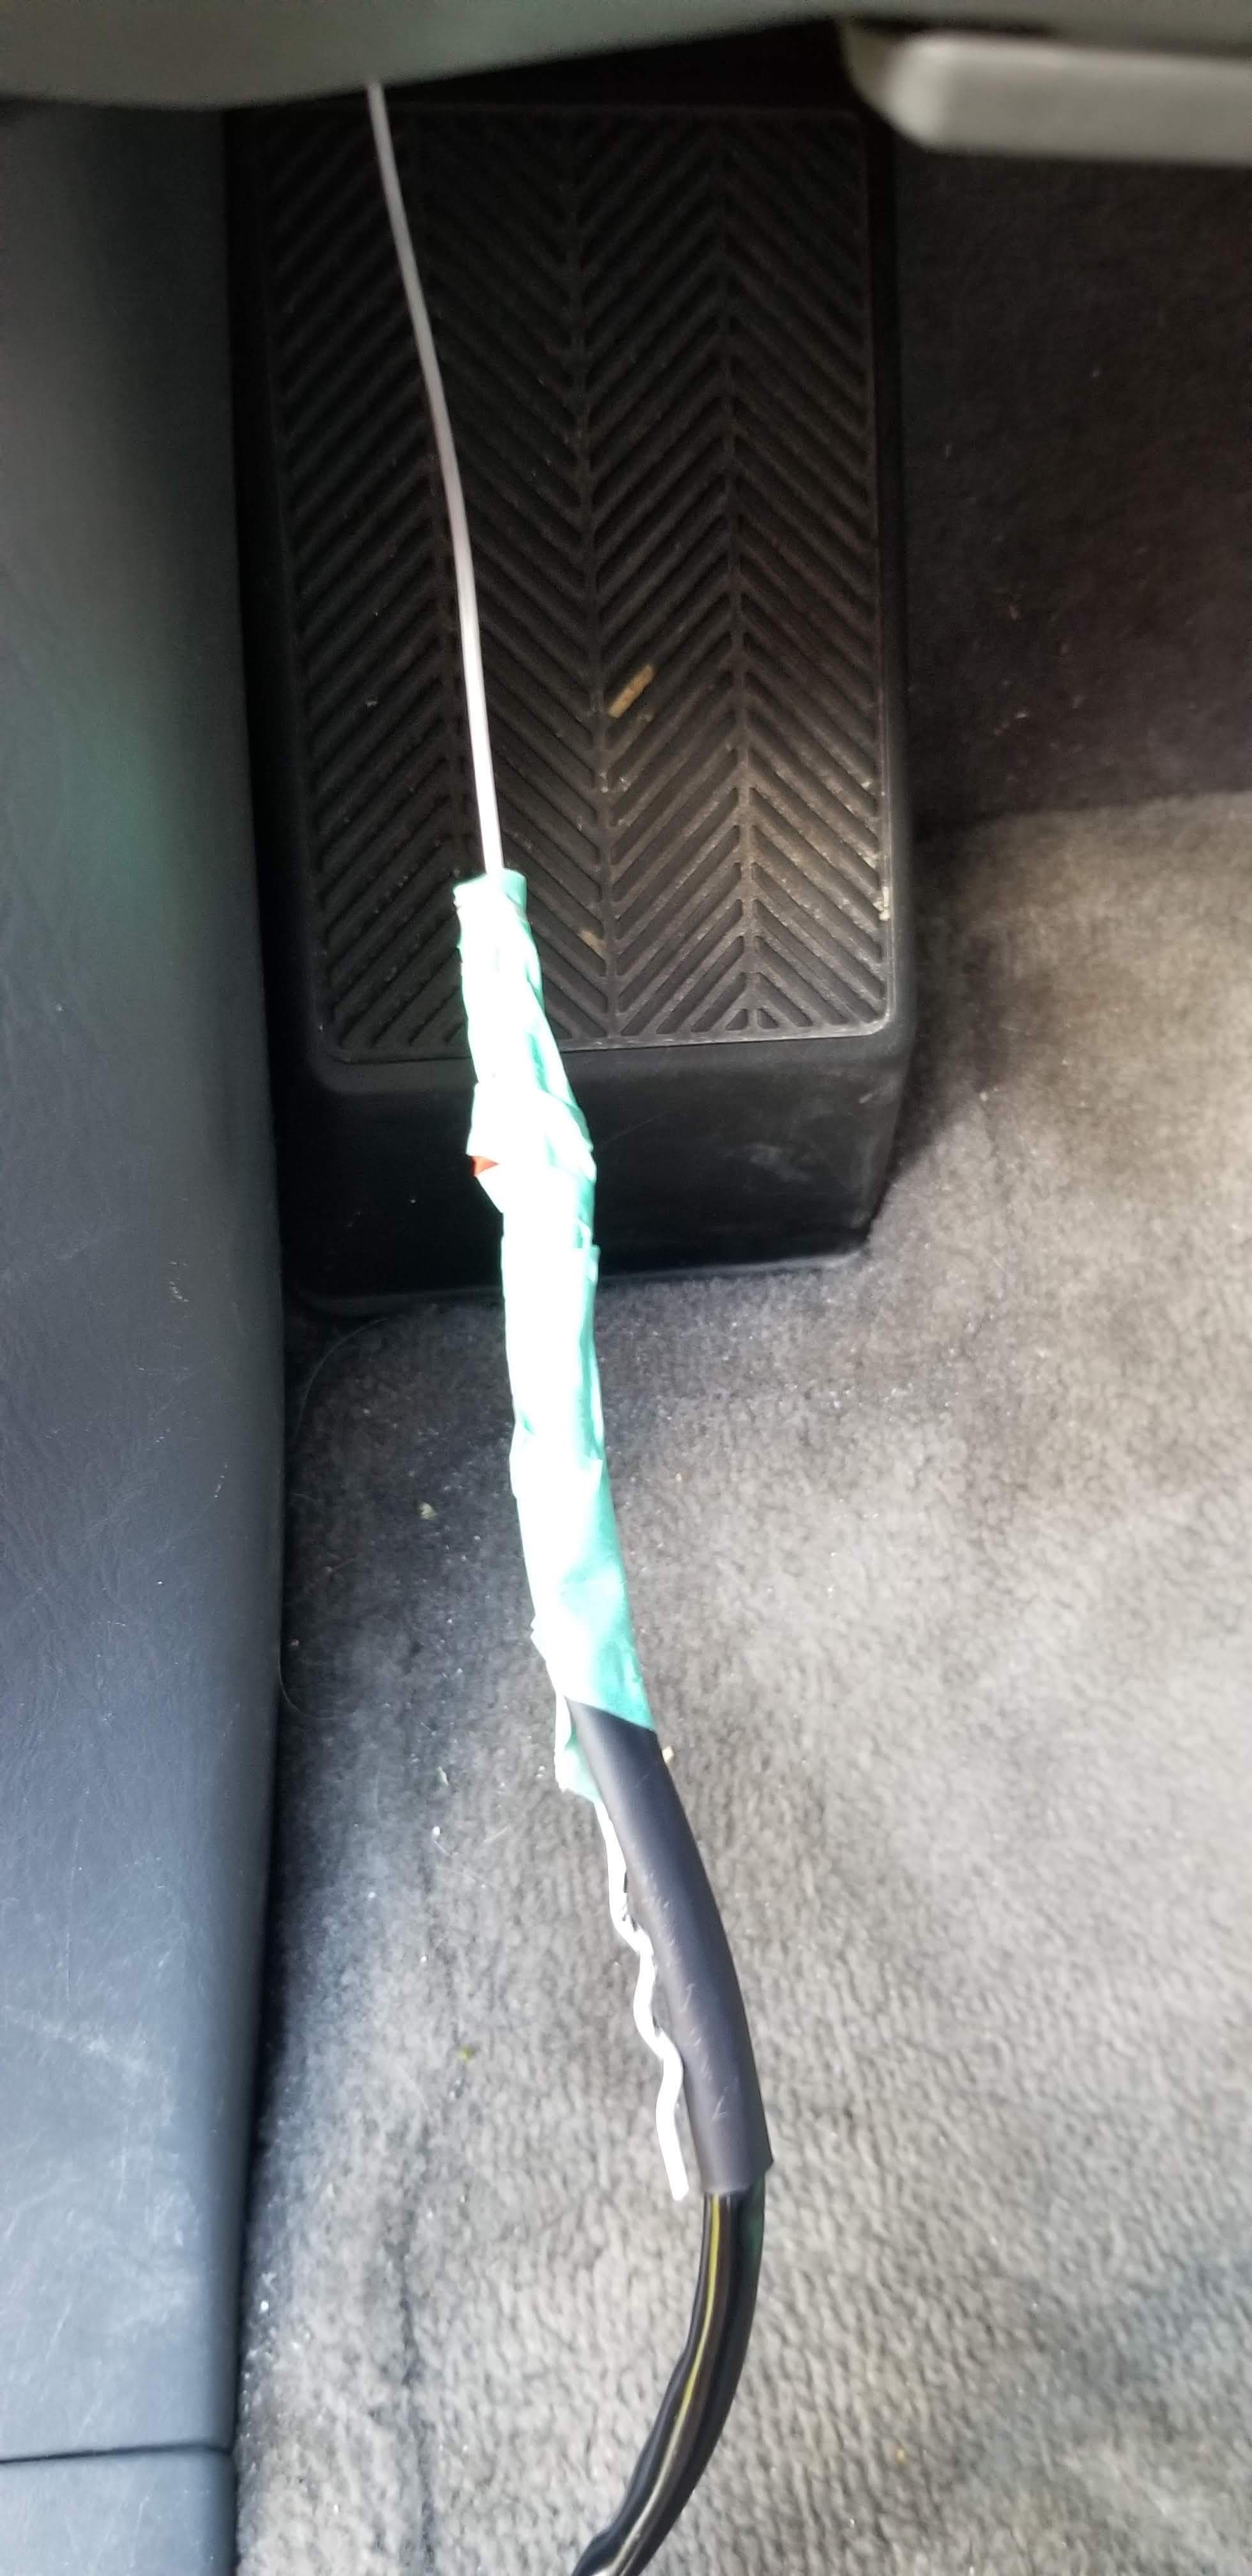
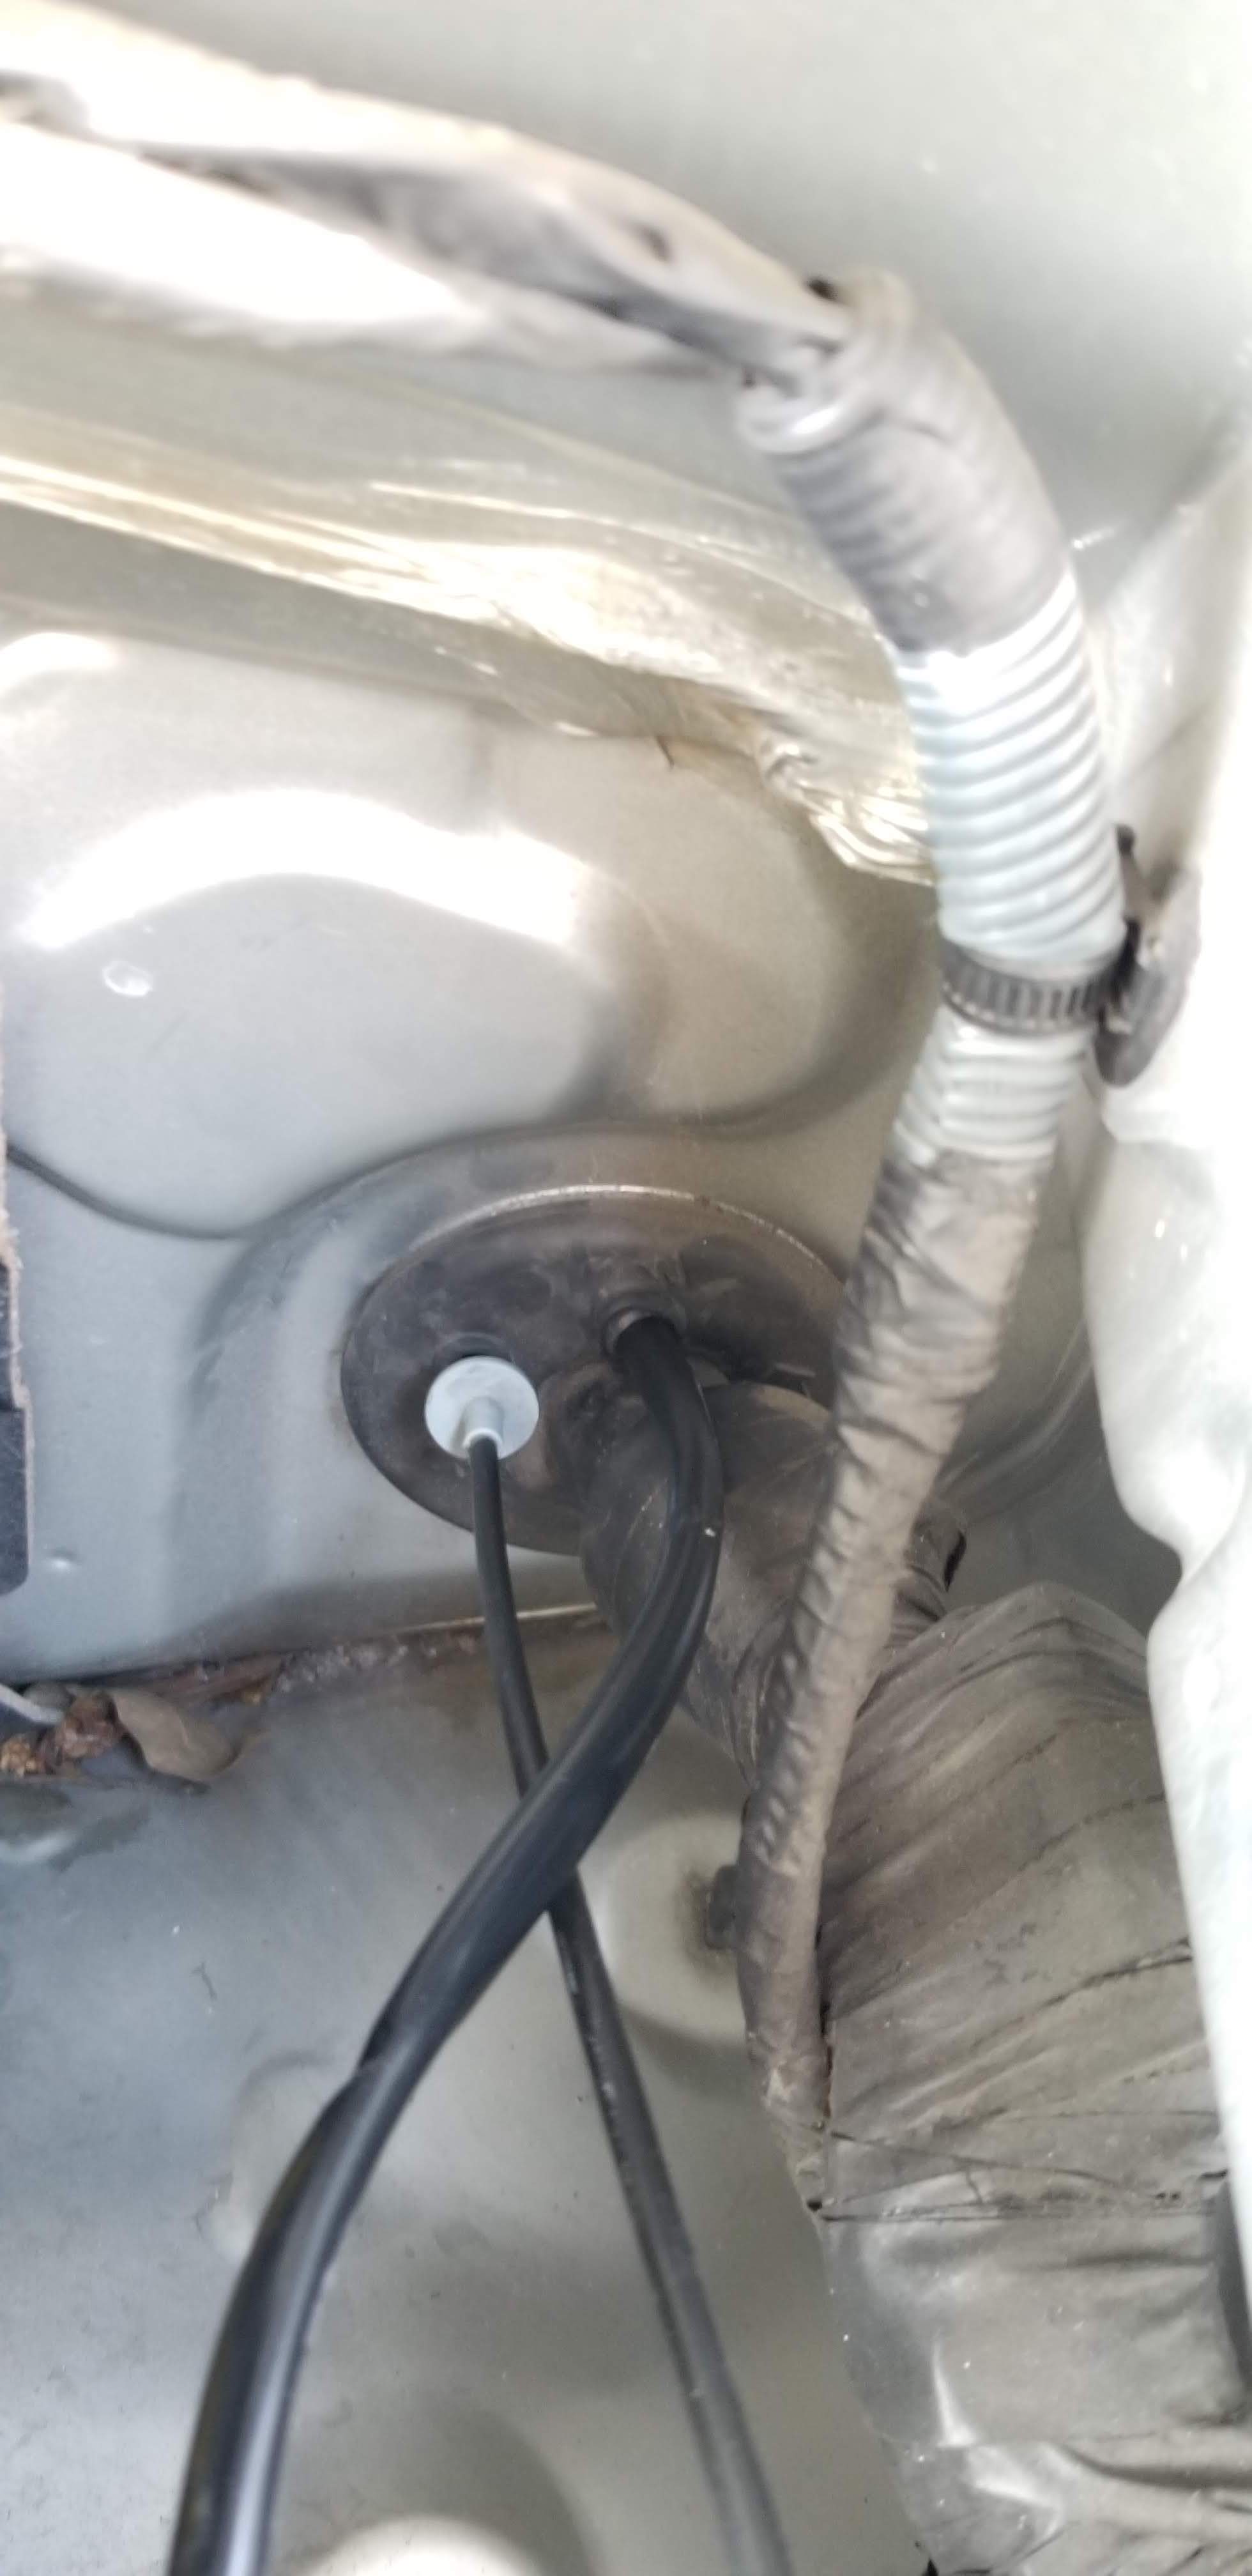
To do that, I cut a hole in the rubber nipple (where you see the white coat hanger in the pictures below) in the engine compartment on the firewall grommet thing. This is made for wiring expansions anyways. Then, under the drivers seat, push the wiring up through the hole that leads to the engine compartment. I found it MUCH easier to remove the plug (leaving just wiring and connections) and to tape those wires to a wire hanger that had already been pushed through the firewall.
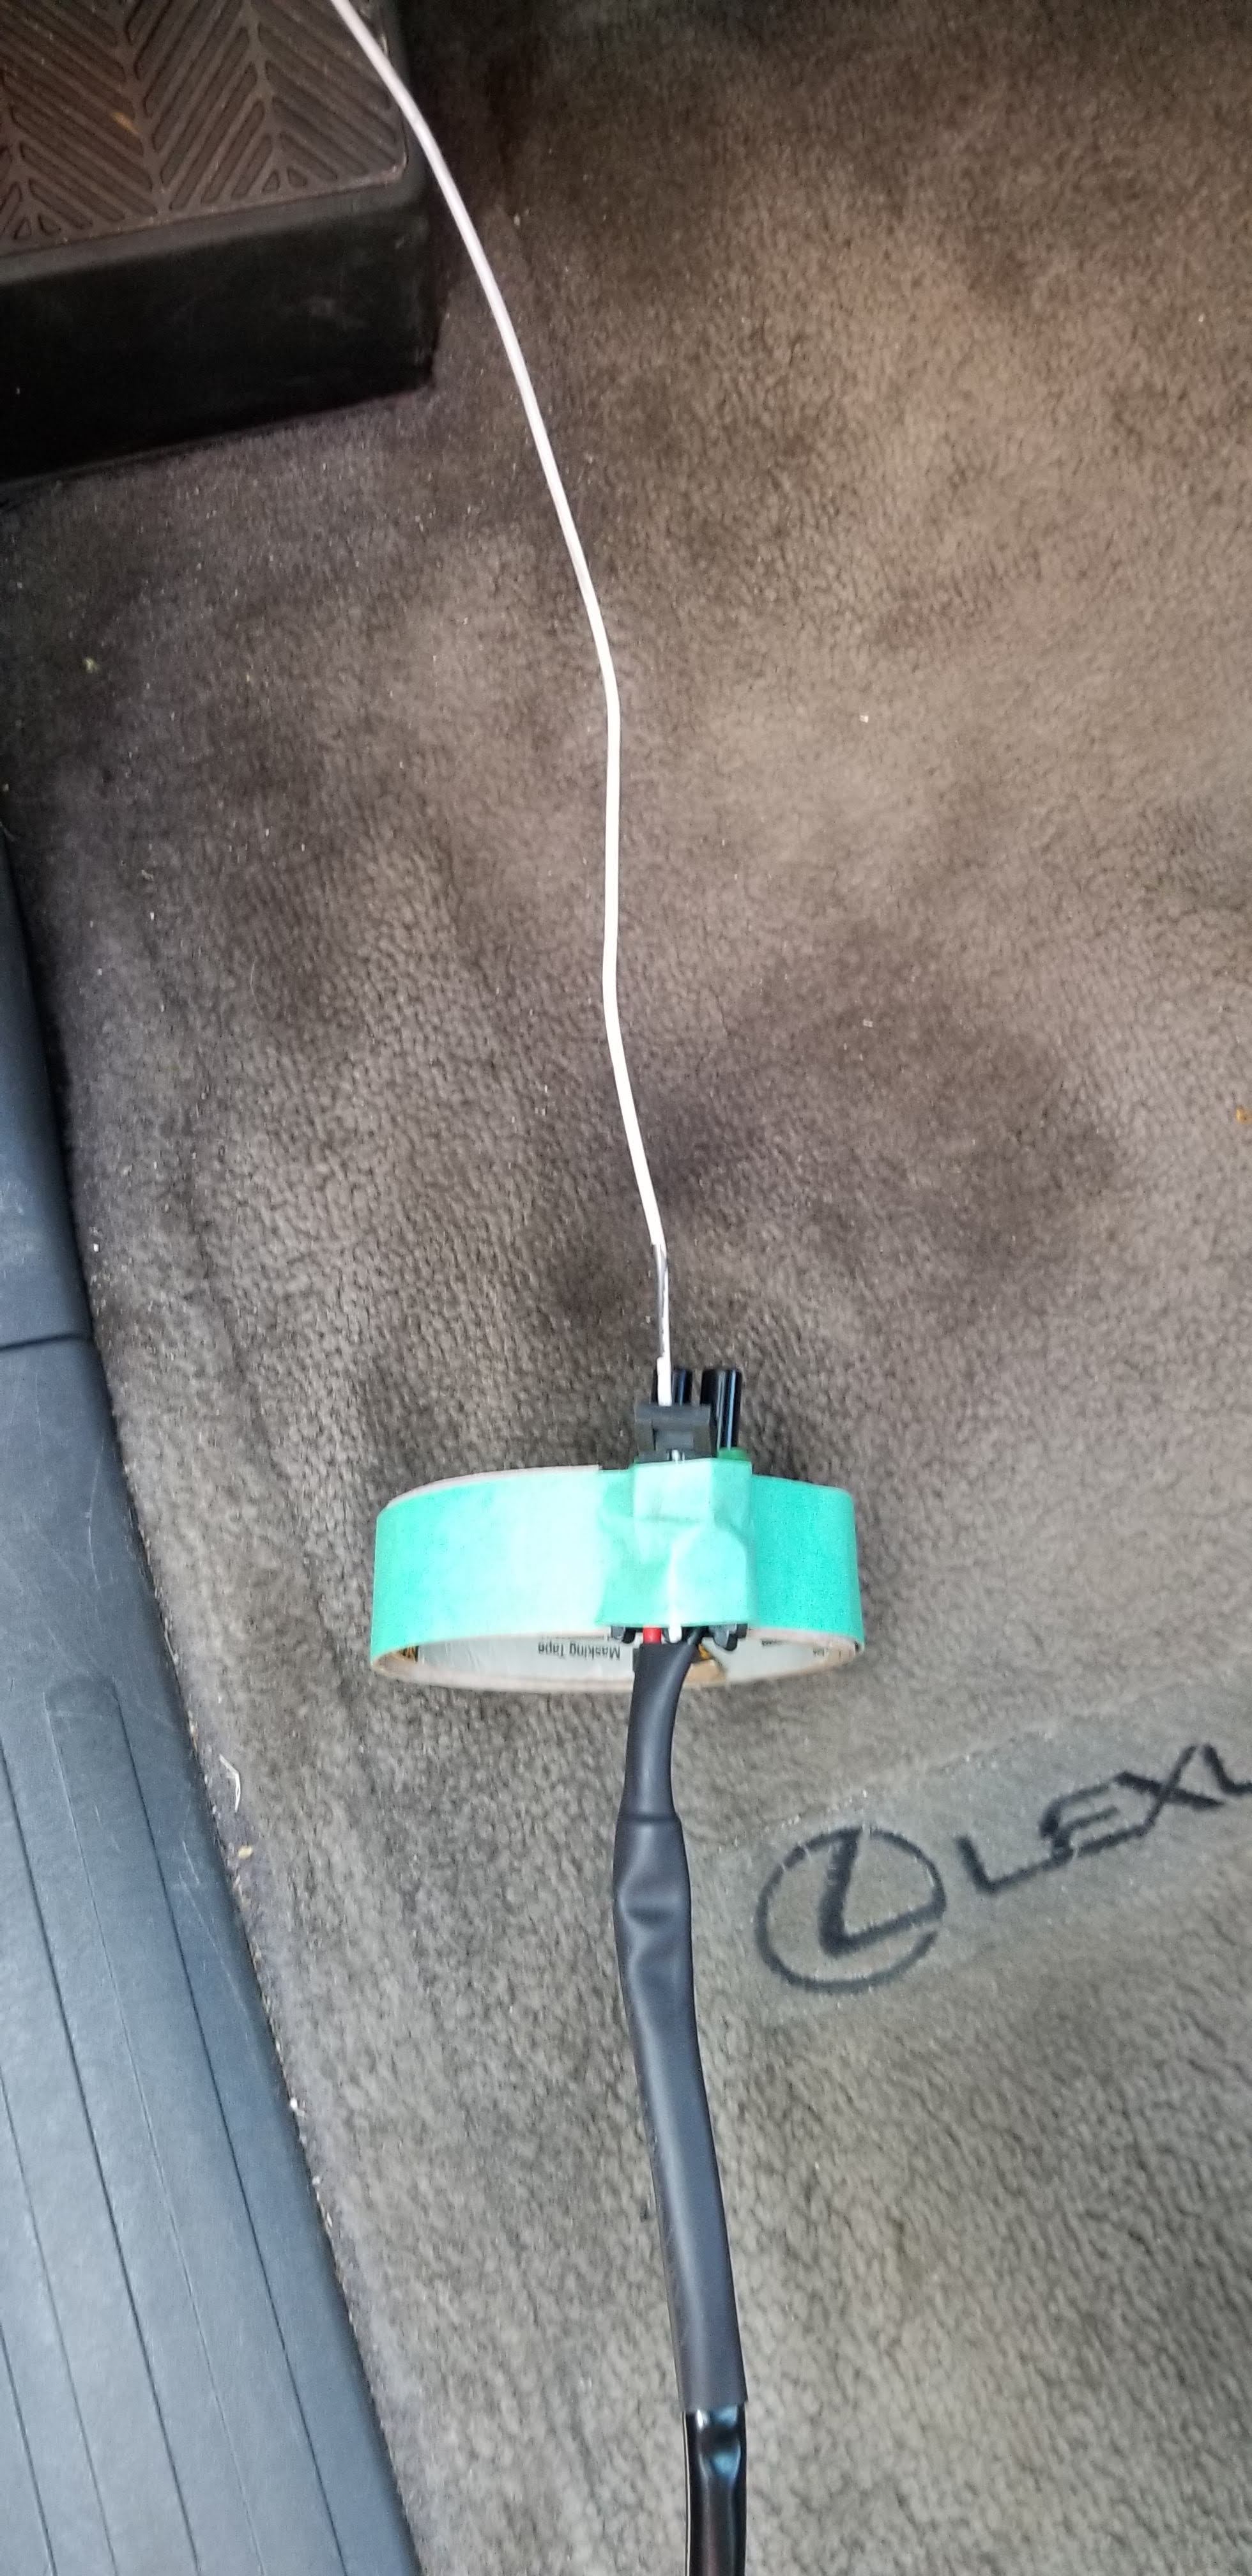

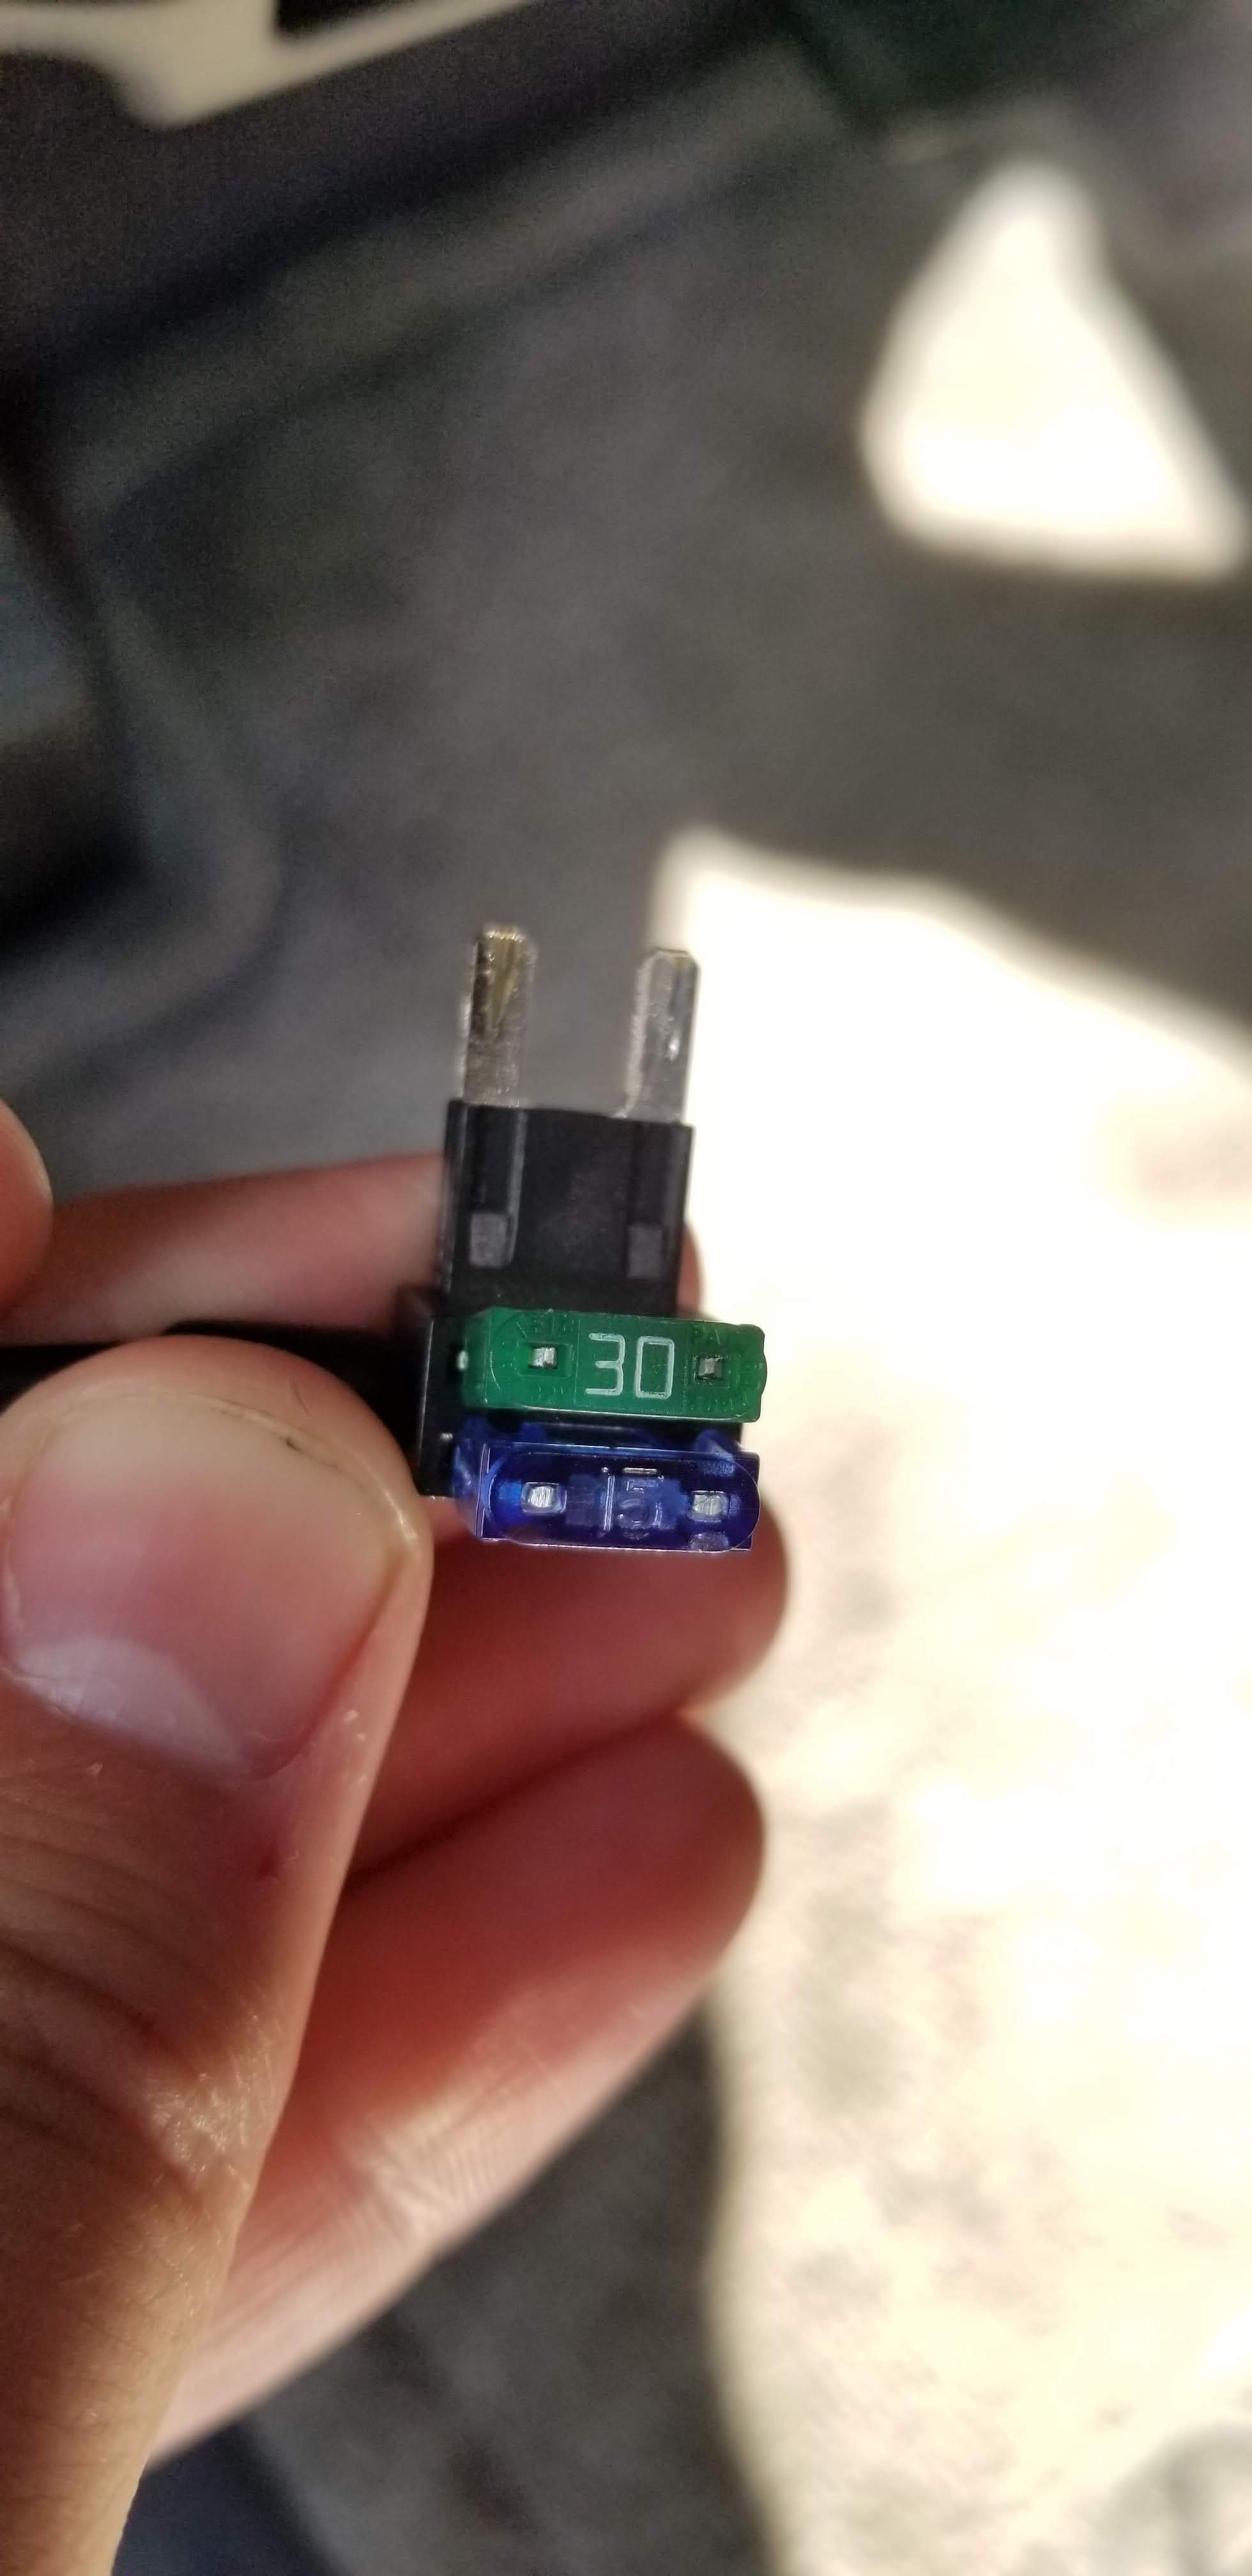
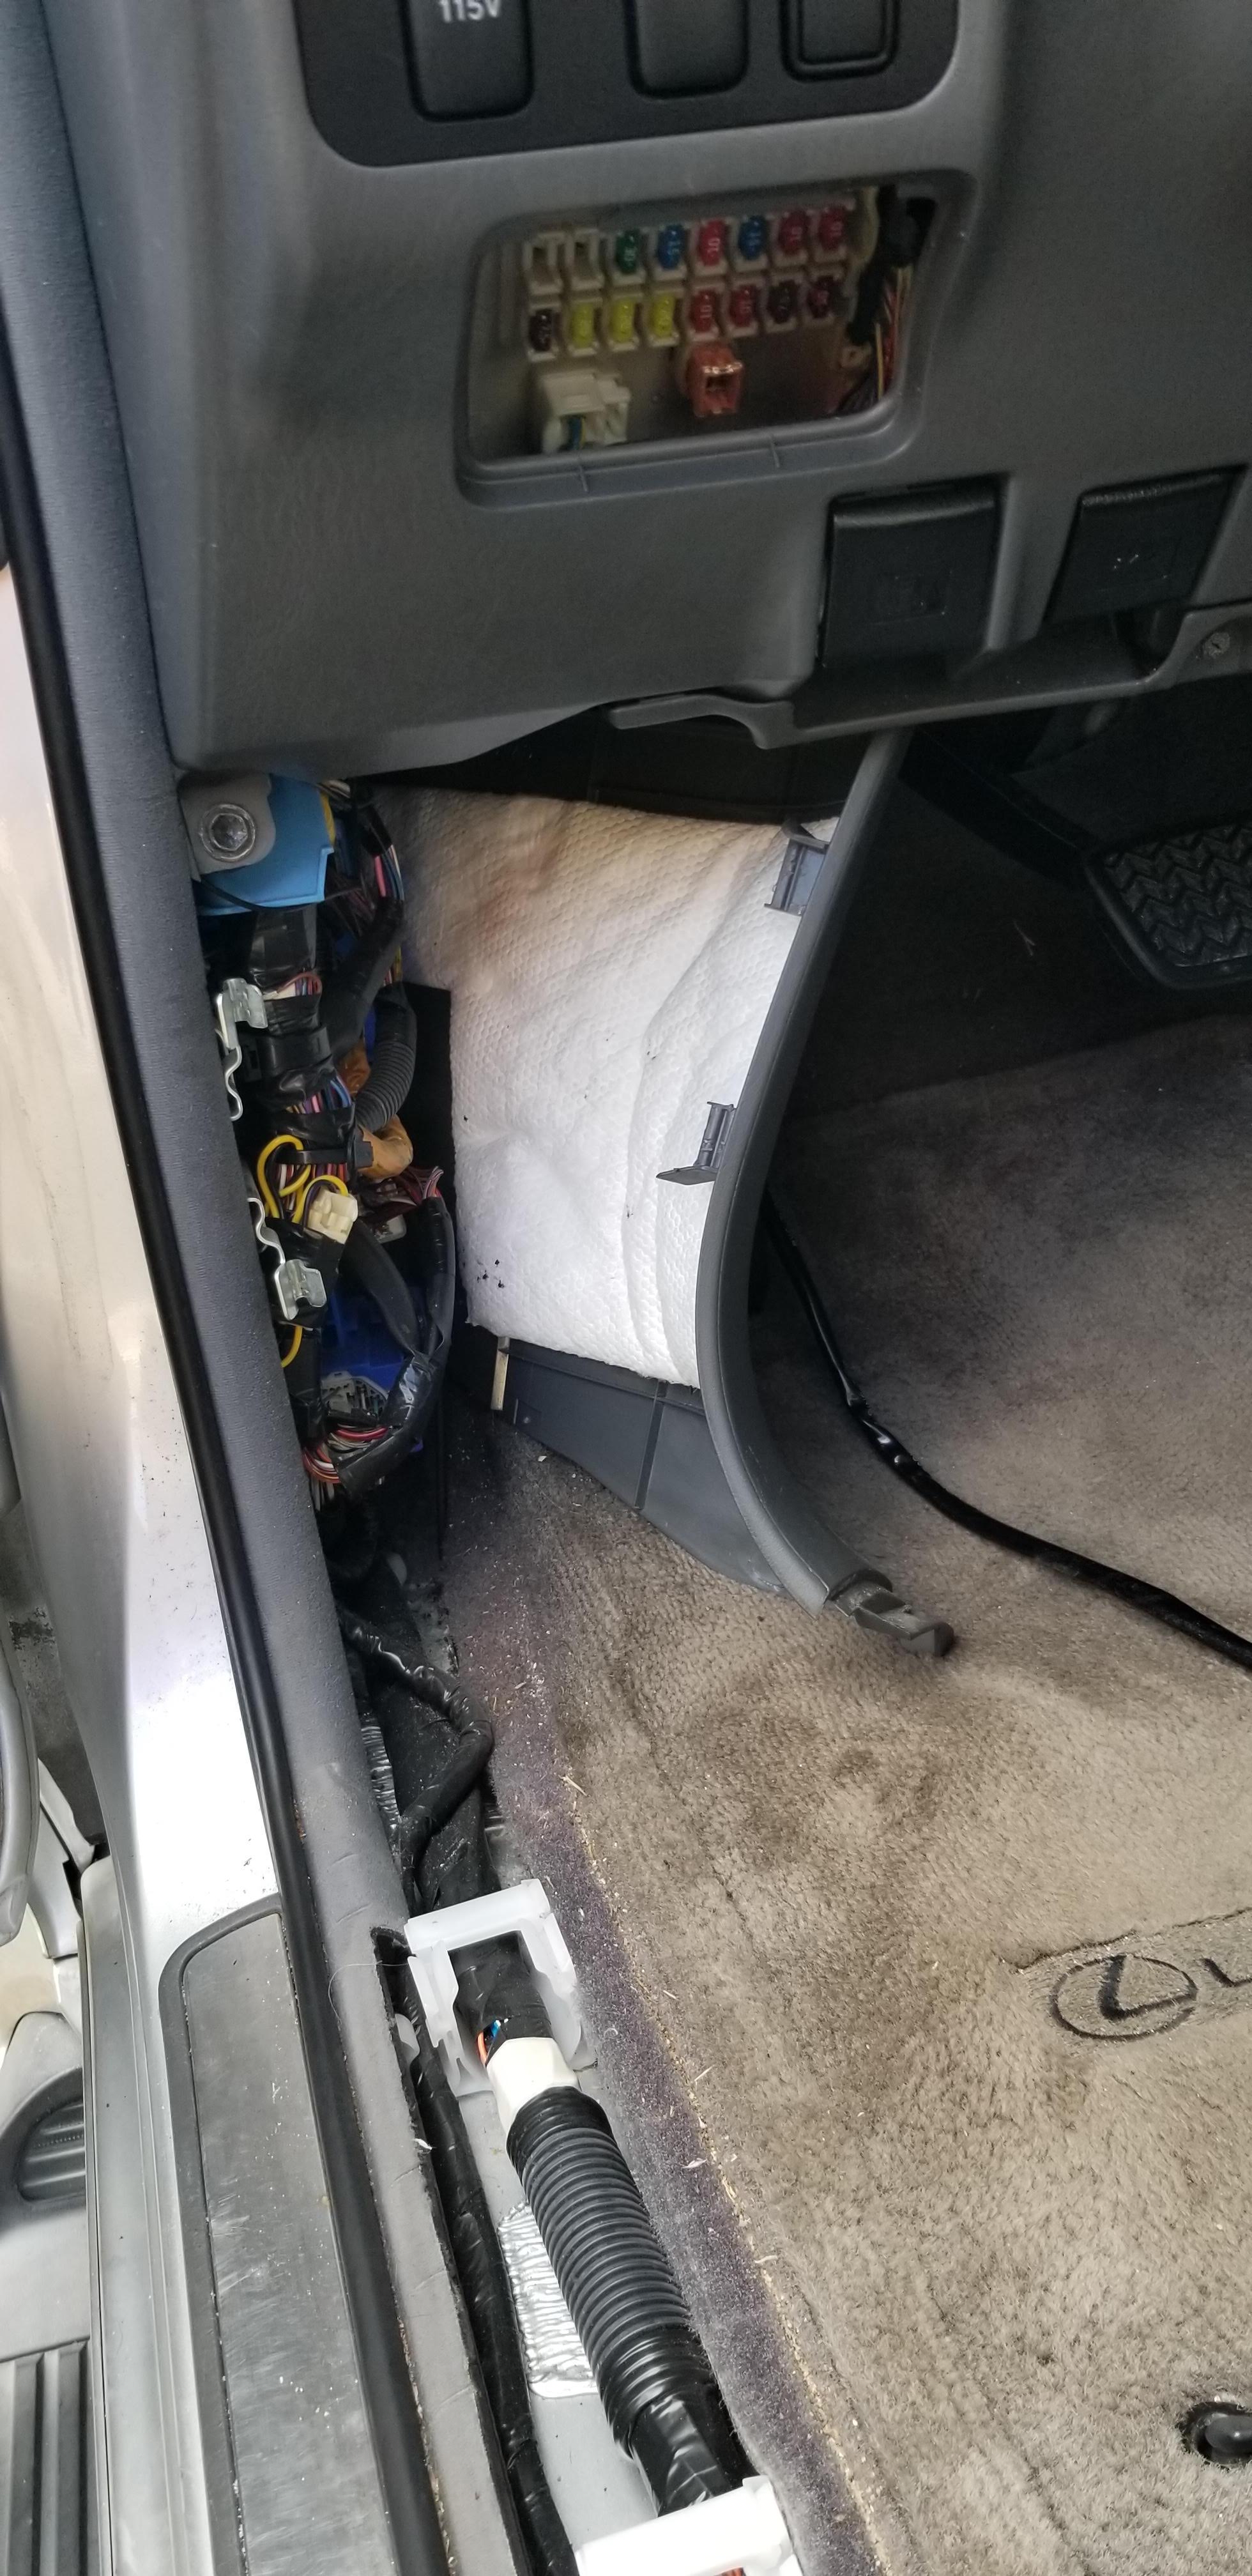
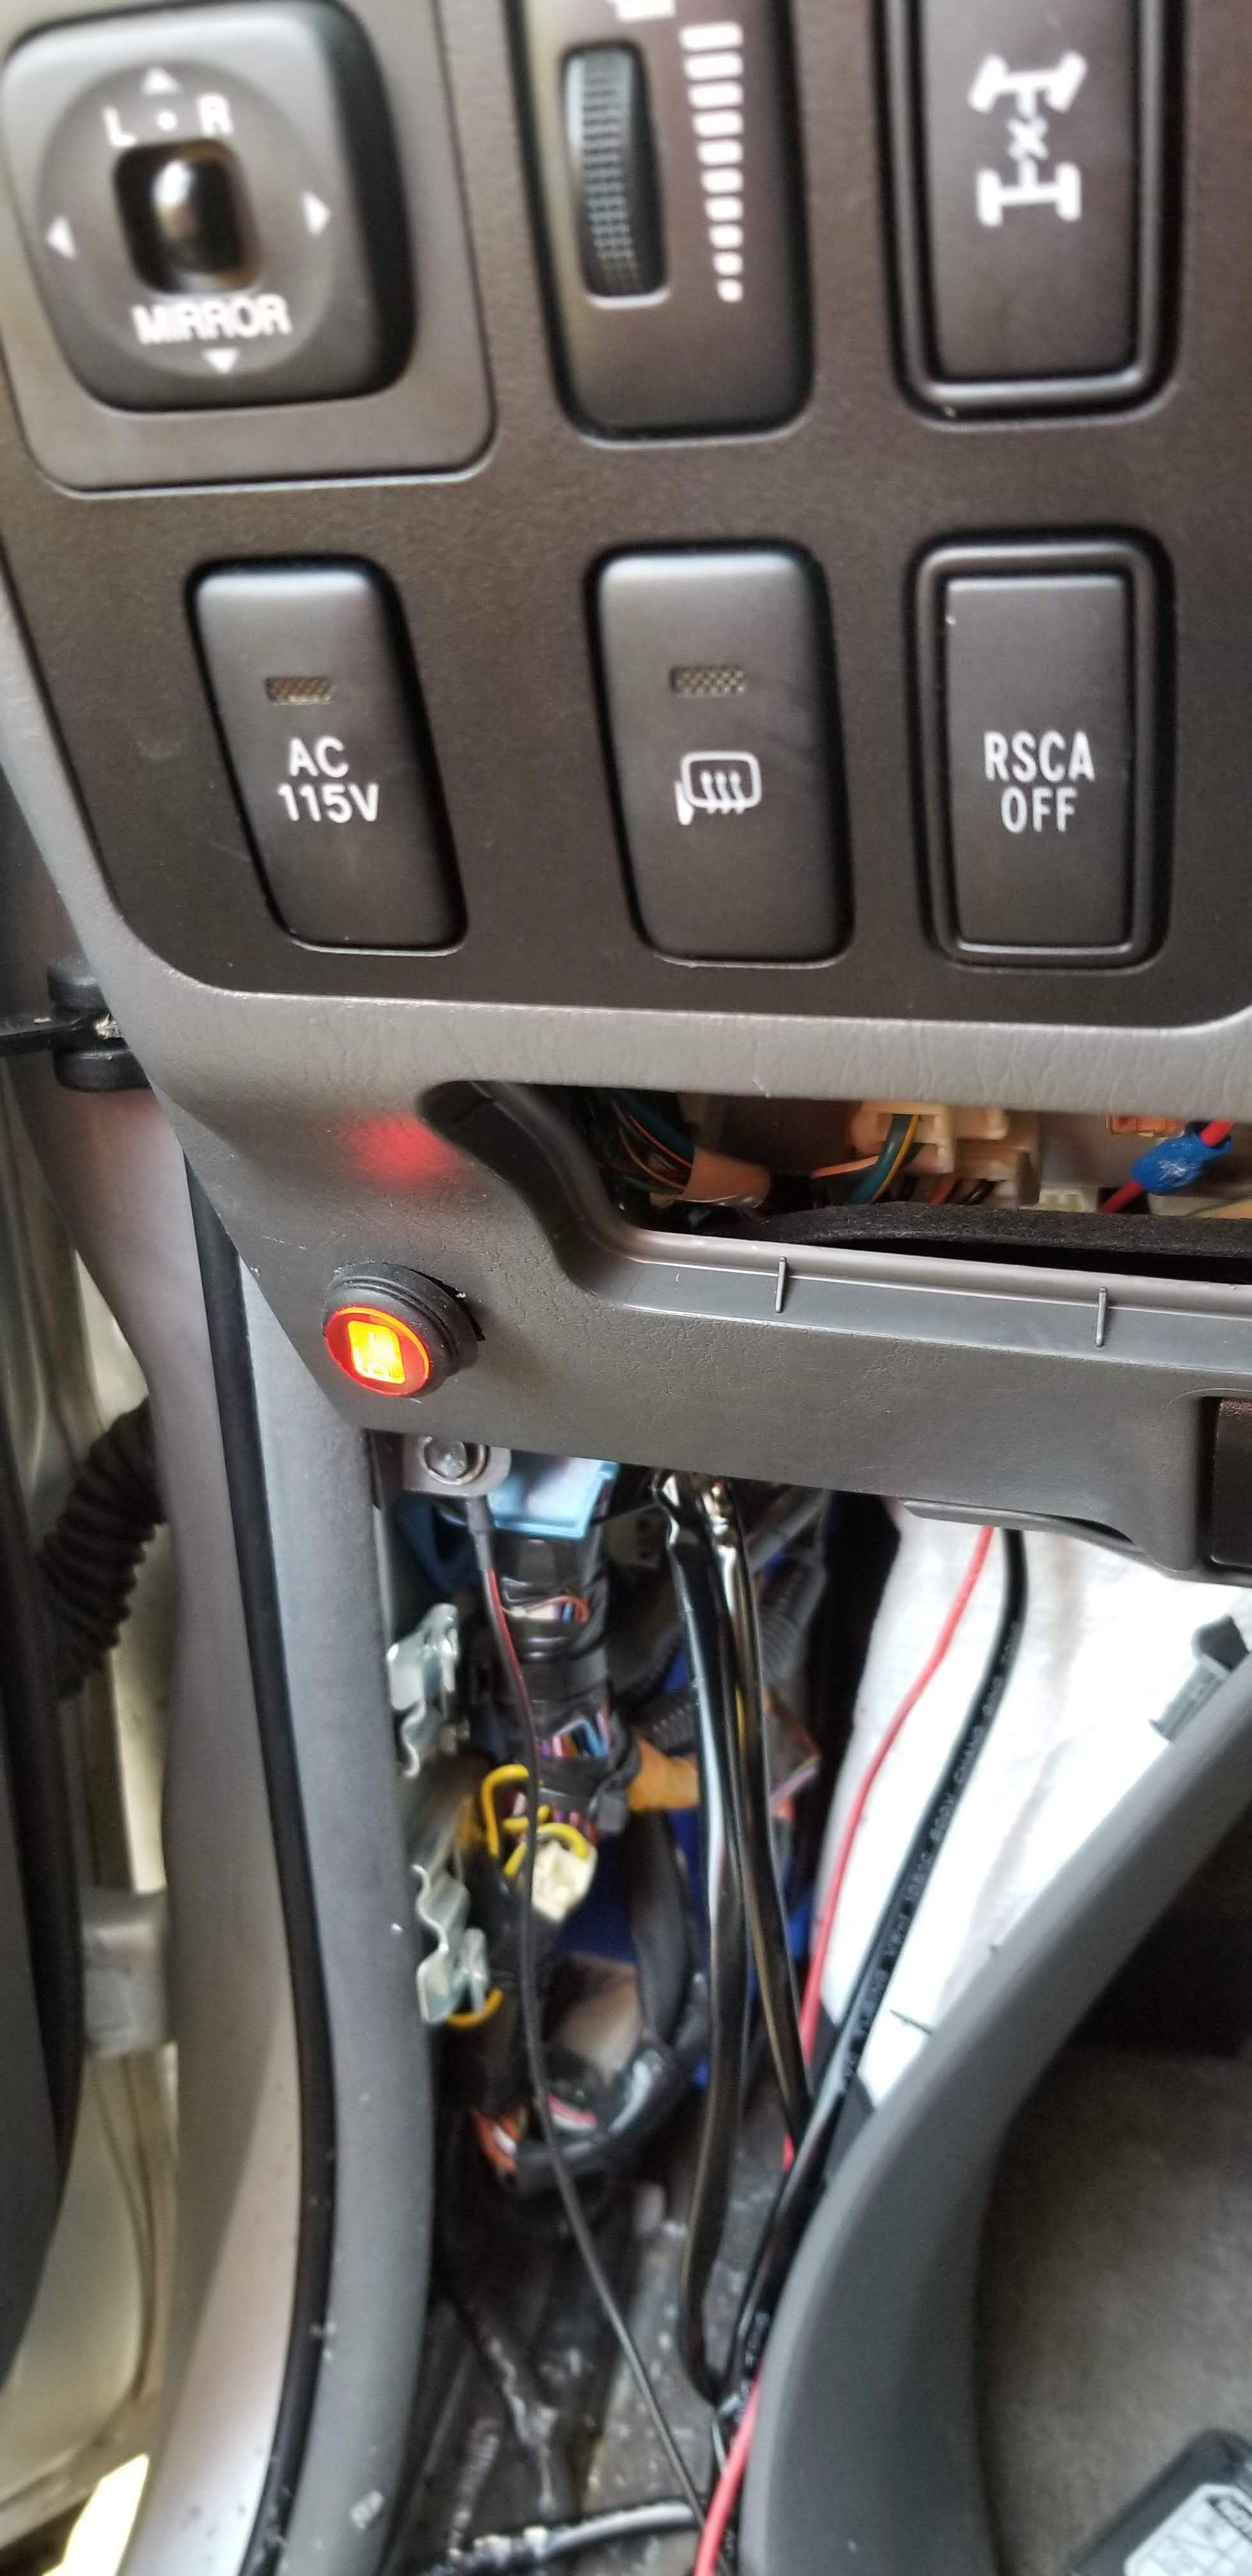
Alright, got that done? Sweet. Bet it took a minute. Now you can make sure everything works. Plug in the lights to the harnesses, the black to a ground, and the red to power. I pulled back the plastic by the drivers left footwell to use a ground bolt there, you can see in the top left of the picture below. Then I used the Add a Circuit Tap to tap the 30A drivers power seat fuse, which is in the small fuse box under the steering wheel. The switch should turn on the lights, and when the lights are on the switch should light up red.
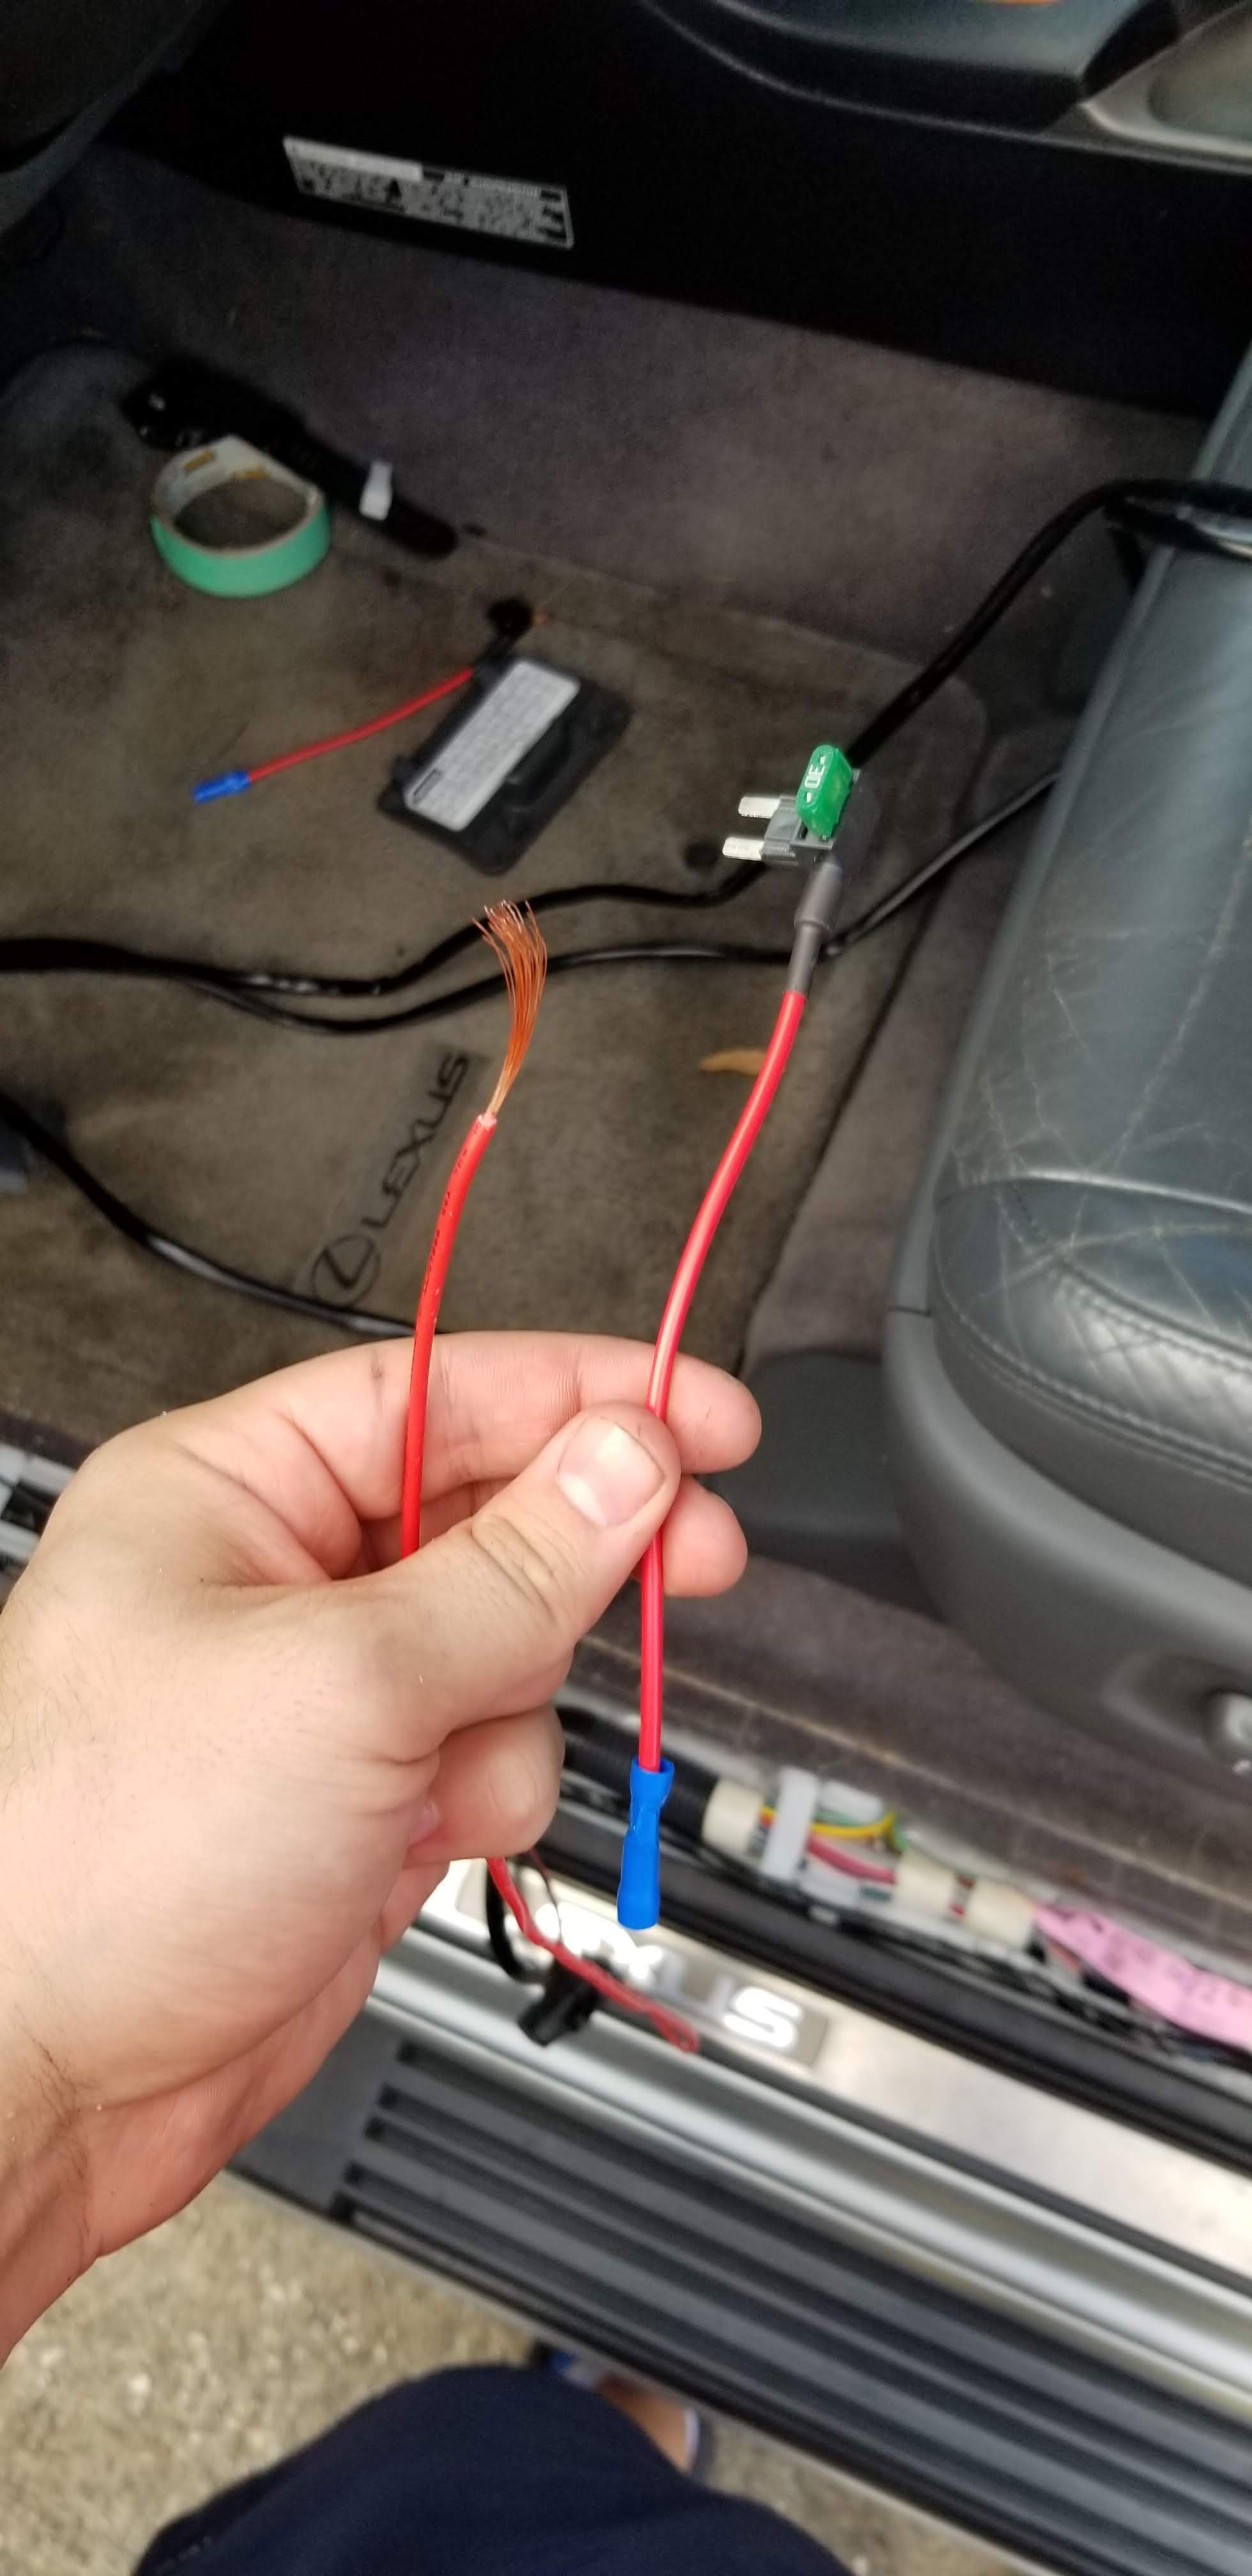
To hook up the included harness to the Add a Circuit Tap, snip the end off the end of the red wire that was included, expose some of the copper using wire cutters, then push that wire into the end of the tap. Crimp the connection using some elbow grease and pliers. Pull the 30A from the drivers power seat slot and put it in the closer spot to the connector. Add another fuse in the next slot, this is the fuse for your ditch lights.
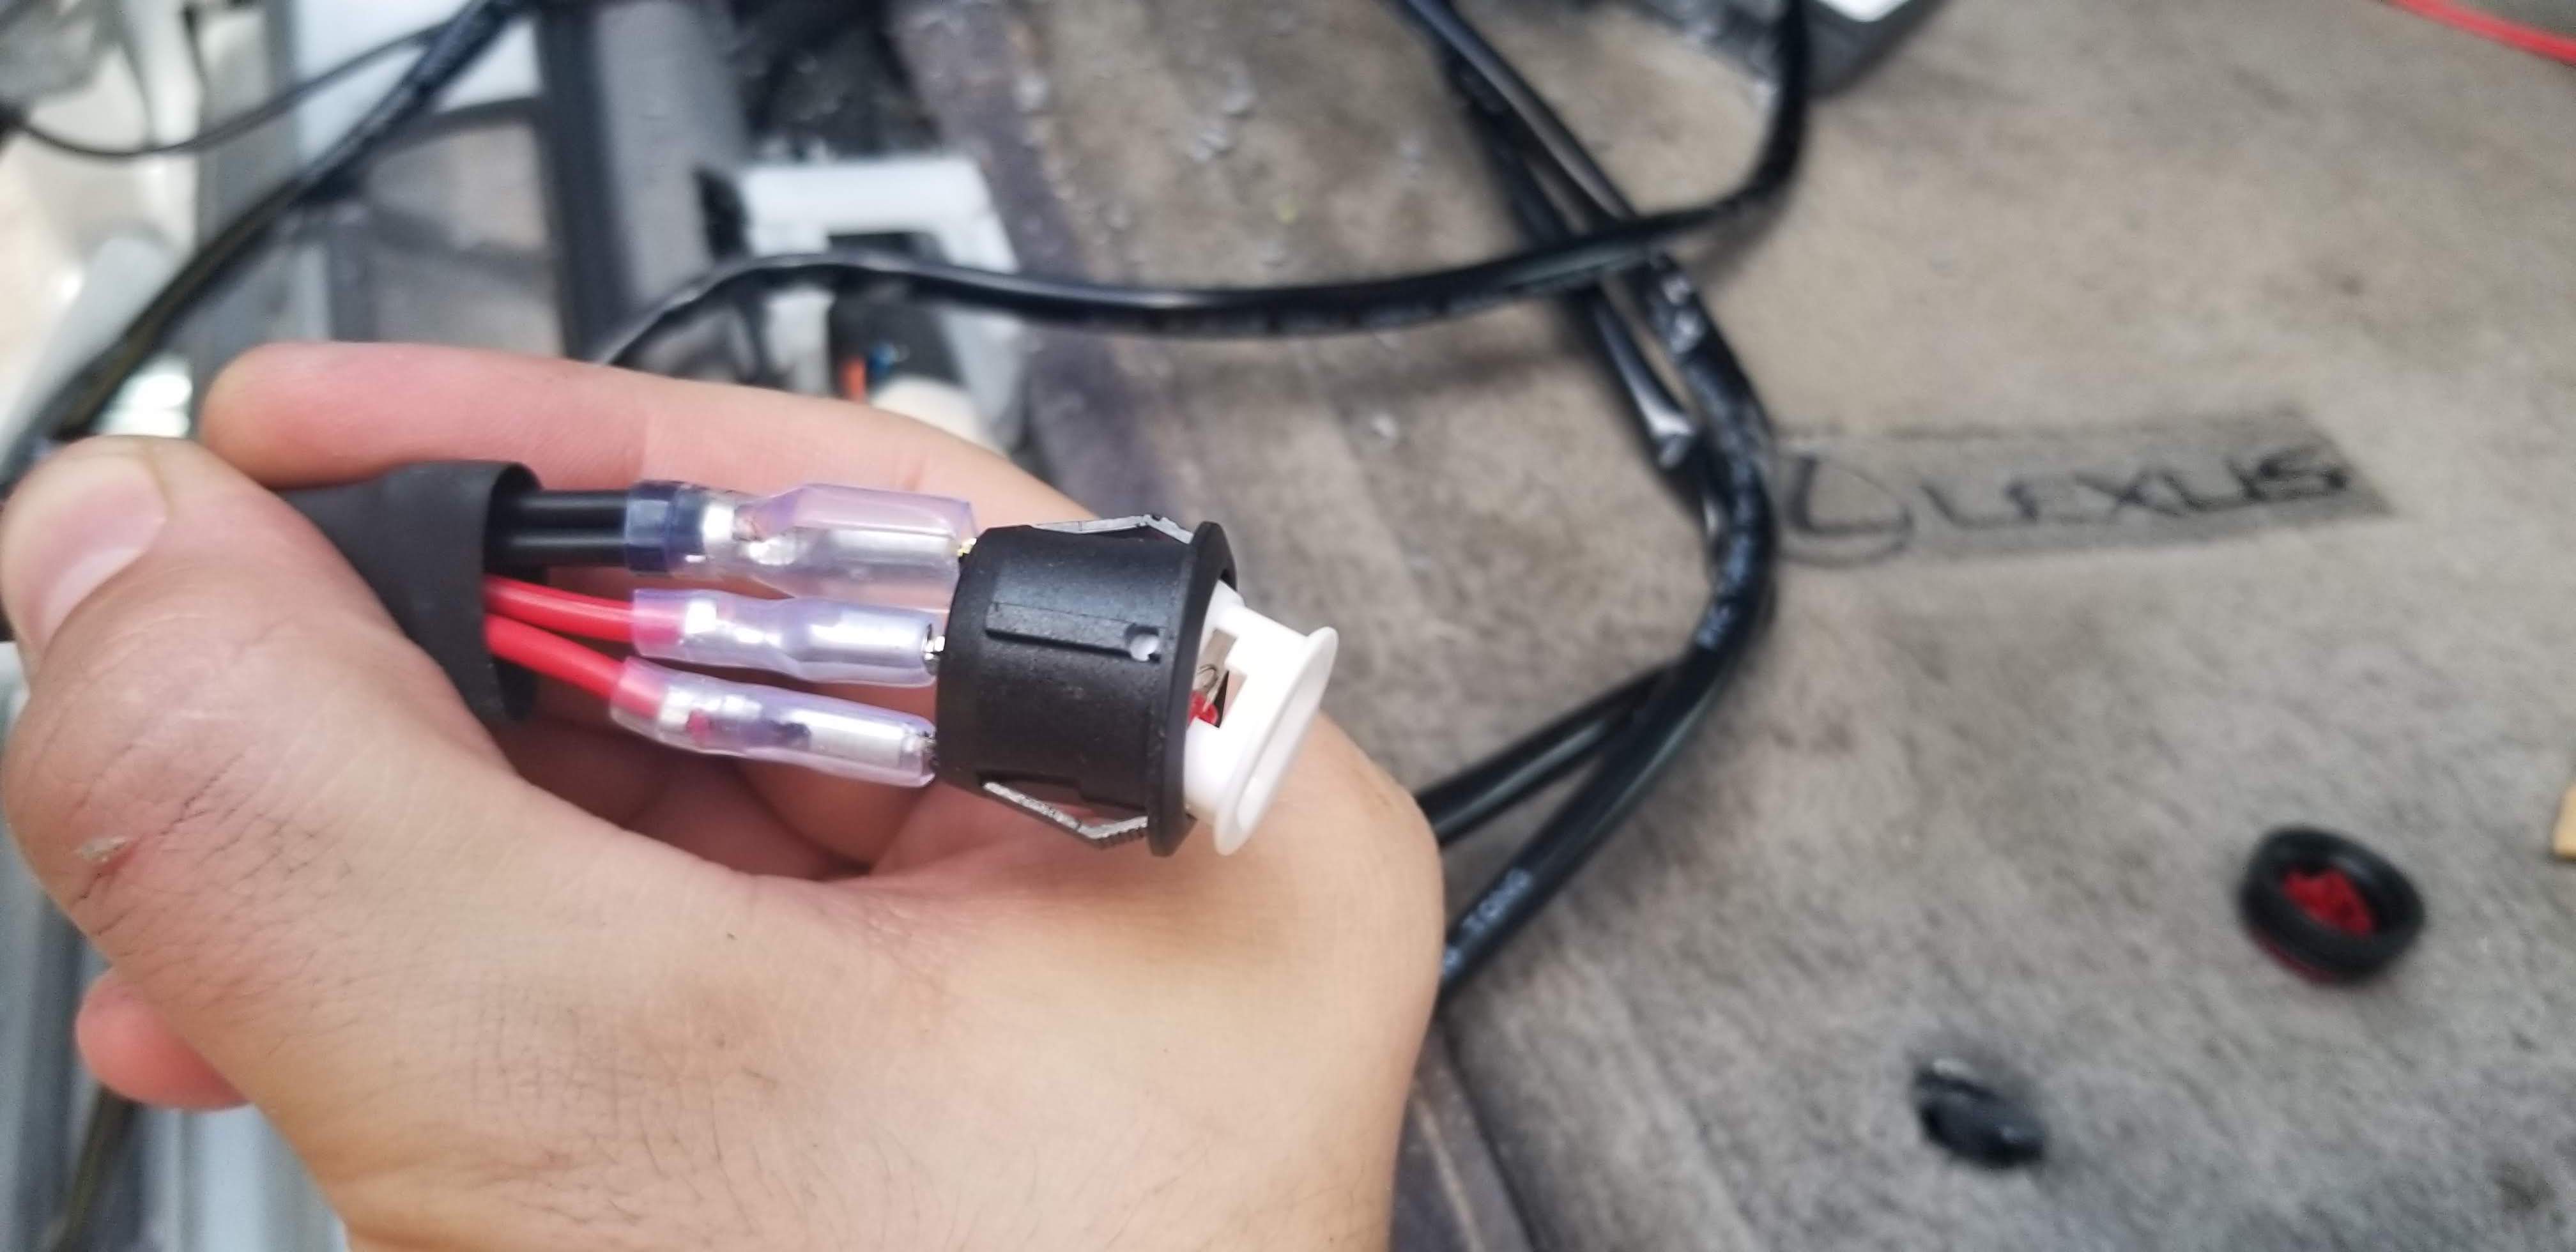
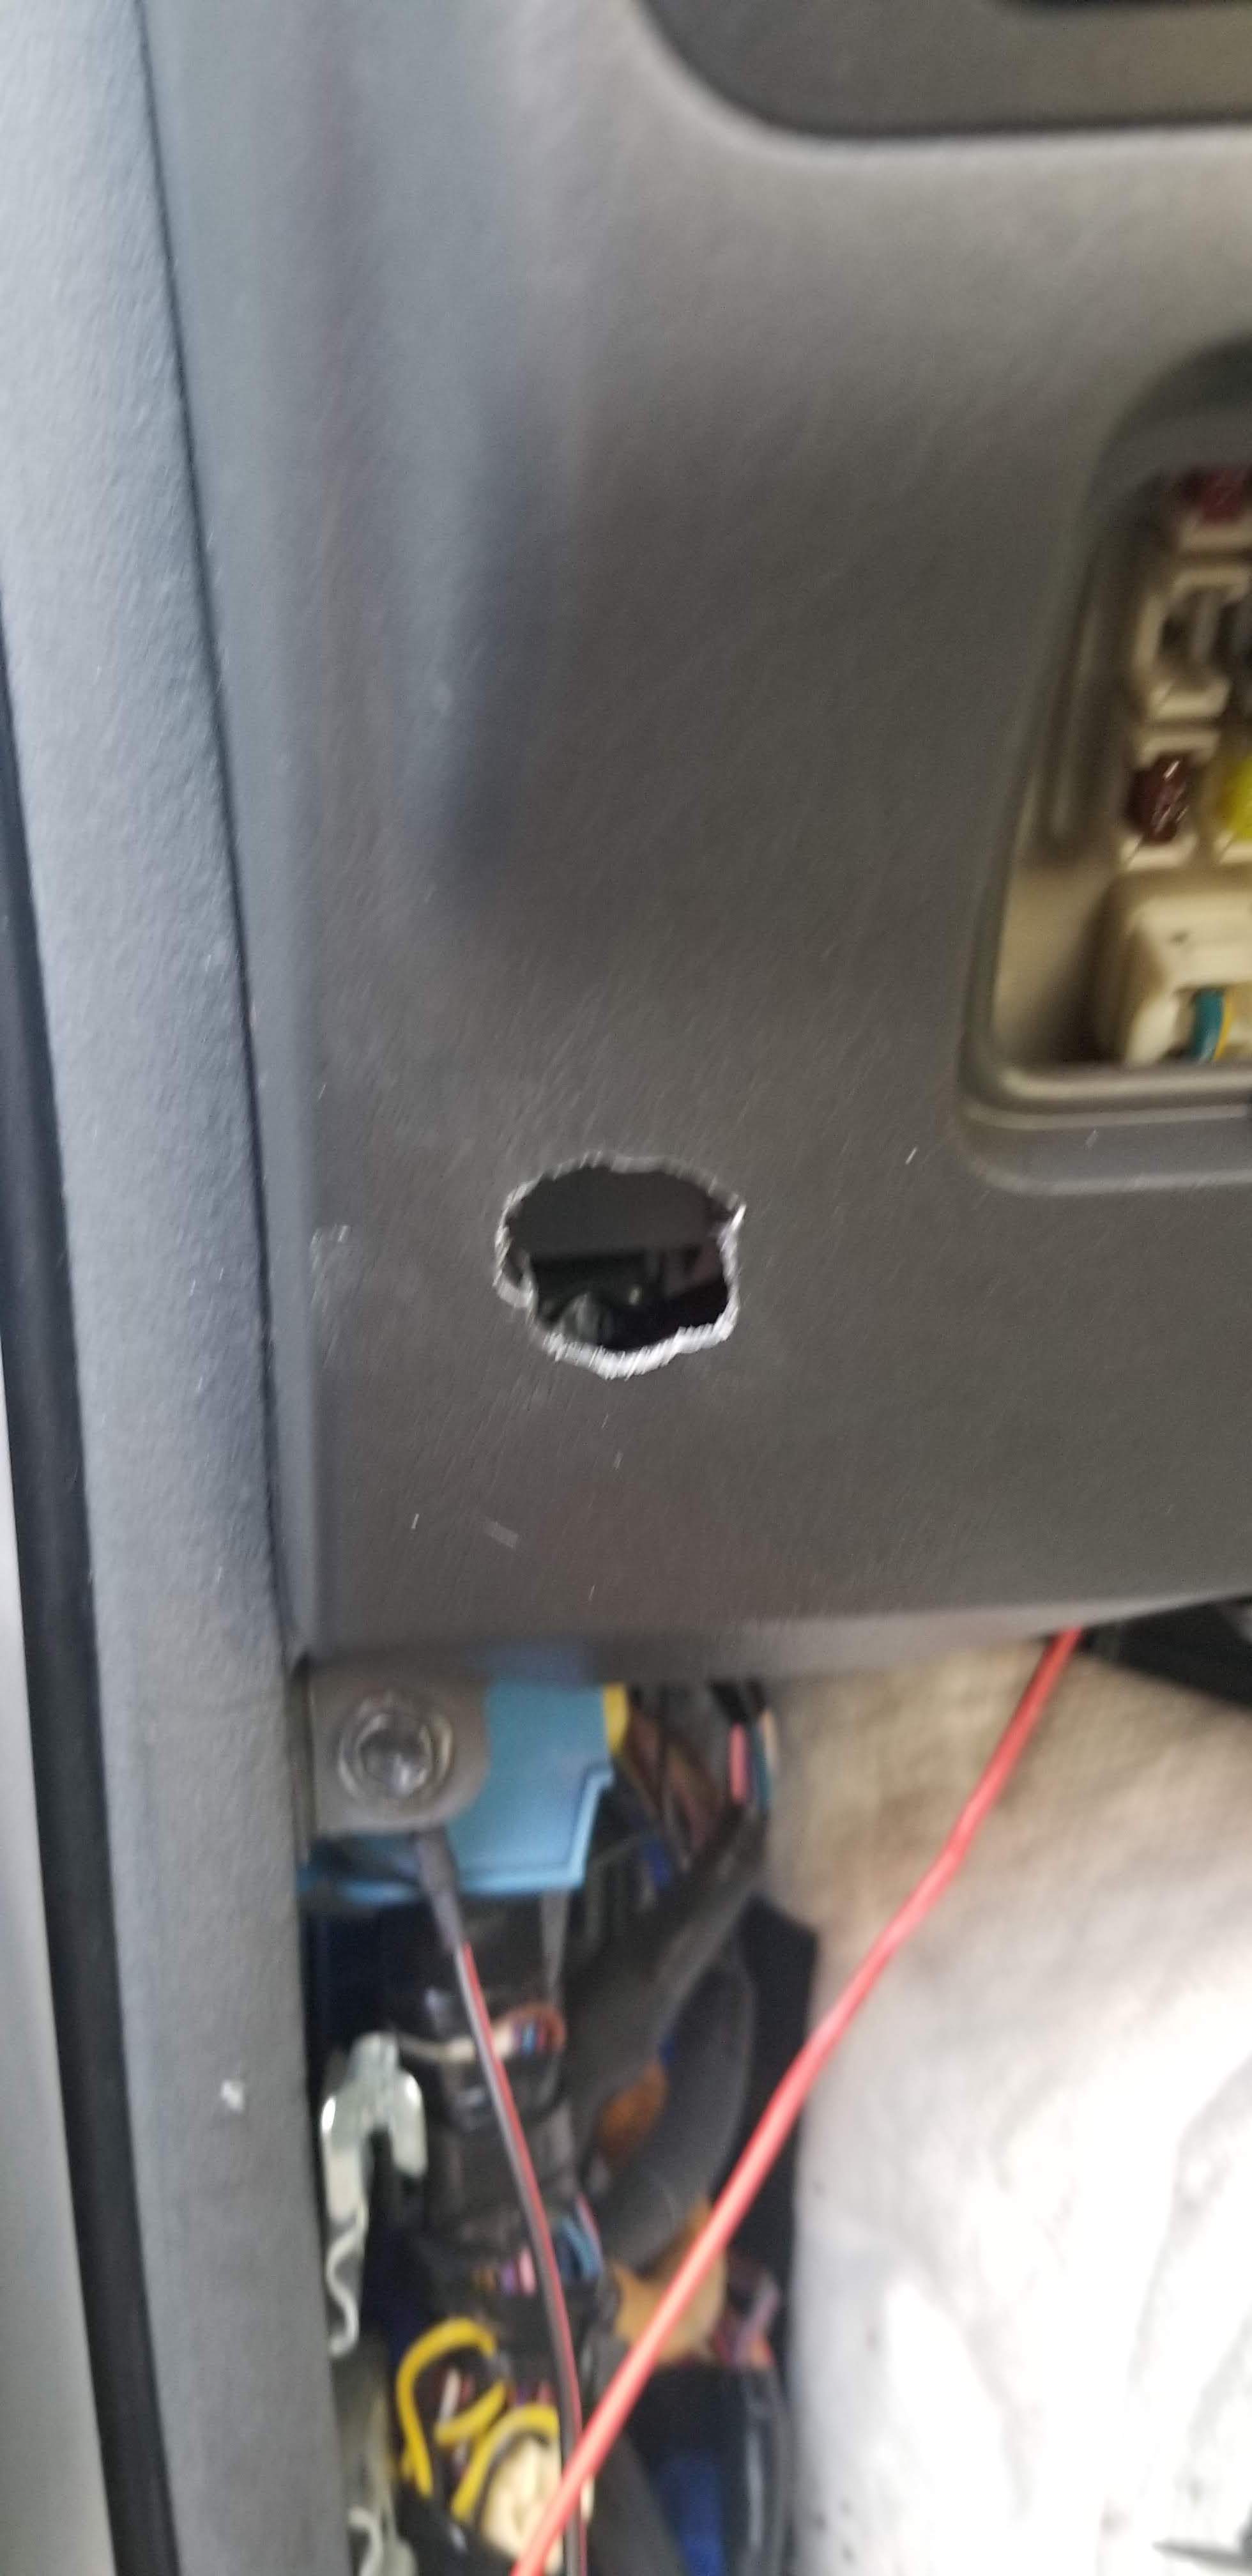
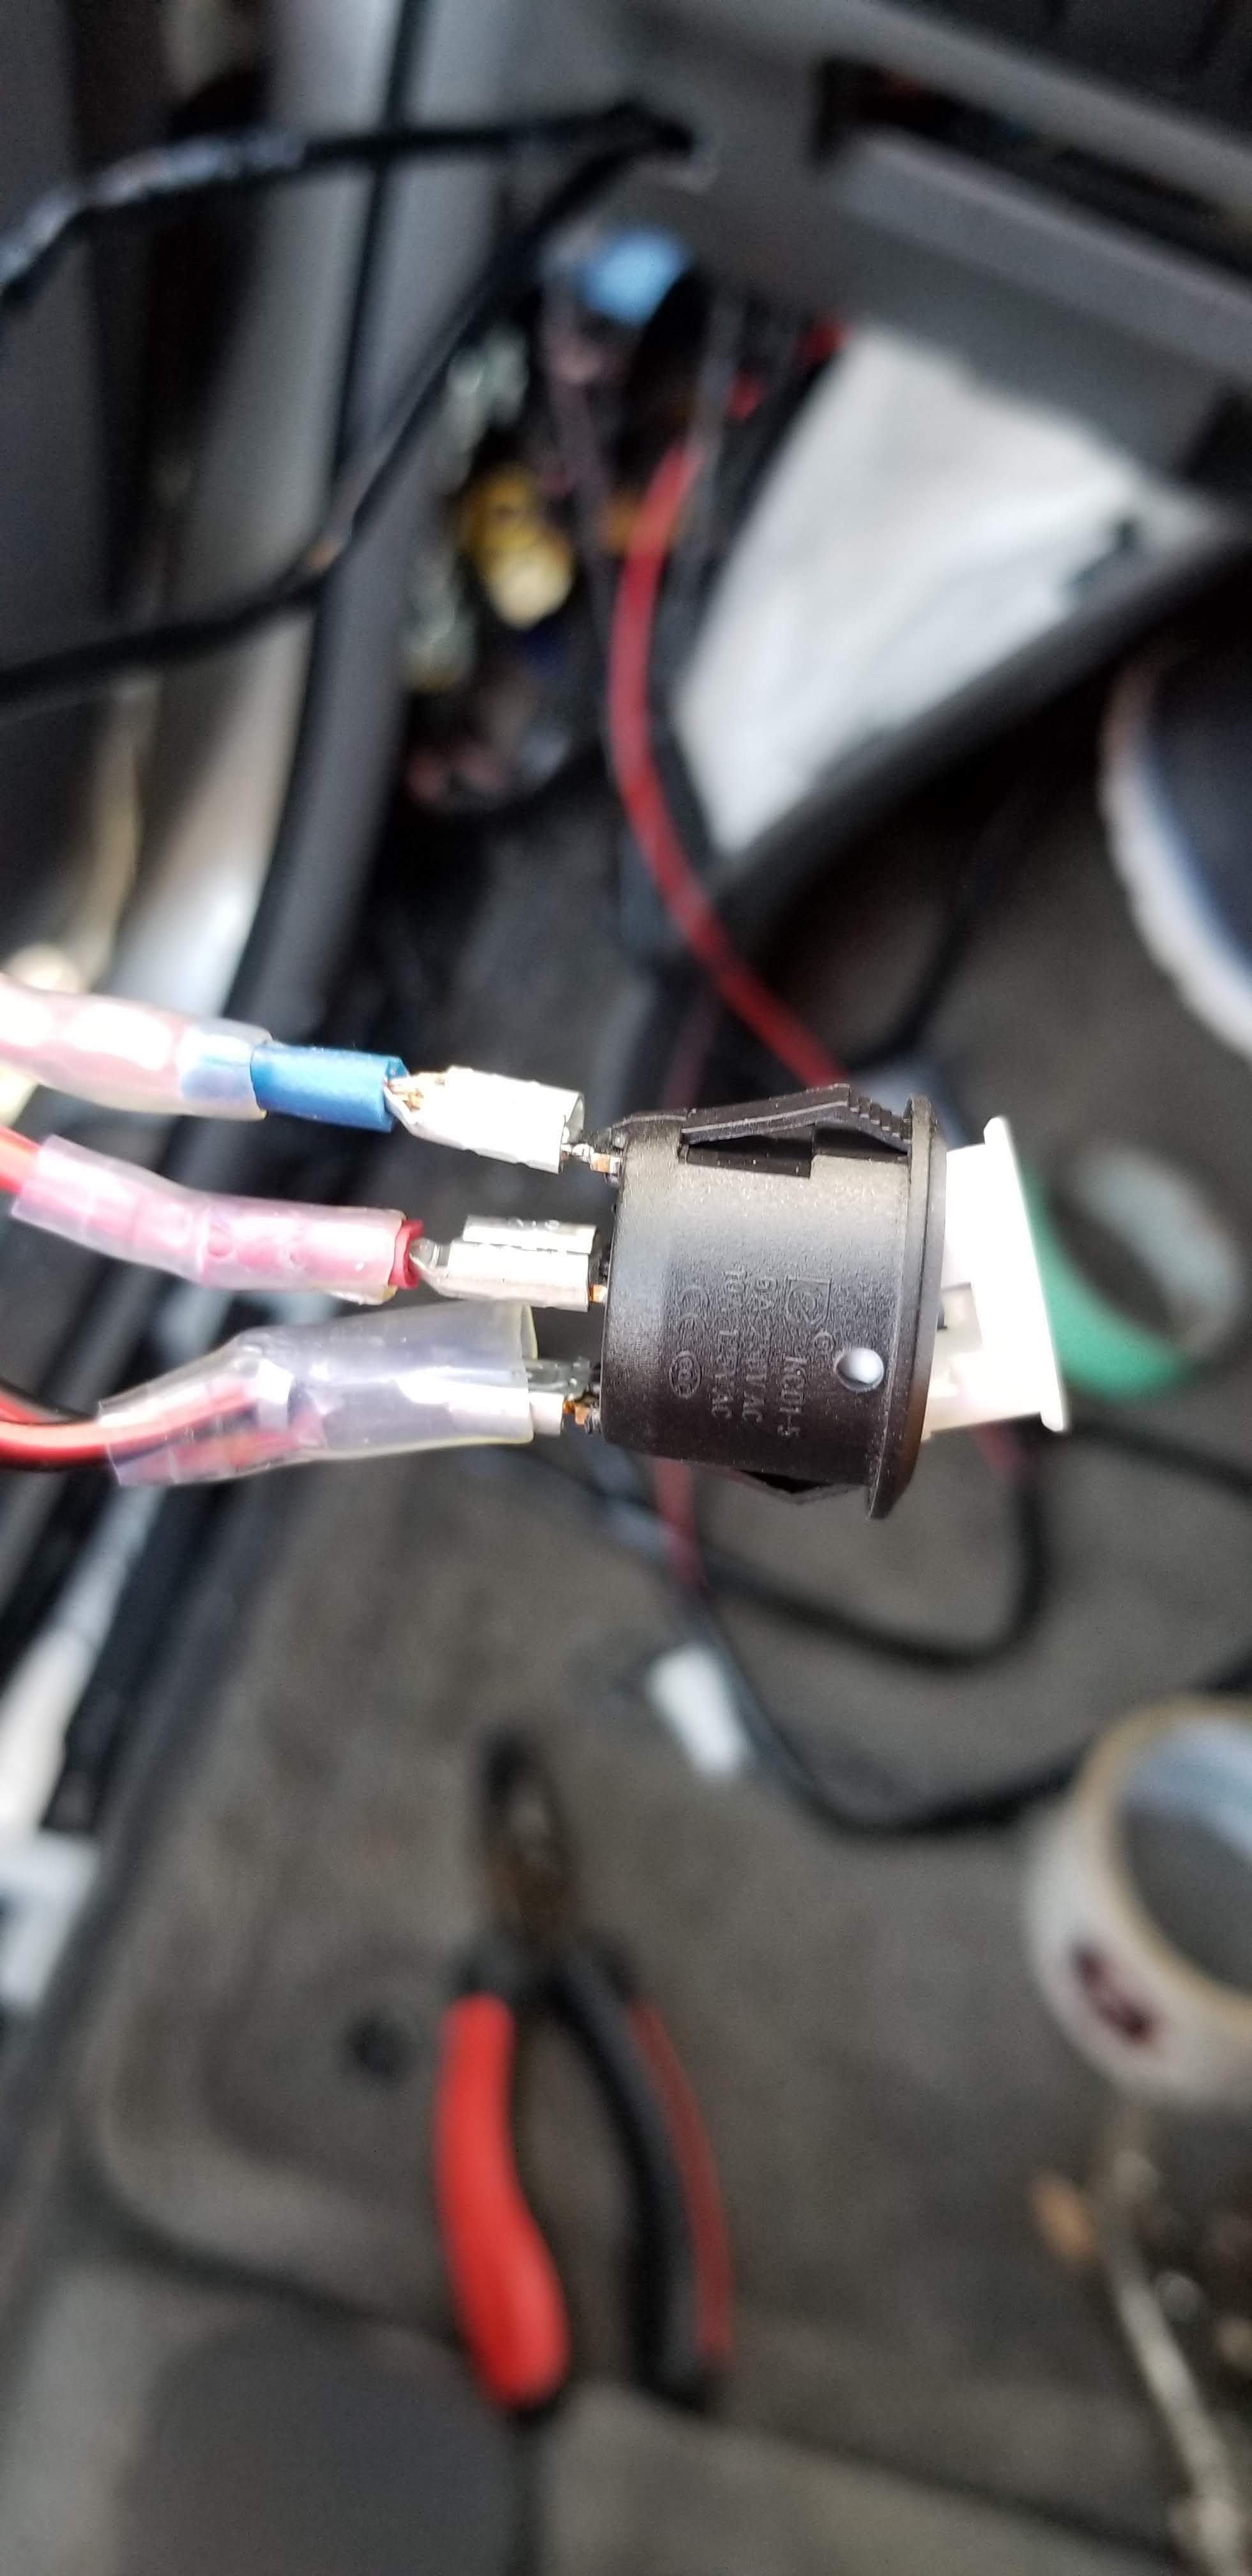
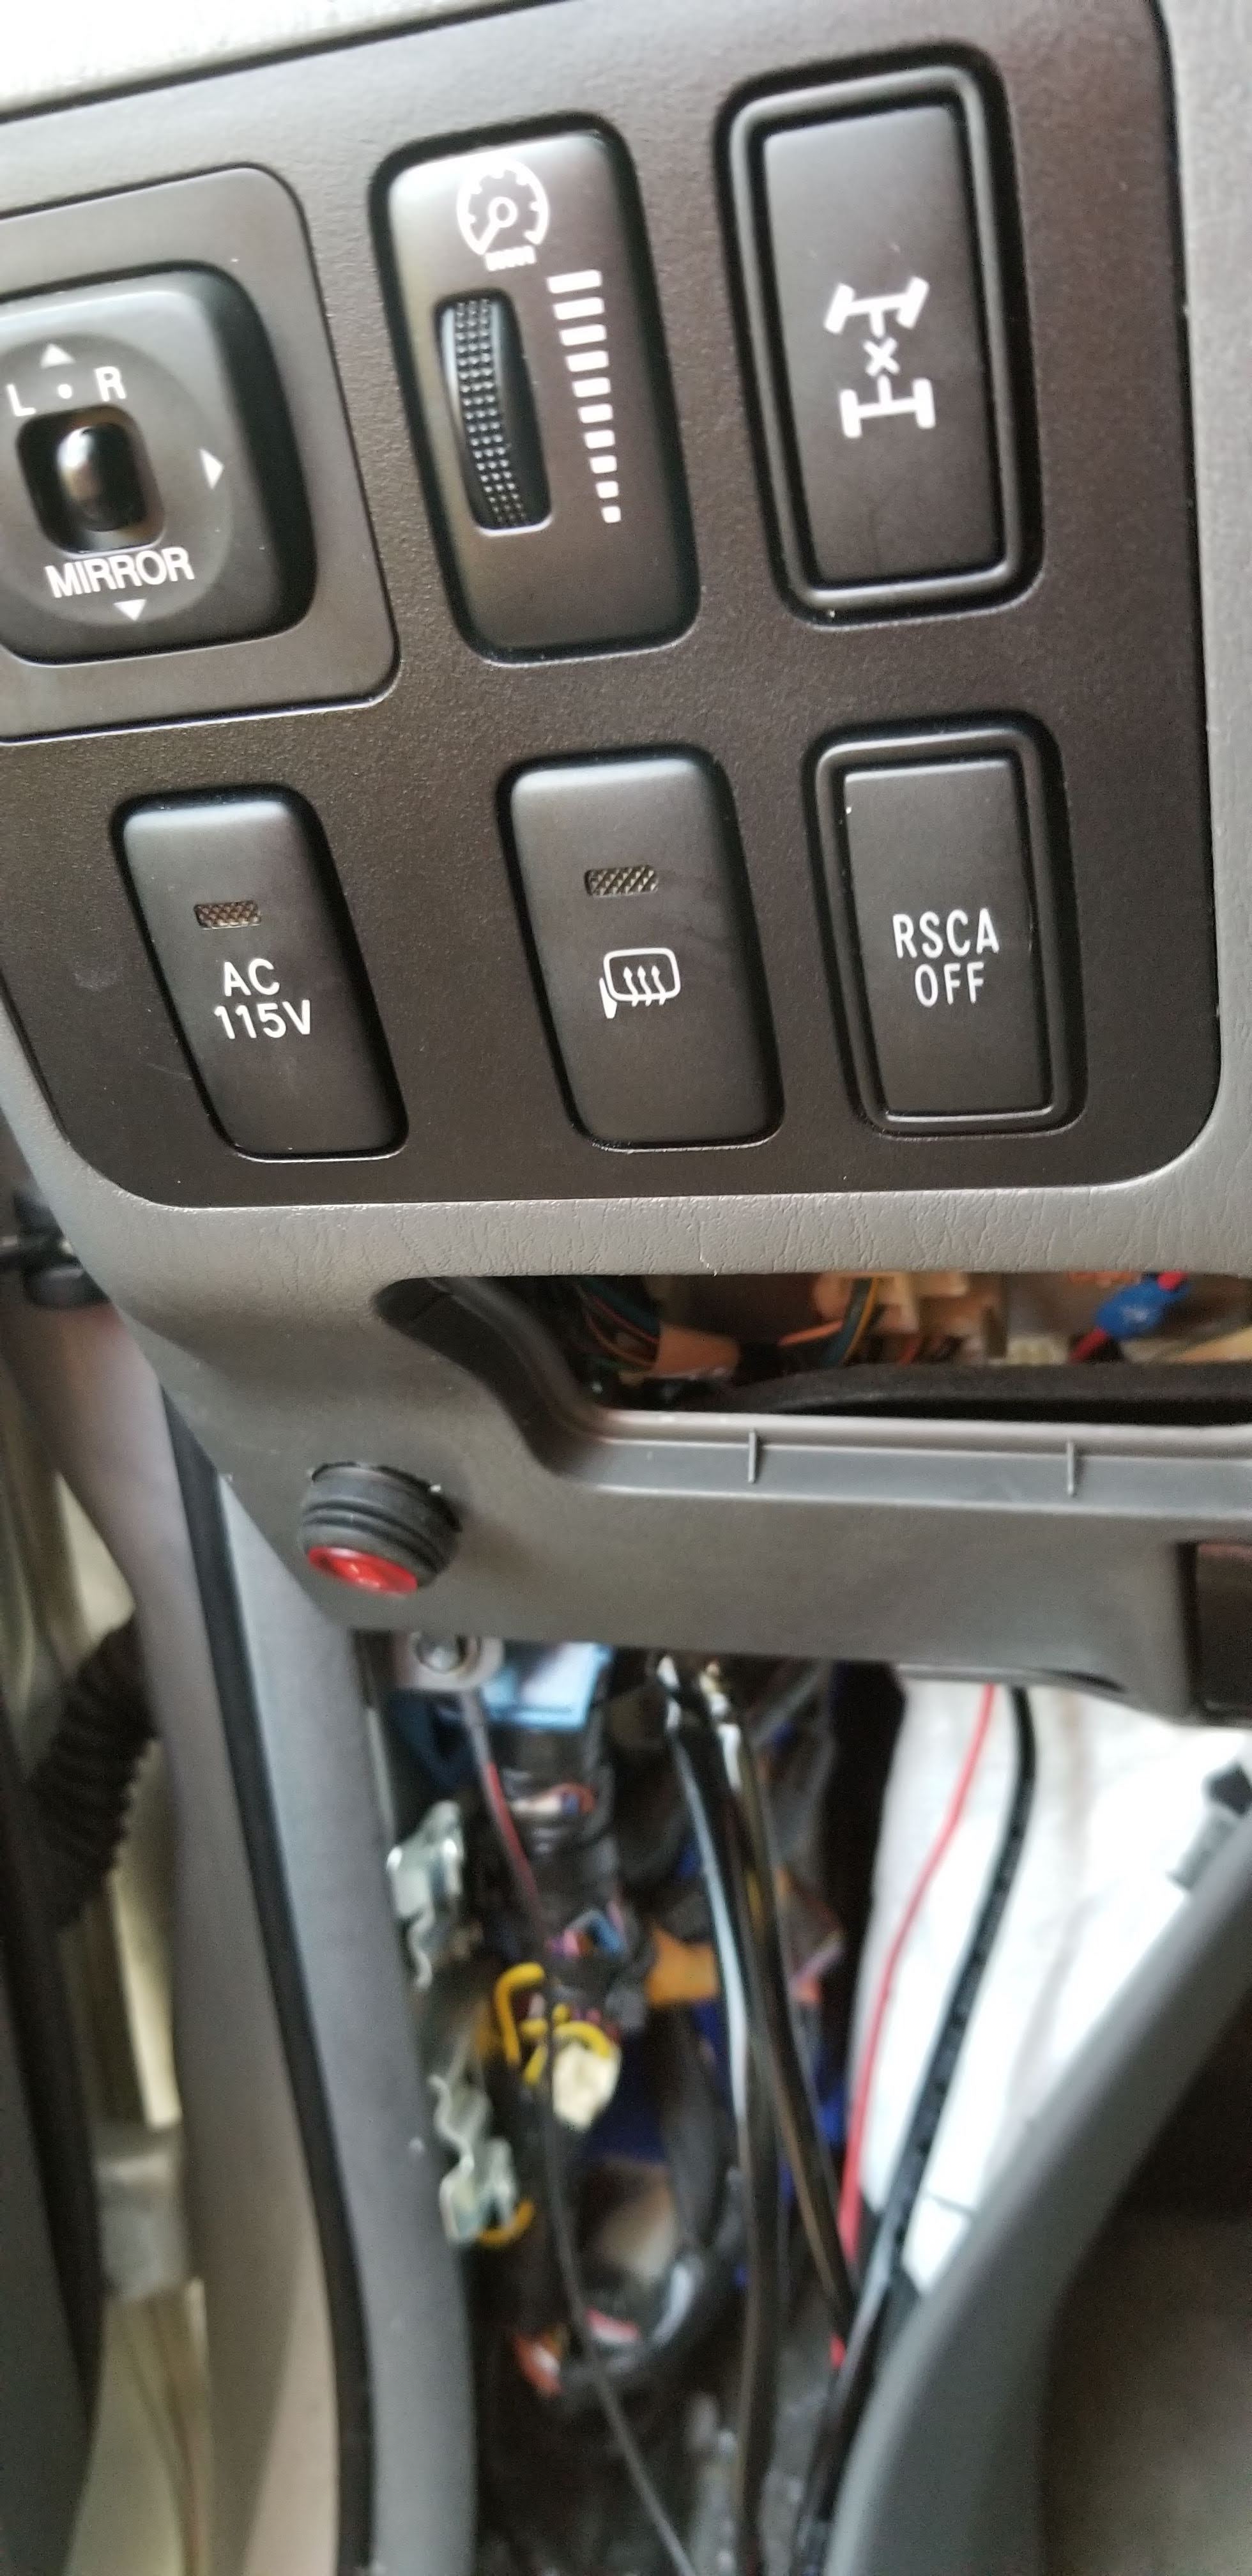
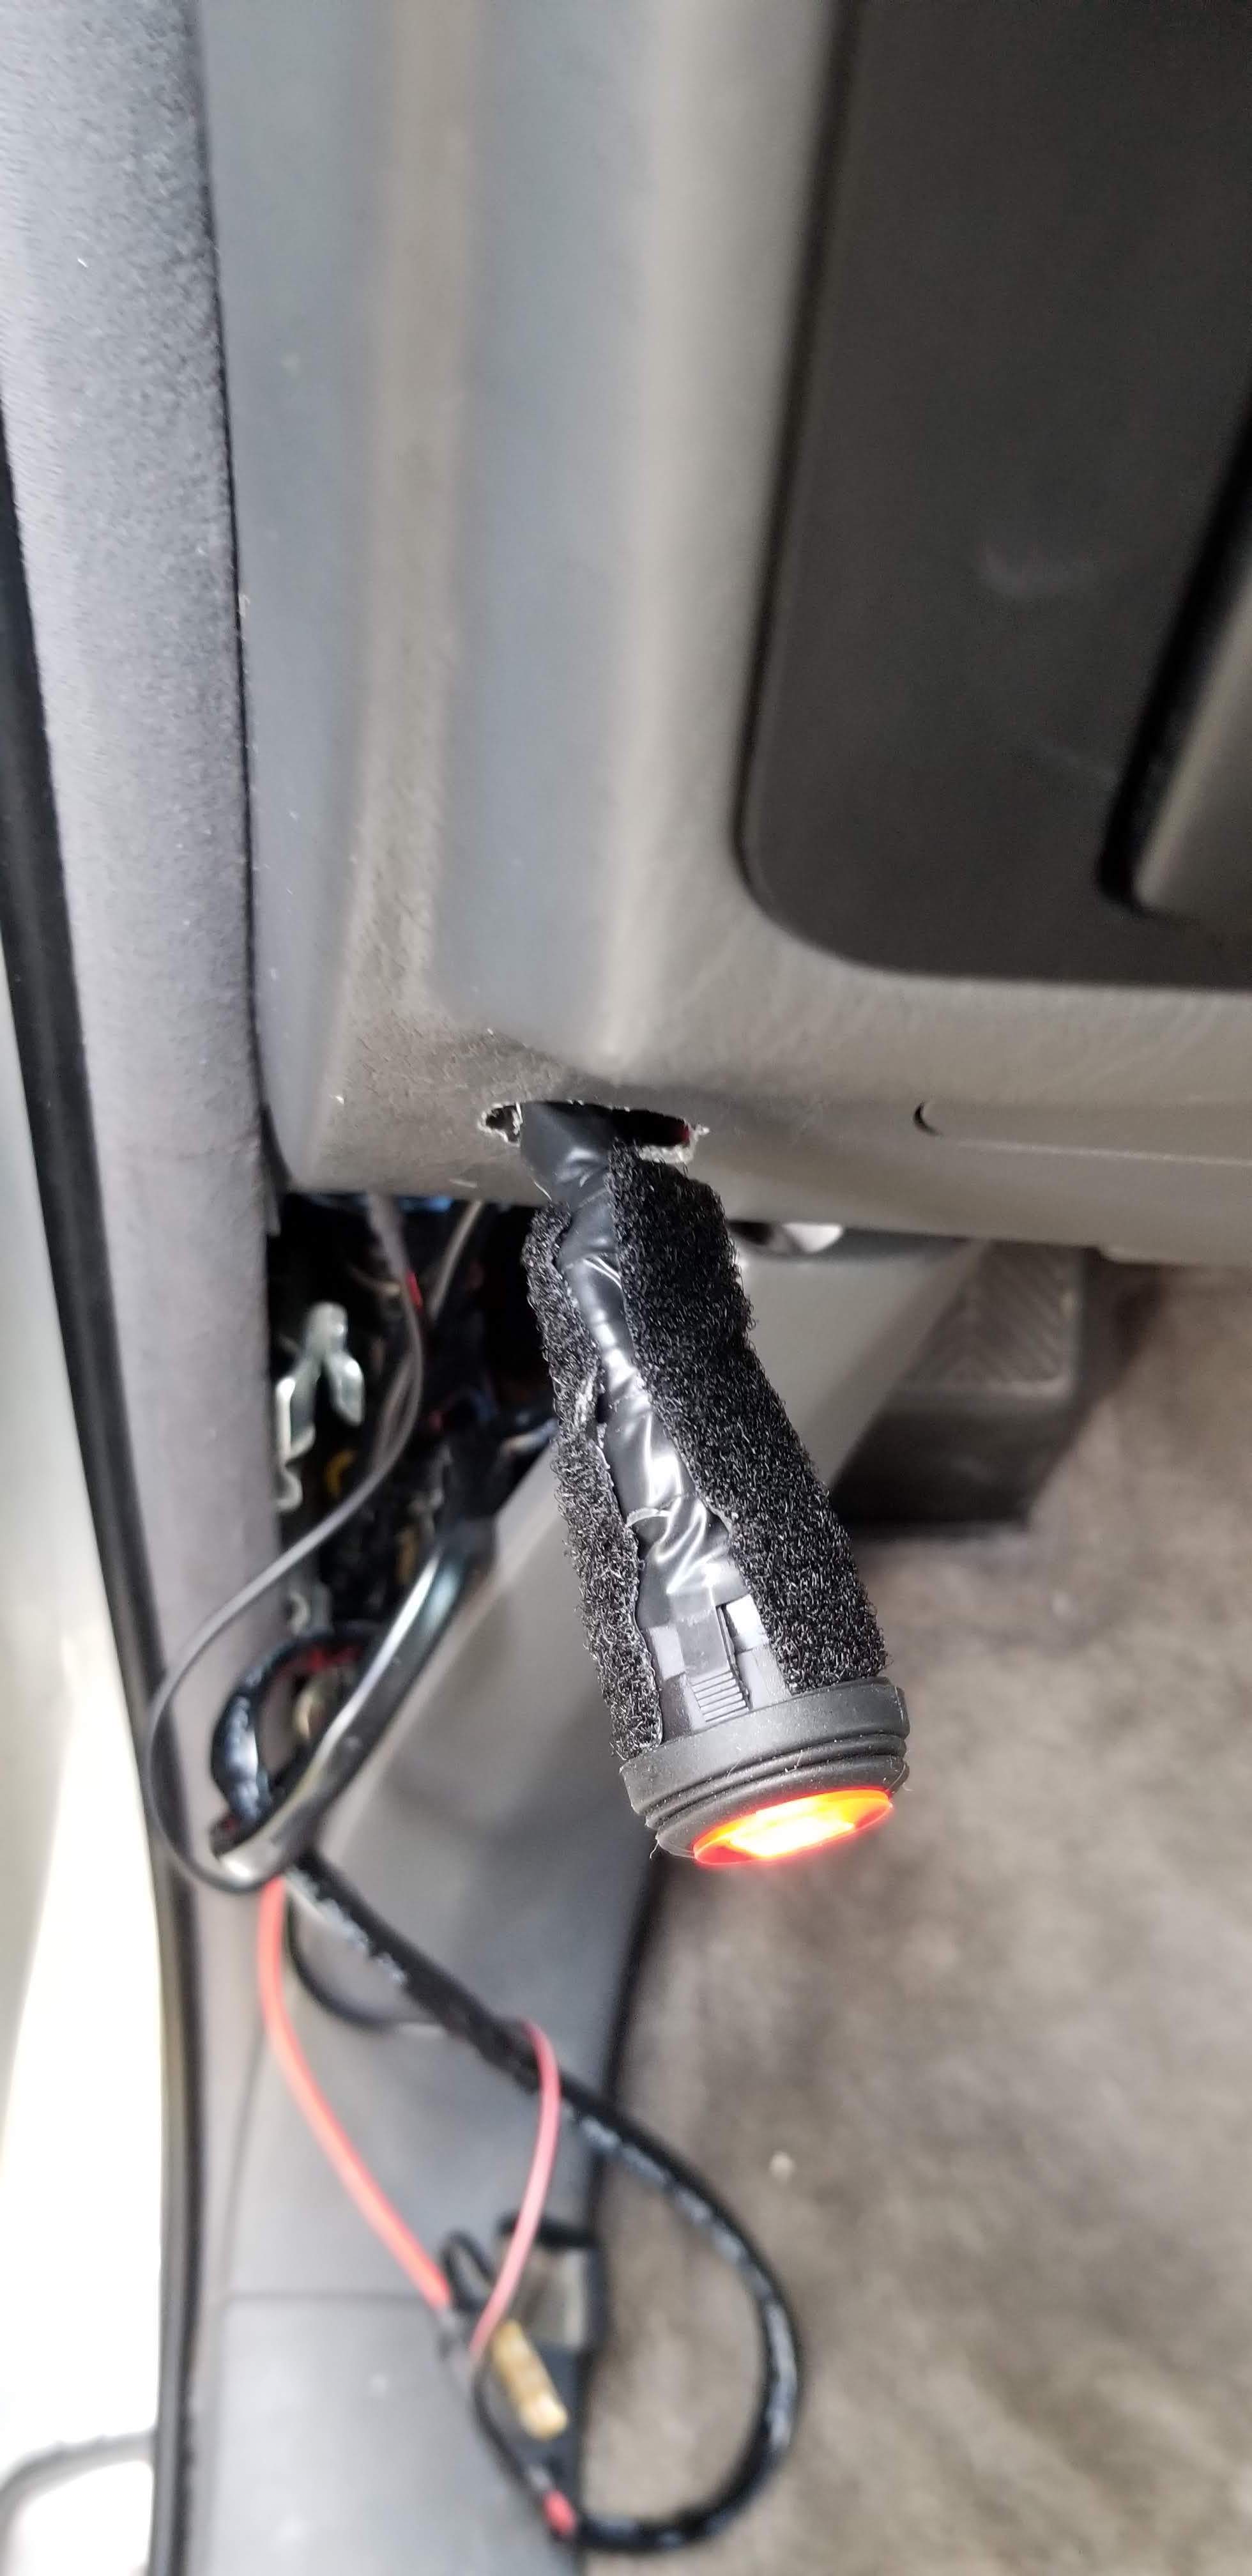
For your switch in the cabin, I had to remove the wiring for it to sit snug in its newly drilled hole. To do this, unplug all the wires (remember where they are), then run the wires up from the back of the hole. Then plug those wires back into the switch, out of the plastic, then you can put the switch where the hole is. I made my hole a little bit too big, so you can use tape or velcro or caulk or basically anything to make it a little more snug.

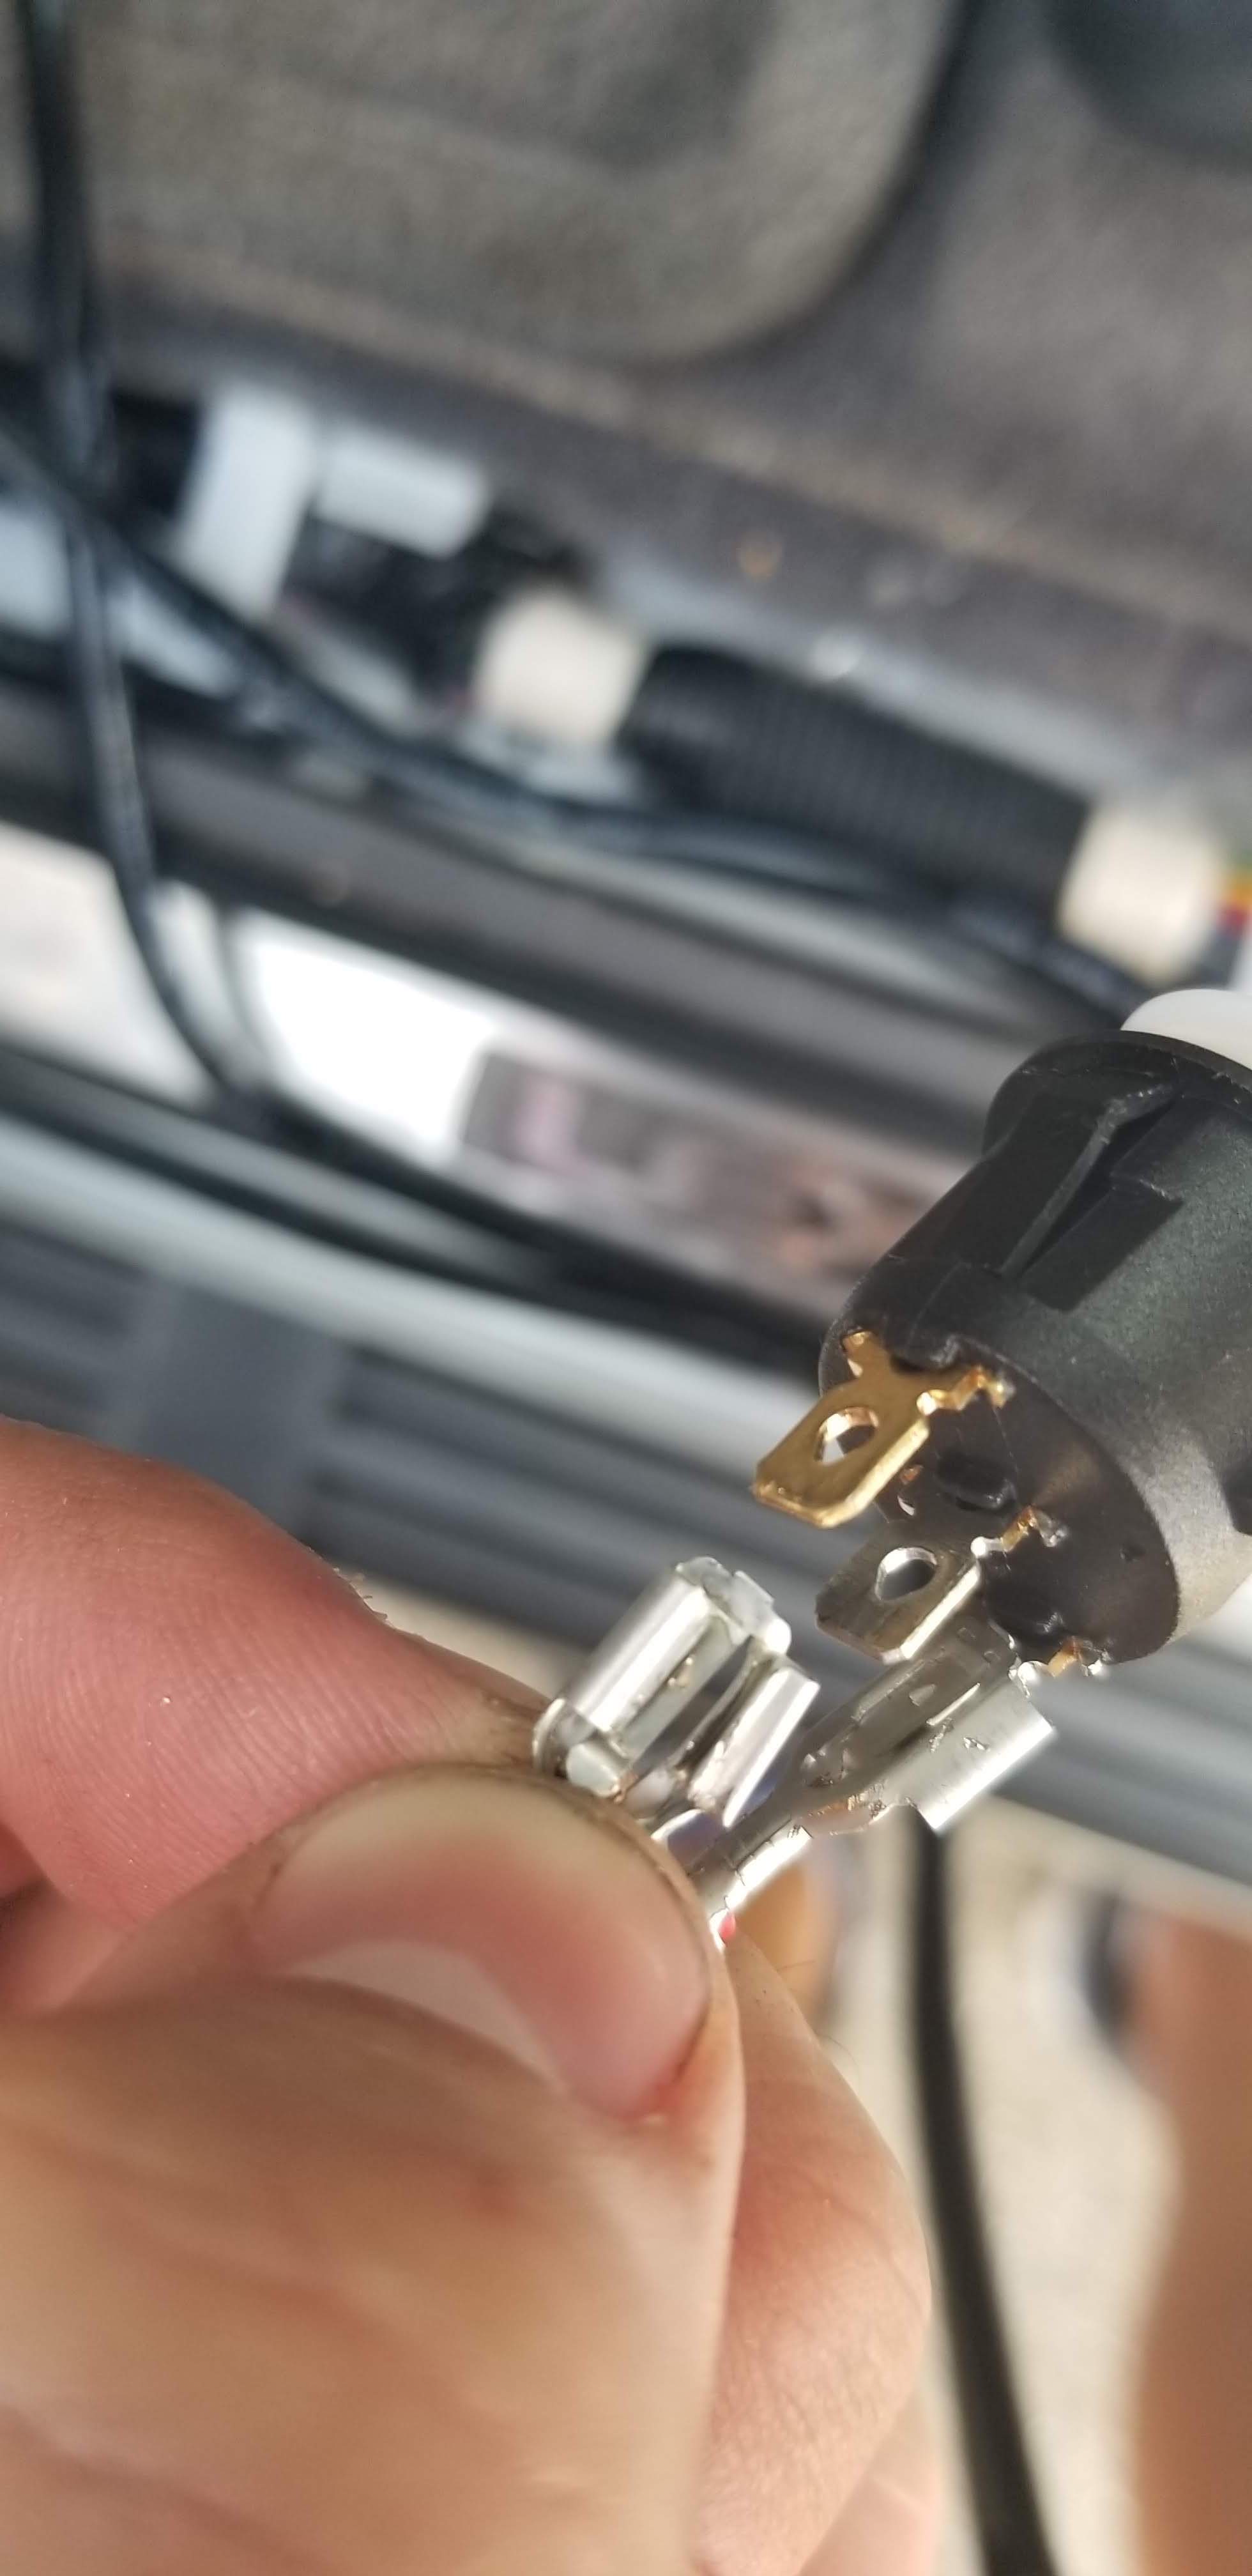
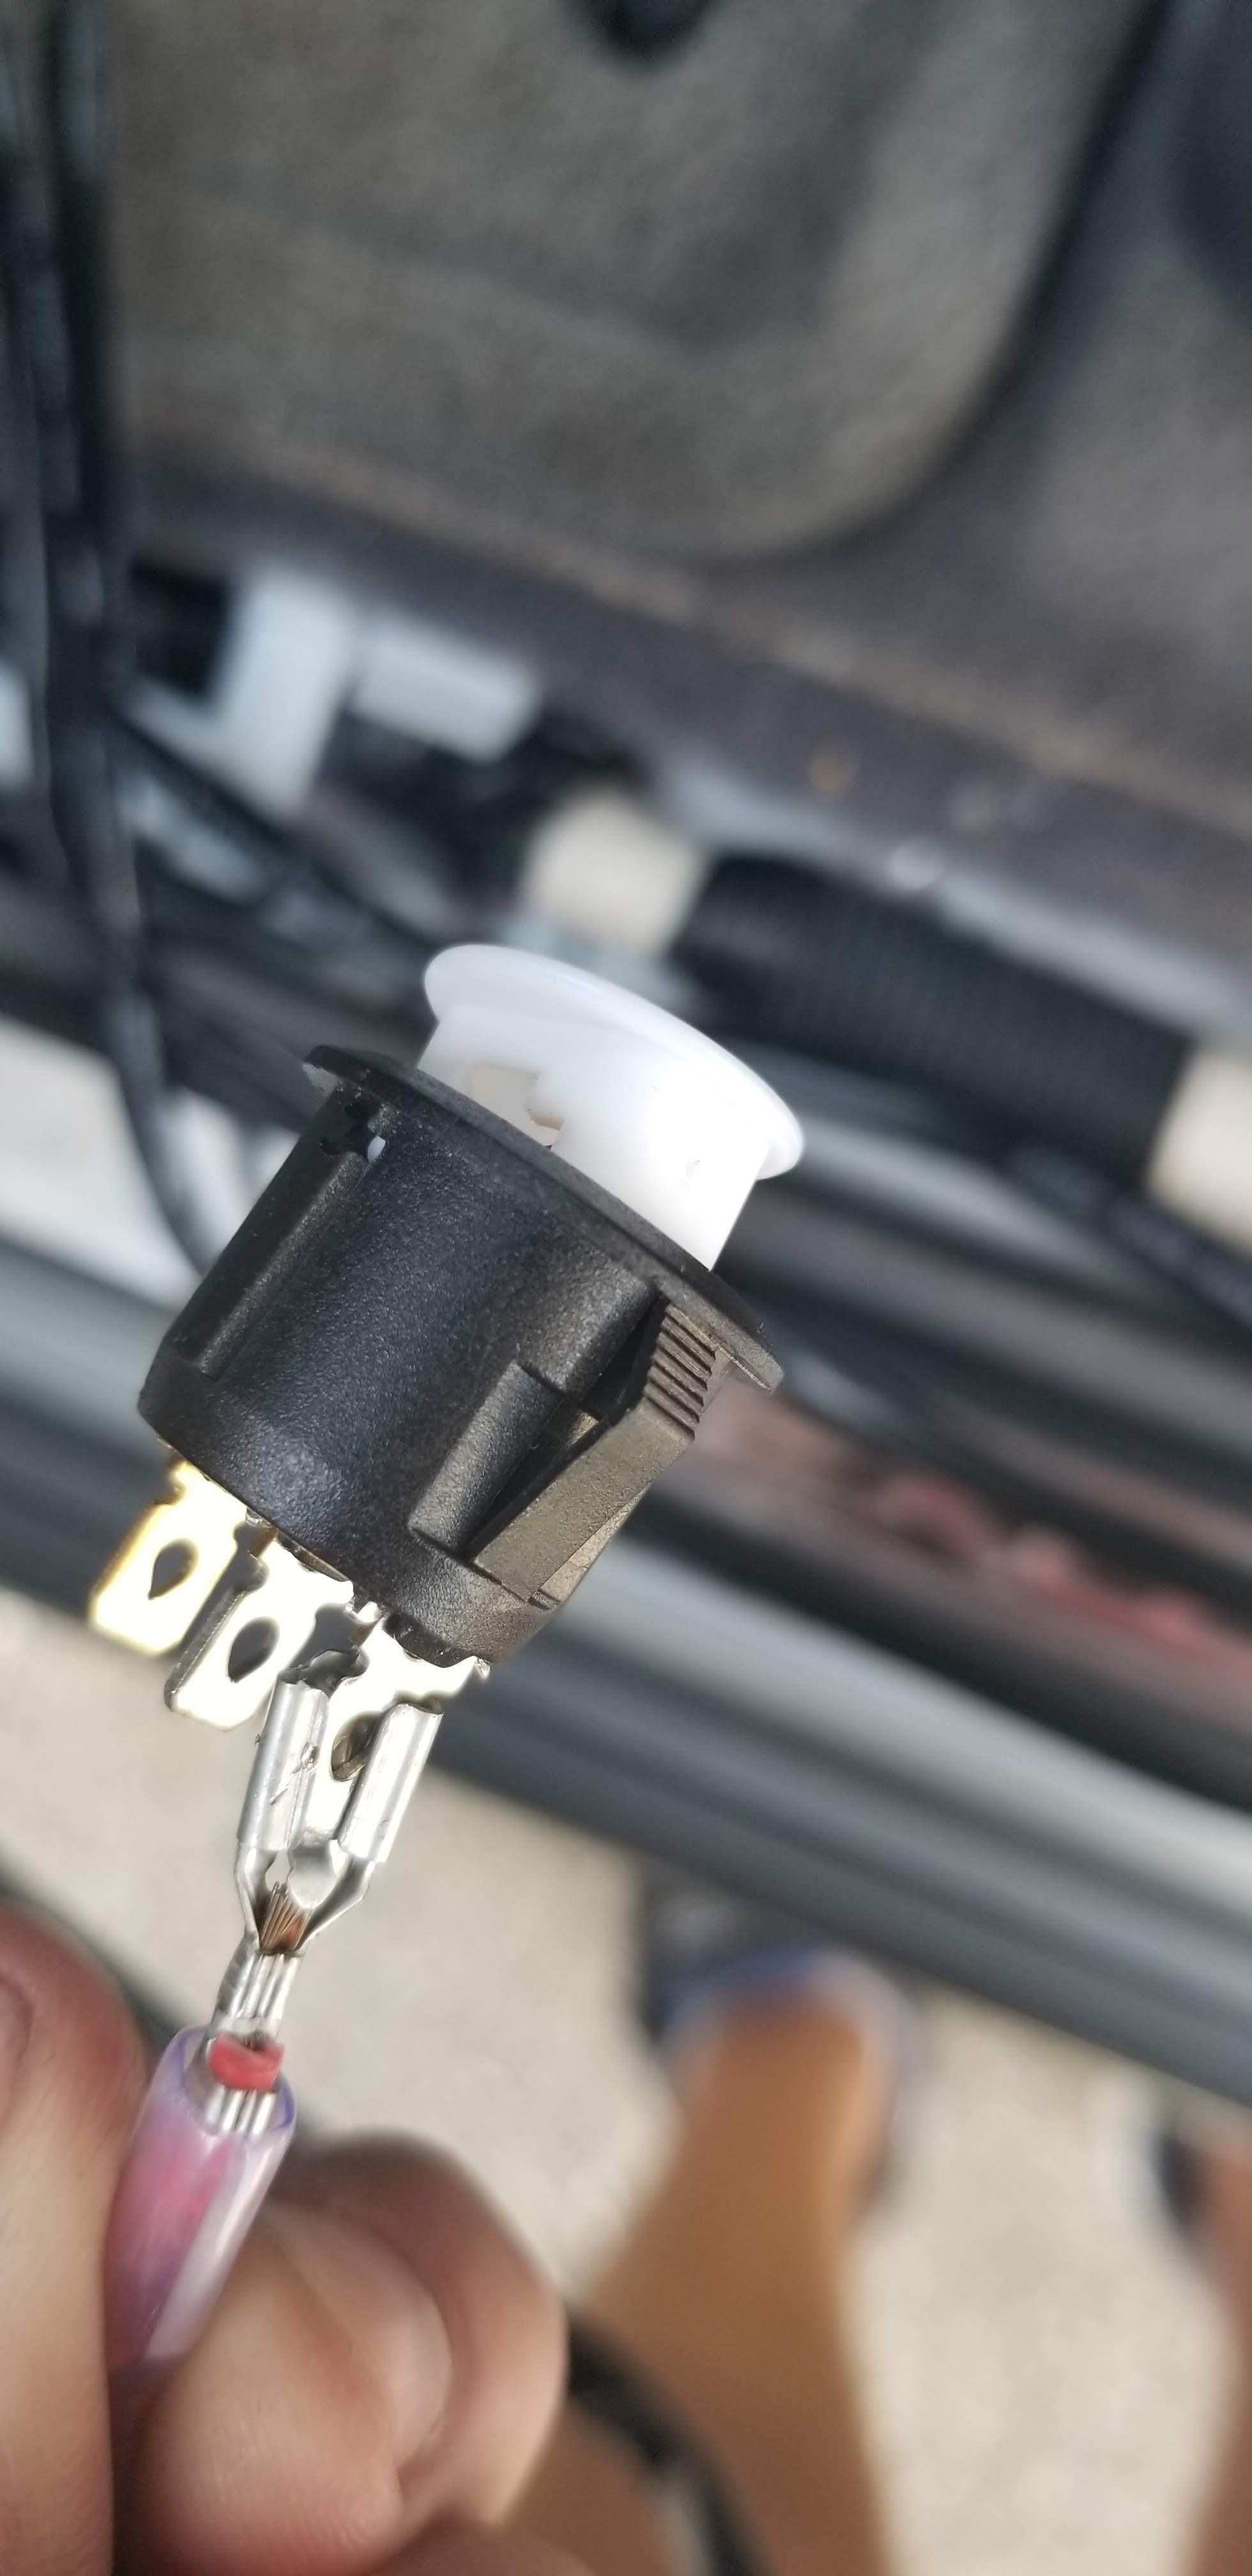
What a terrible hole.
Finally, just make everything pretty. I ran the interior wiring behind the plastic footwell. In the engine compartment, I ran the wiring for each light under the plastic piece by the windshield, so very little of the wiring is exposed. This was a little difficult to do, but looks a lot better. I also used zip ties to keep the new electrical running next to the old electrical, and behind that plastic panel I mentioned earlier. Reassemble your engine plastic pieces, close up the interior pieces, you’ve got some bright lights!
The reason my install took so long was because I broke the connectors when I was putting the switch back together inside the hole, and had to crimp some new ends. Also I blew a fuse when testing. Then again, it’s electrical in a car. Have you ever done a electrical project in your car and NOT blown a fuse. Me either. The nice thing about the Add a Circuit Tap that I linked is that it comes with lots of extra fuses, so I just replaced it with a 5A fuse of the same size.
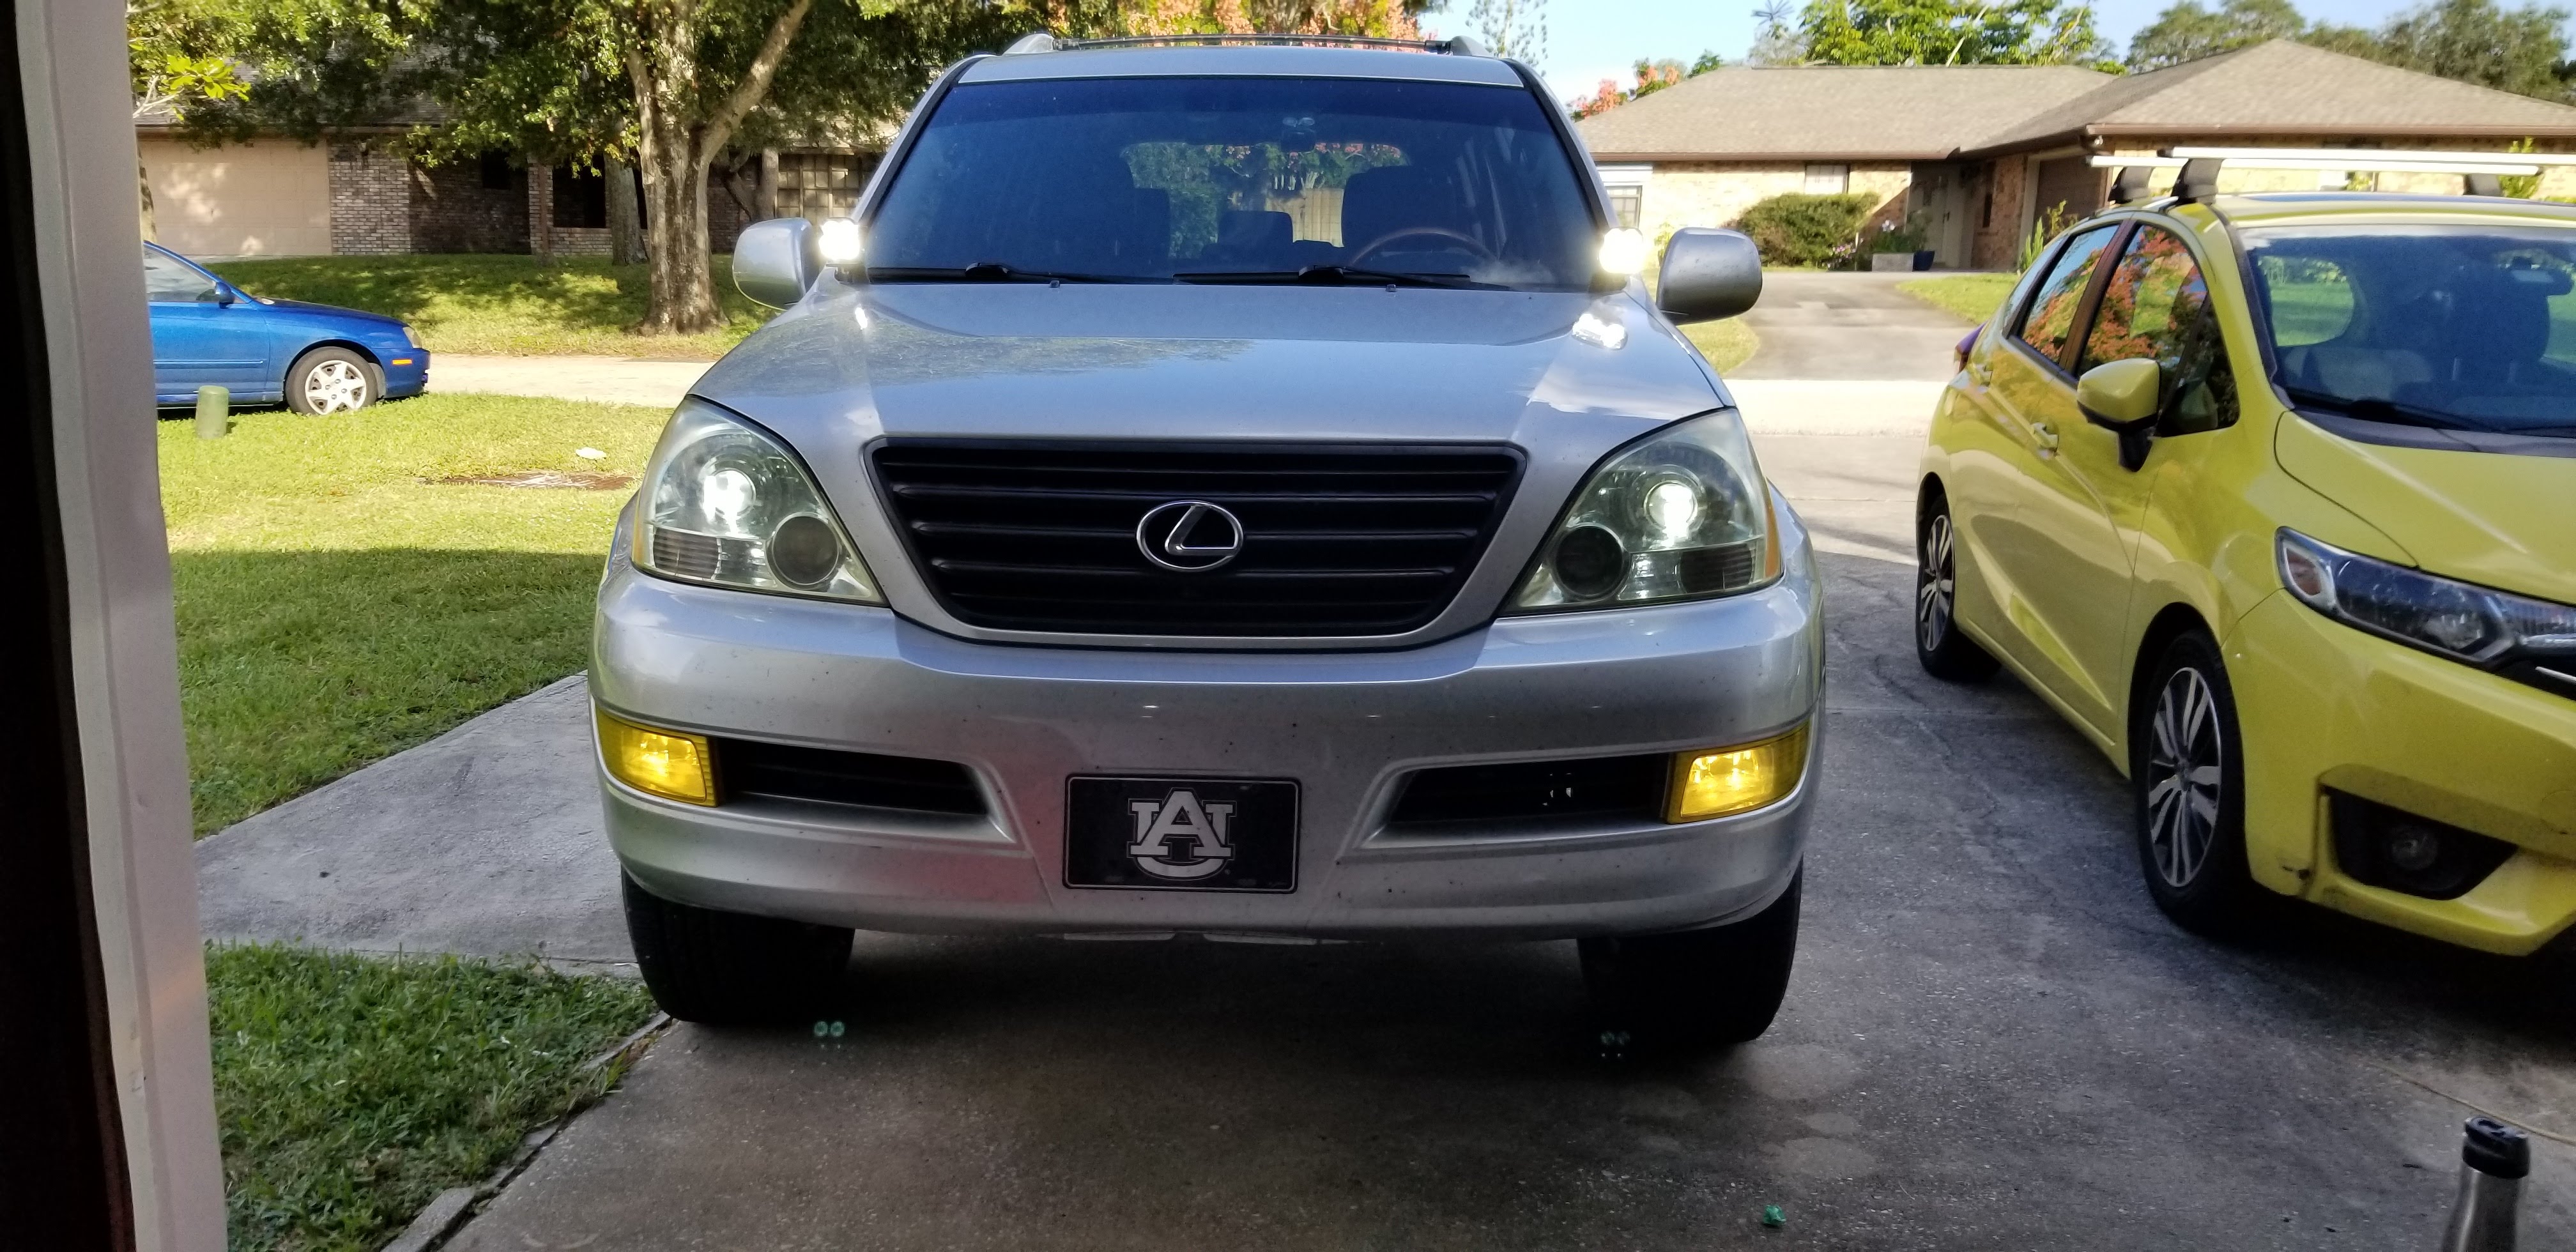
As far as the products, the Rago mounts fit perfect. You can have the hood opened or closed and the lights never touch your windshield. Some videos I saw complain about the wiring harness being too short, but it was long enough for my GX. The lights seem great so far, SUPER bright.
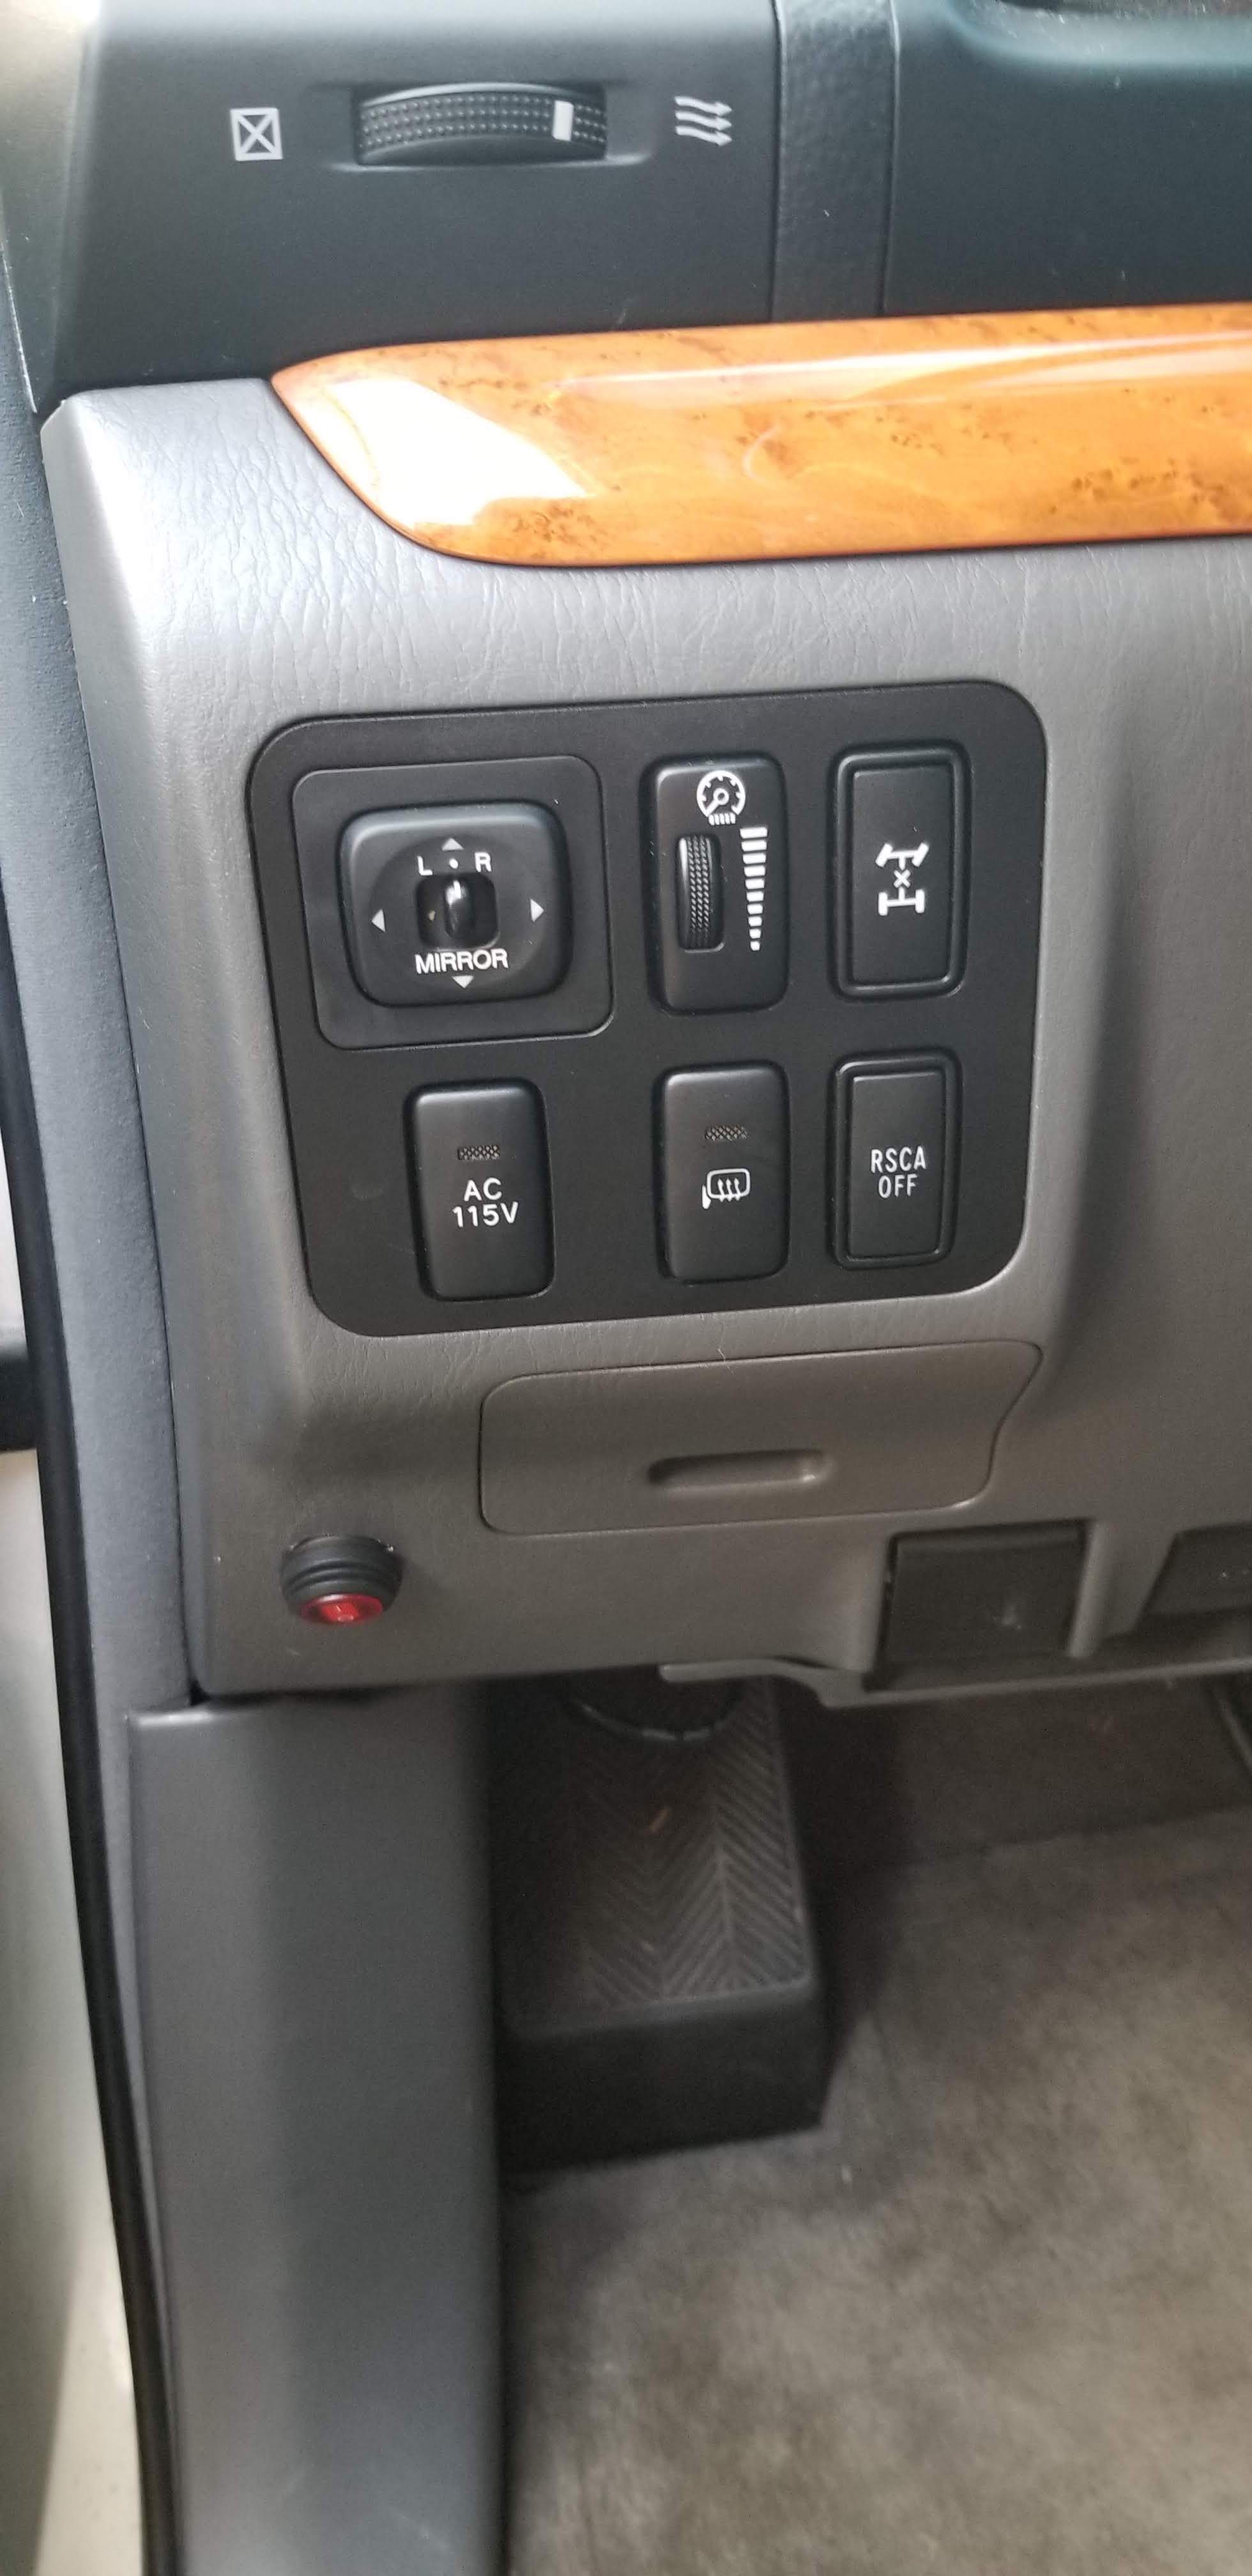
If I were to make this nicer, what I would have done is buy a new plate that converts your existing switch panel to have one extra blank from SBE Precision Products, and a new Toyota OEM looking ditch light switch. That would have added $70 to my install just for a nicer looking switch, so I didn’t. If you go that route, here is a good video on how to do the wiring - it is a little bit different but your switch is backlit, which is fancy.